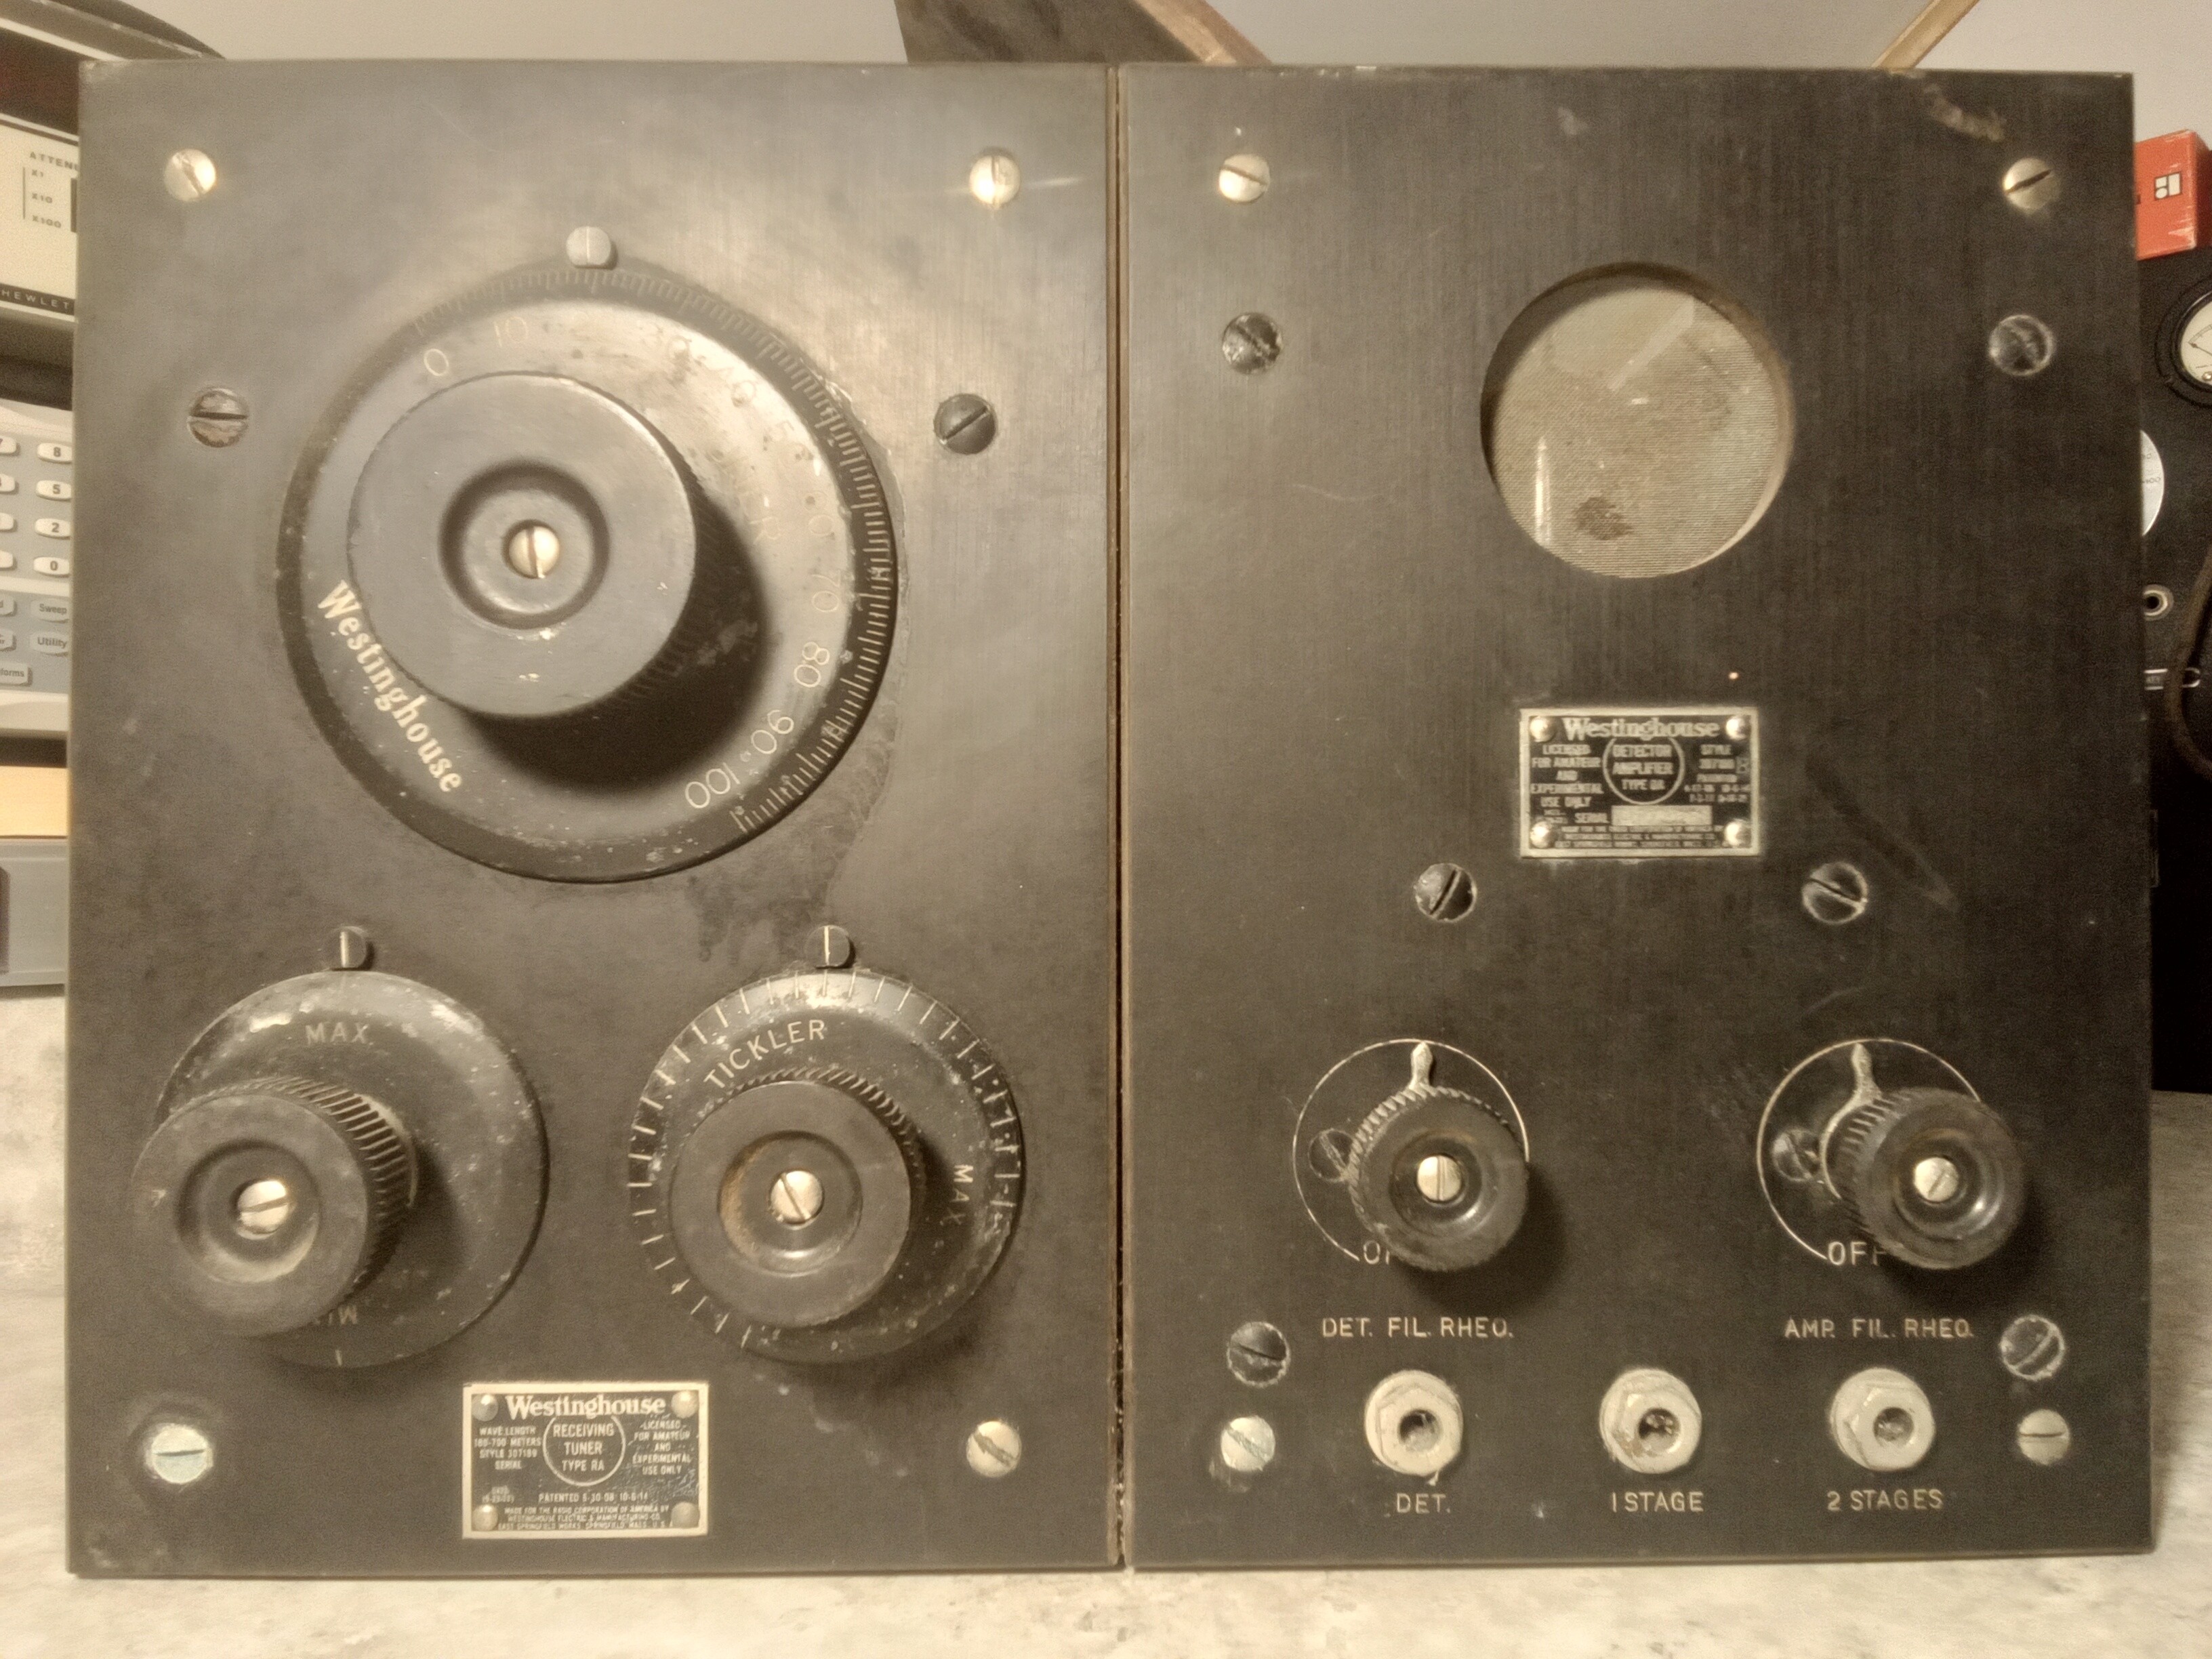
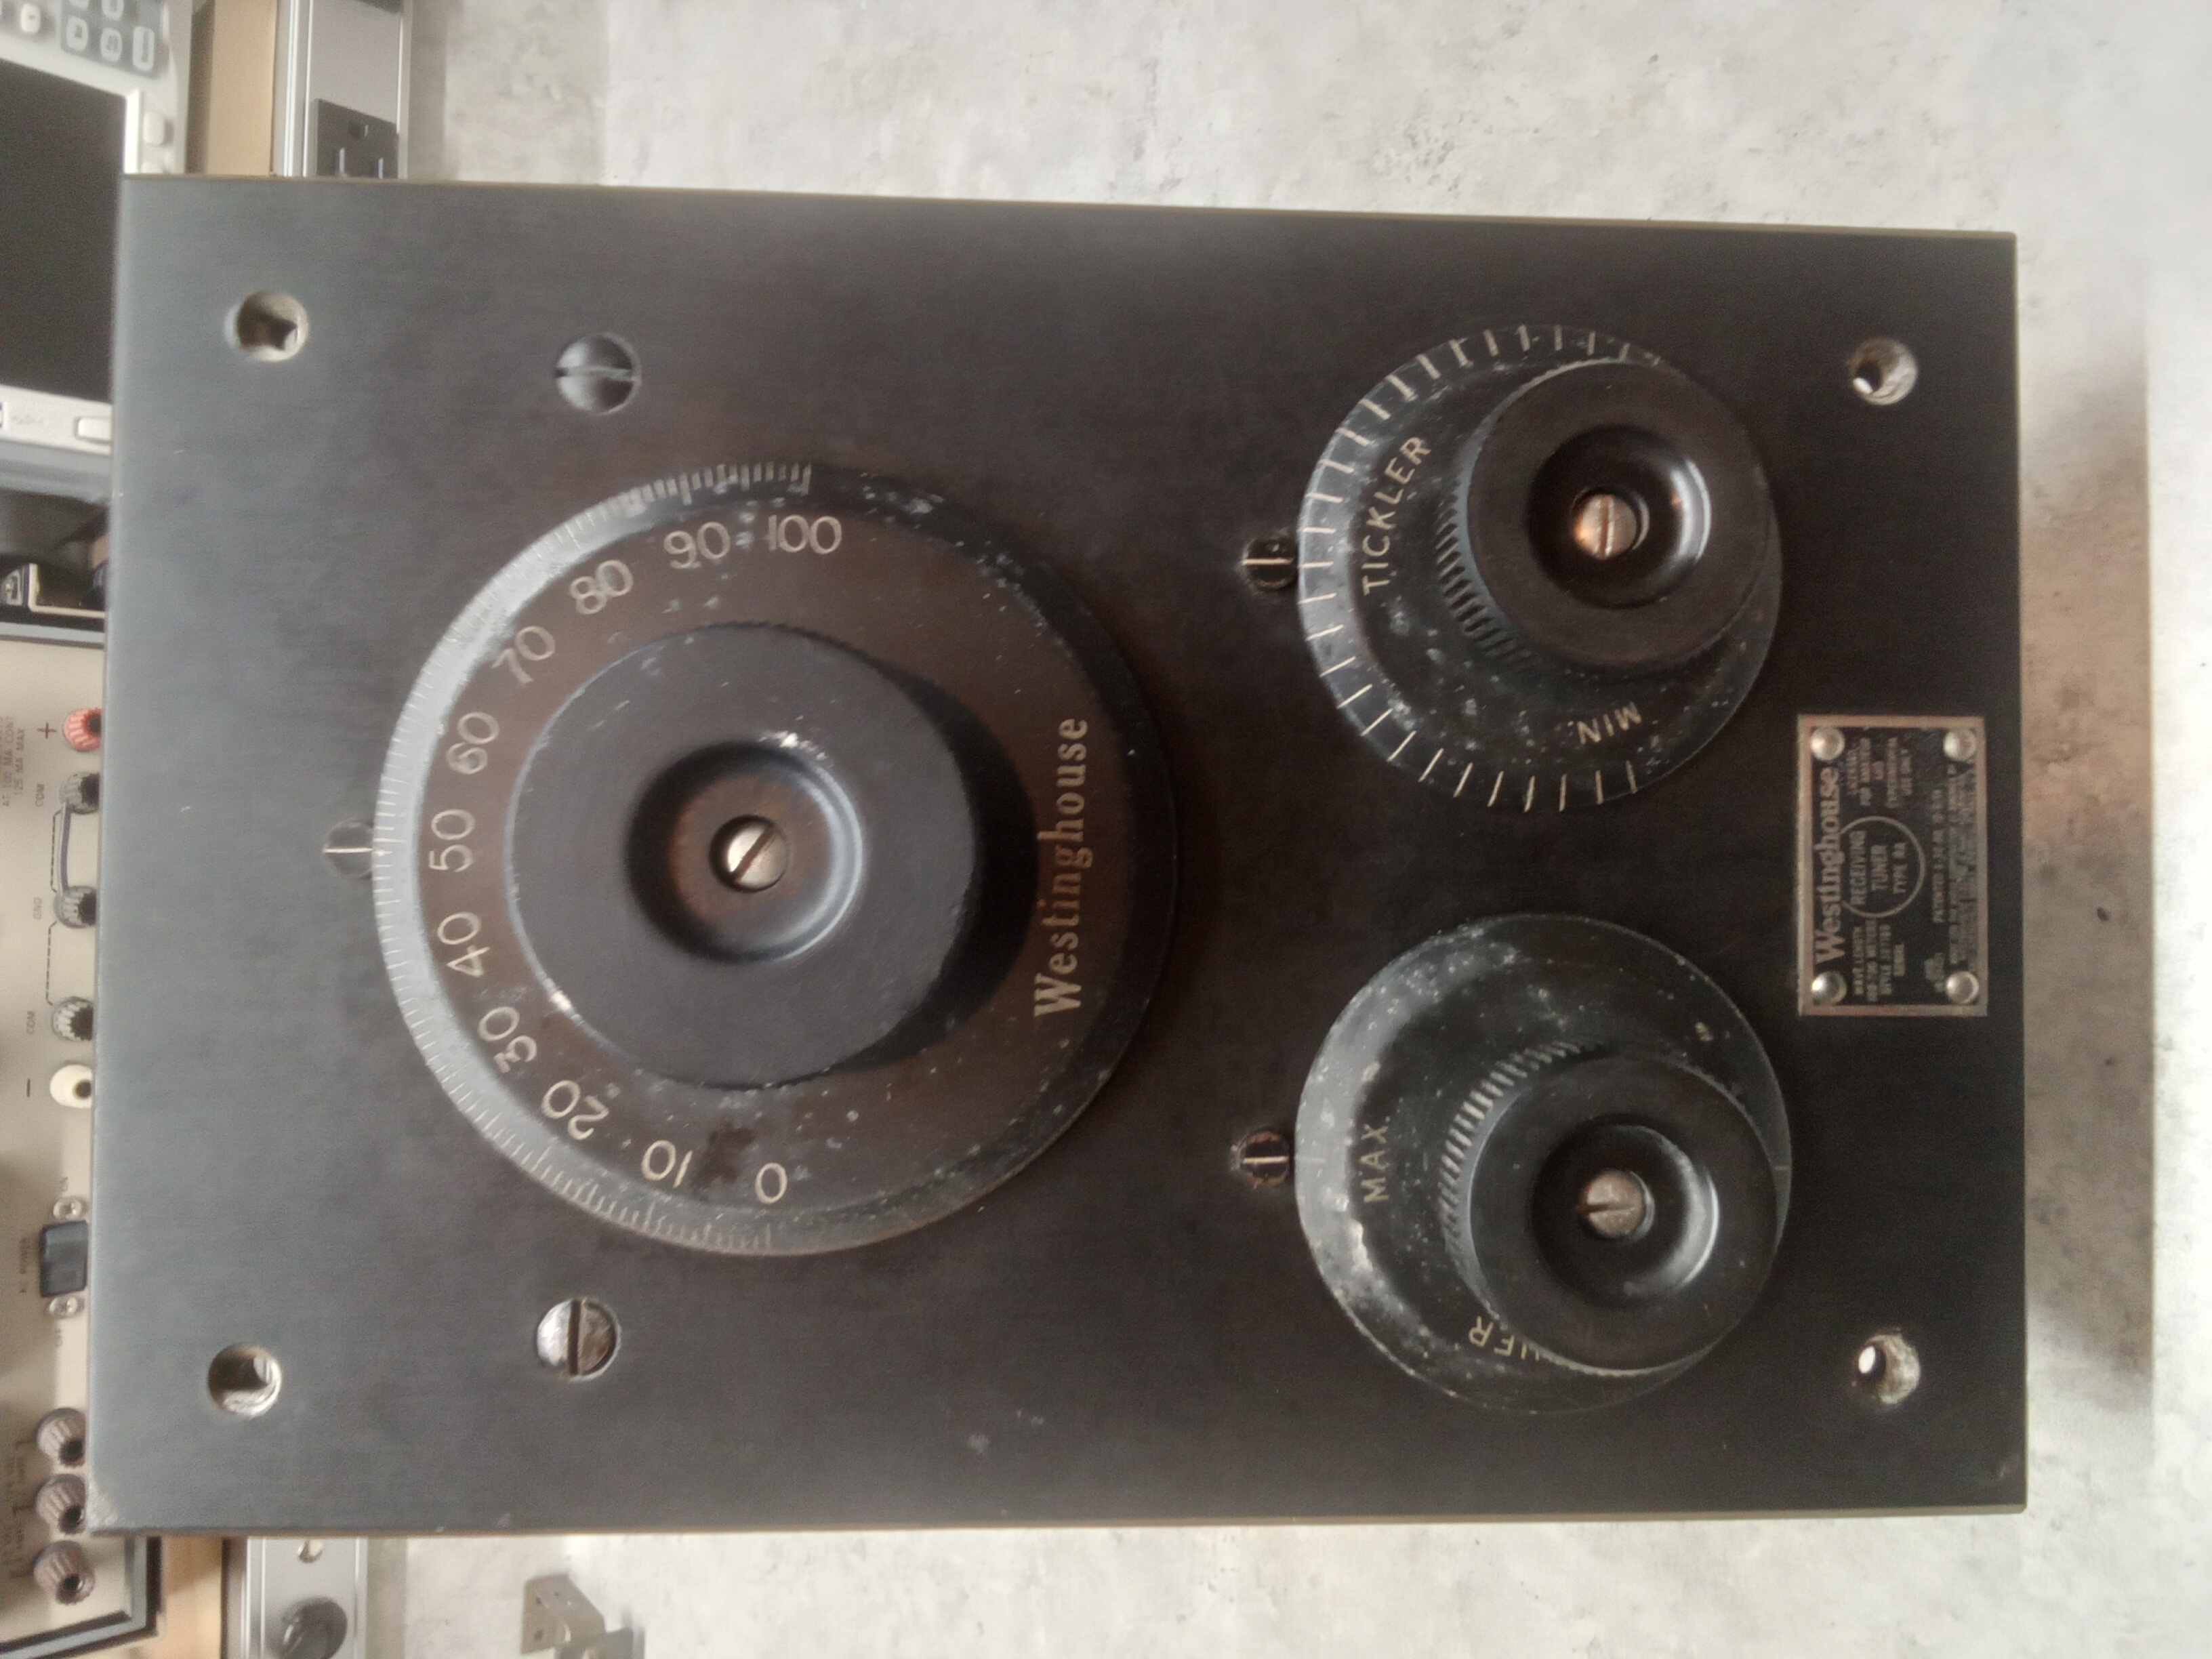
| A Westinghouse RC |
|---|
|
|
| The Rebuild | |
|---|---|
|
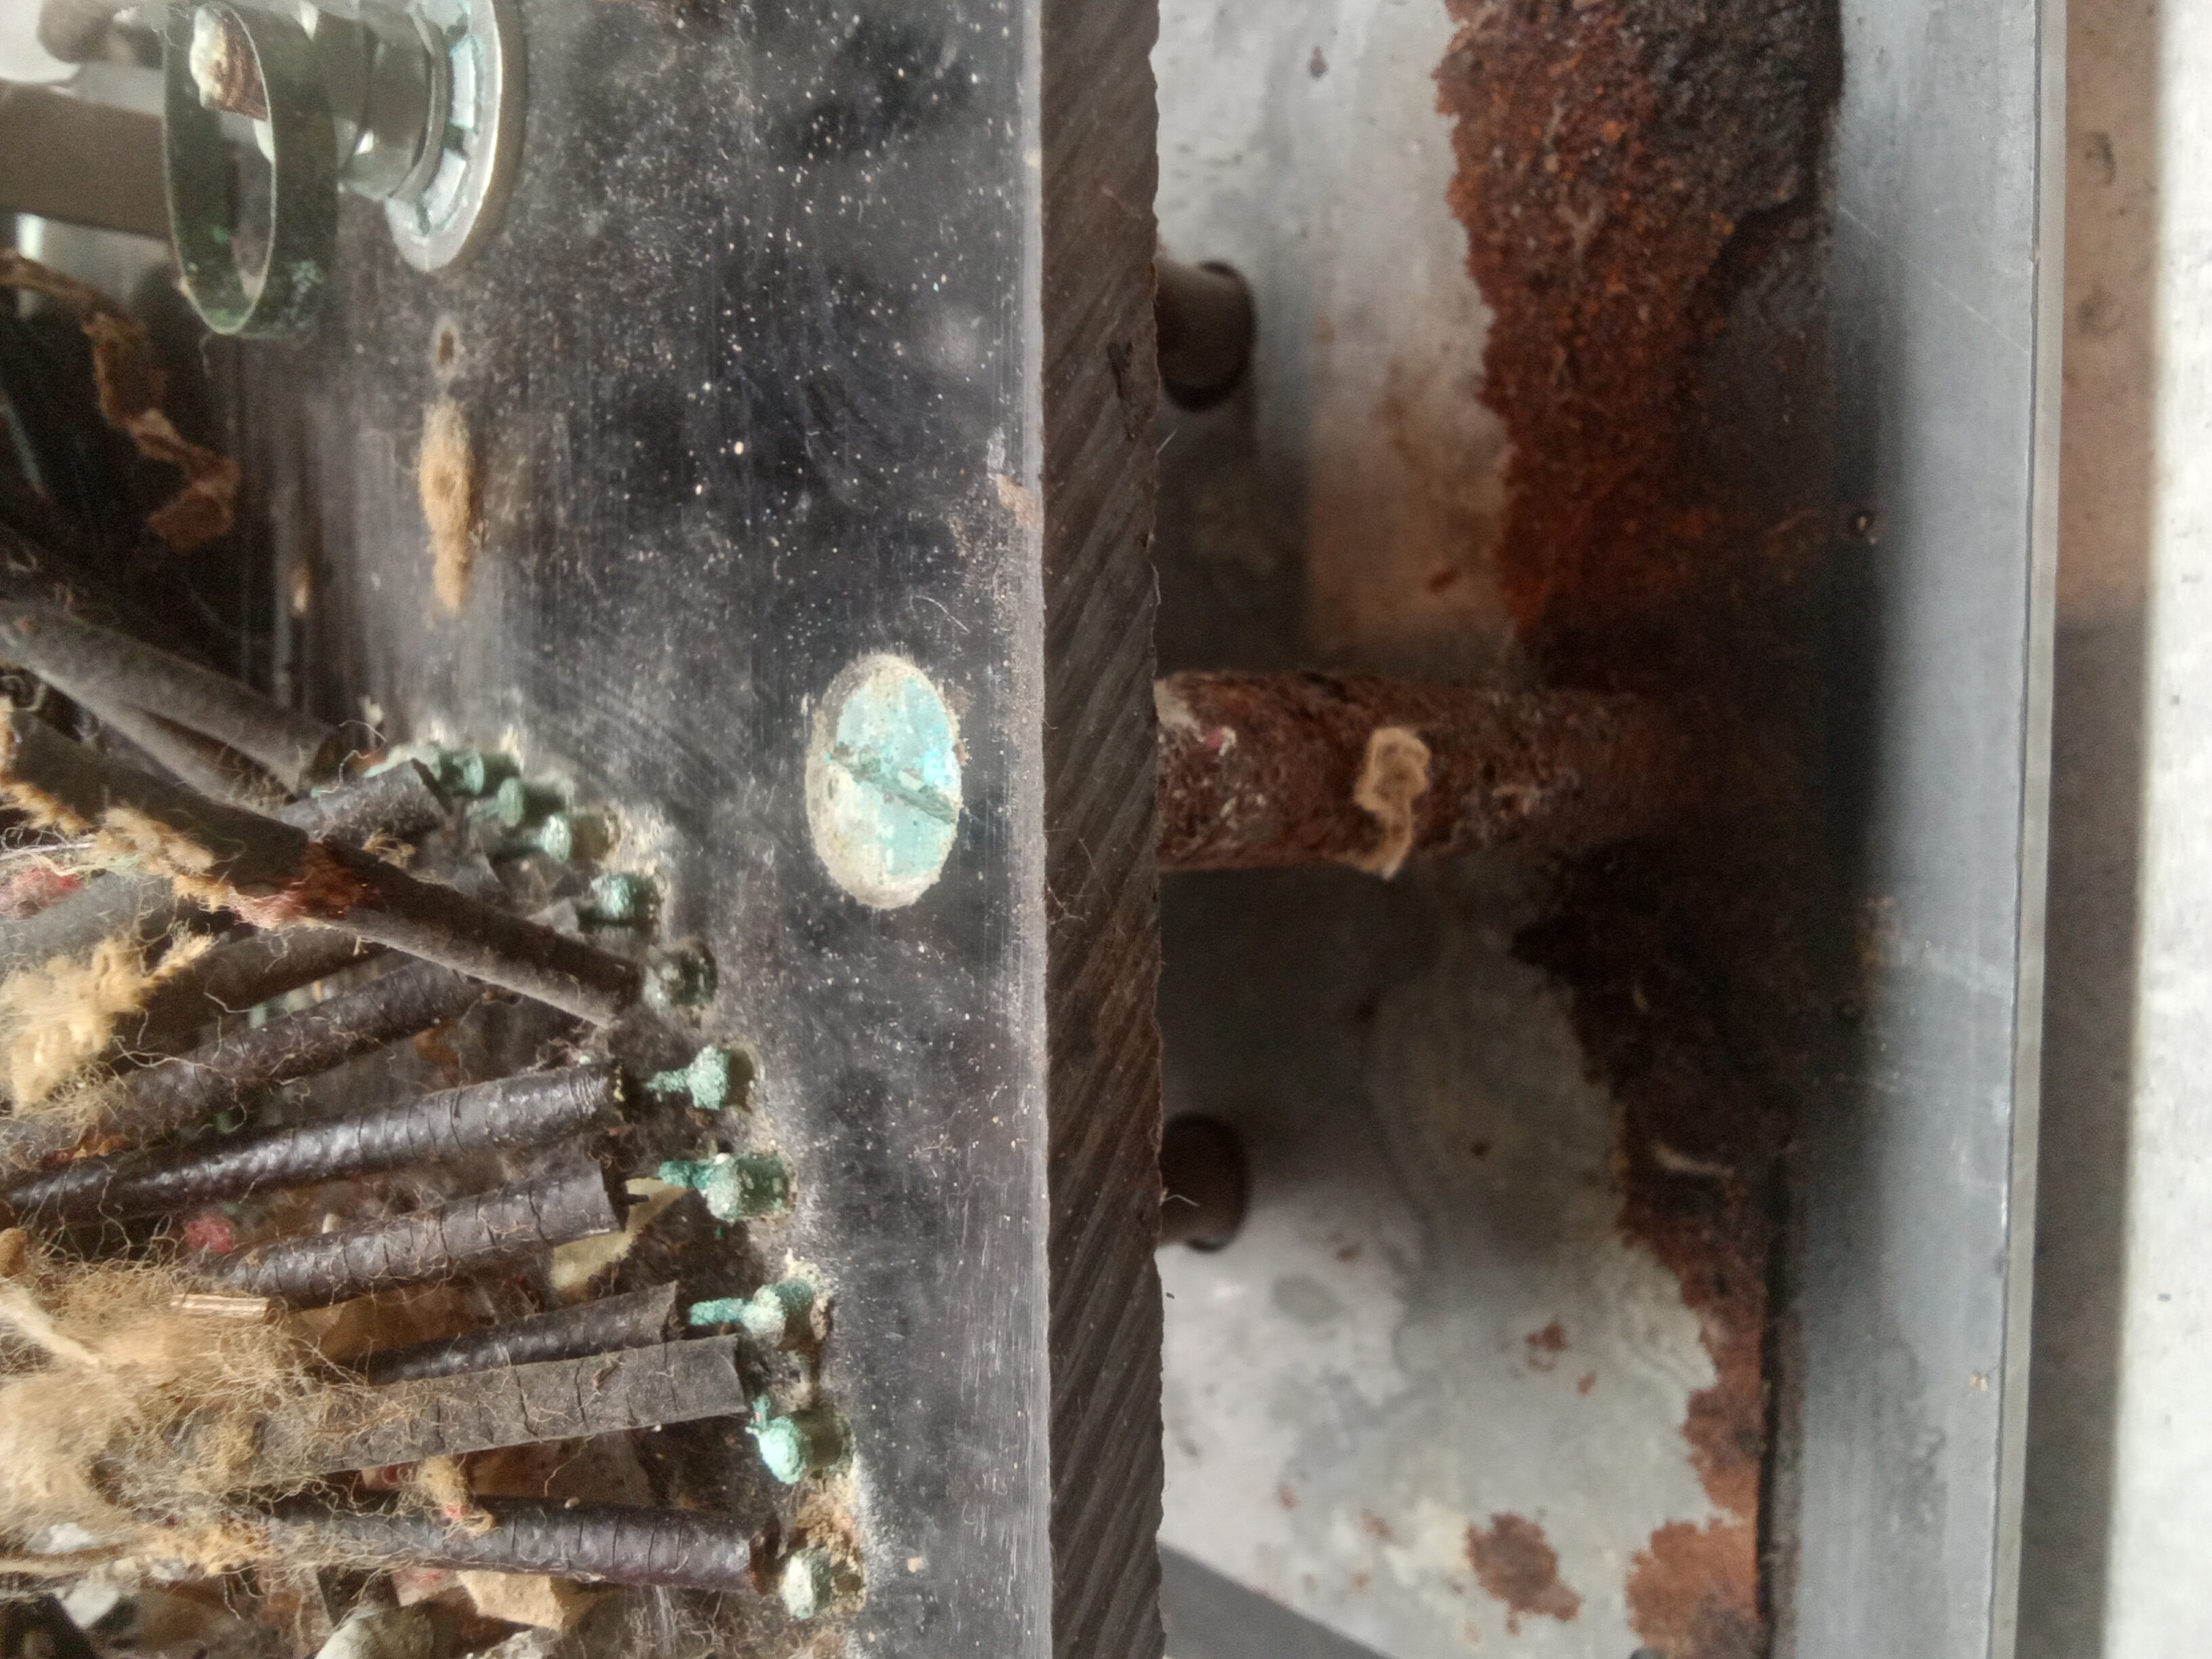
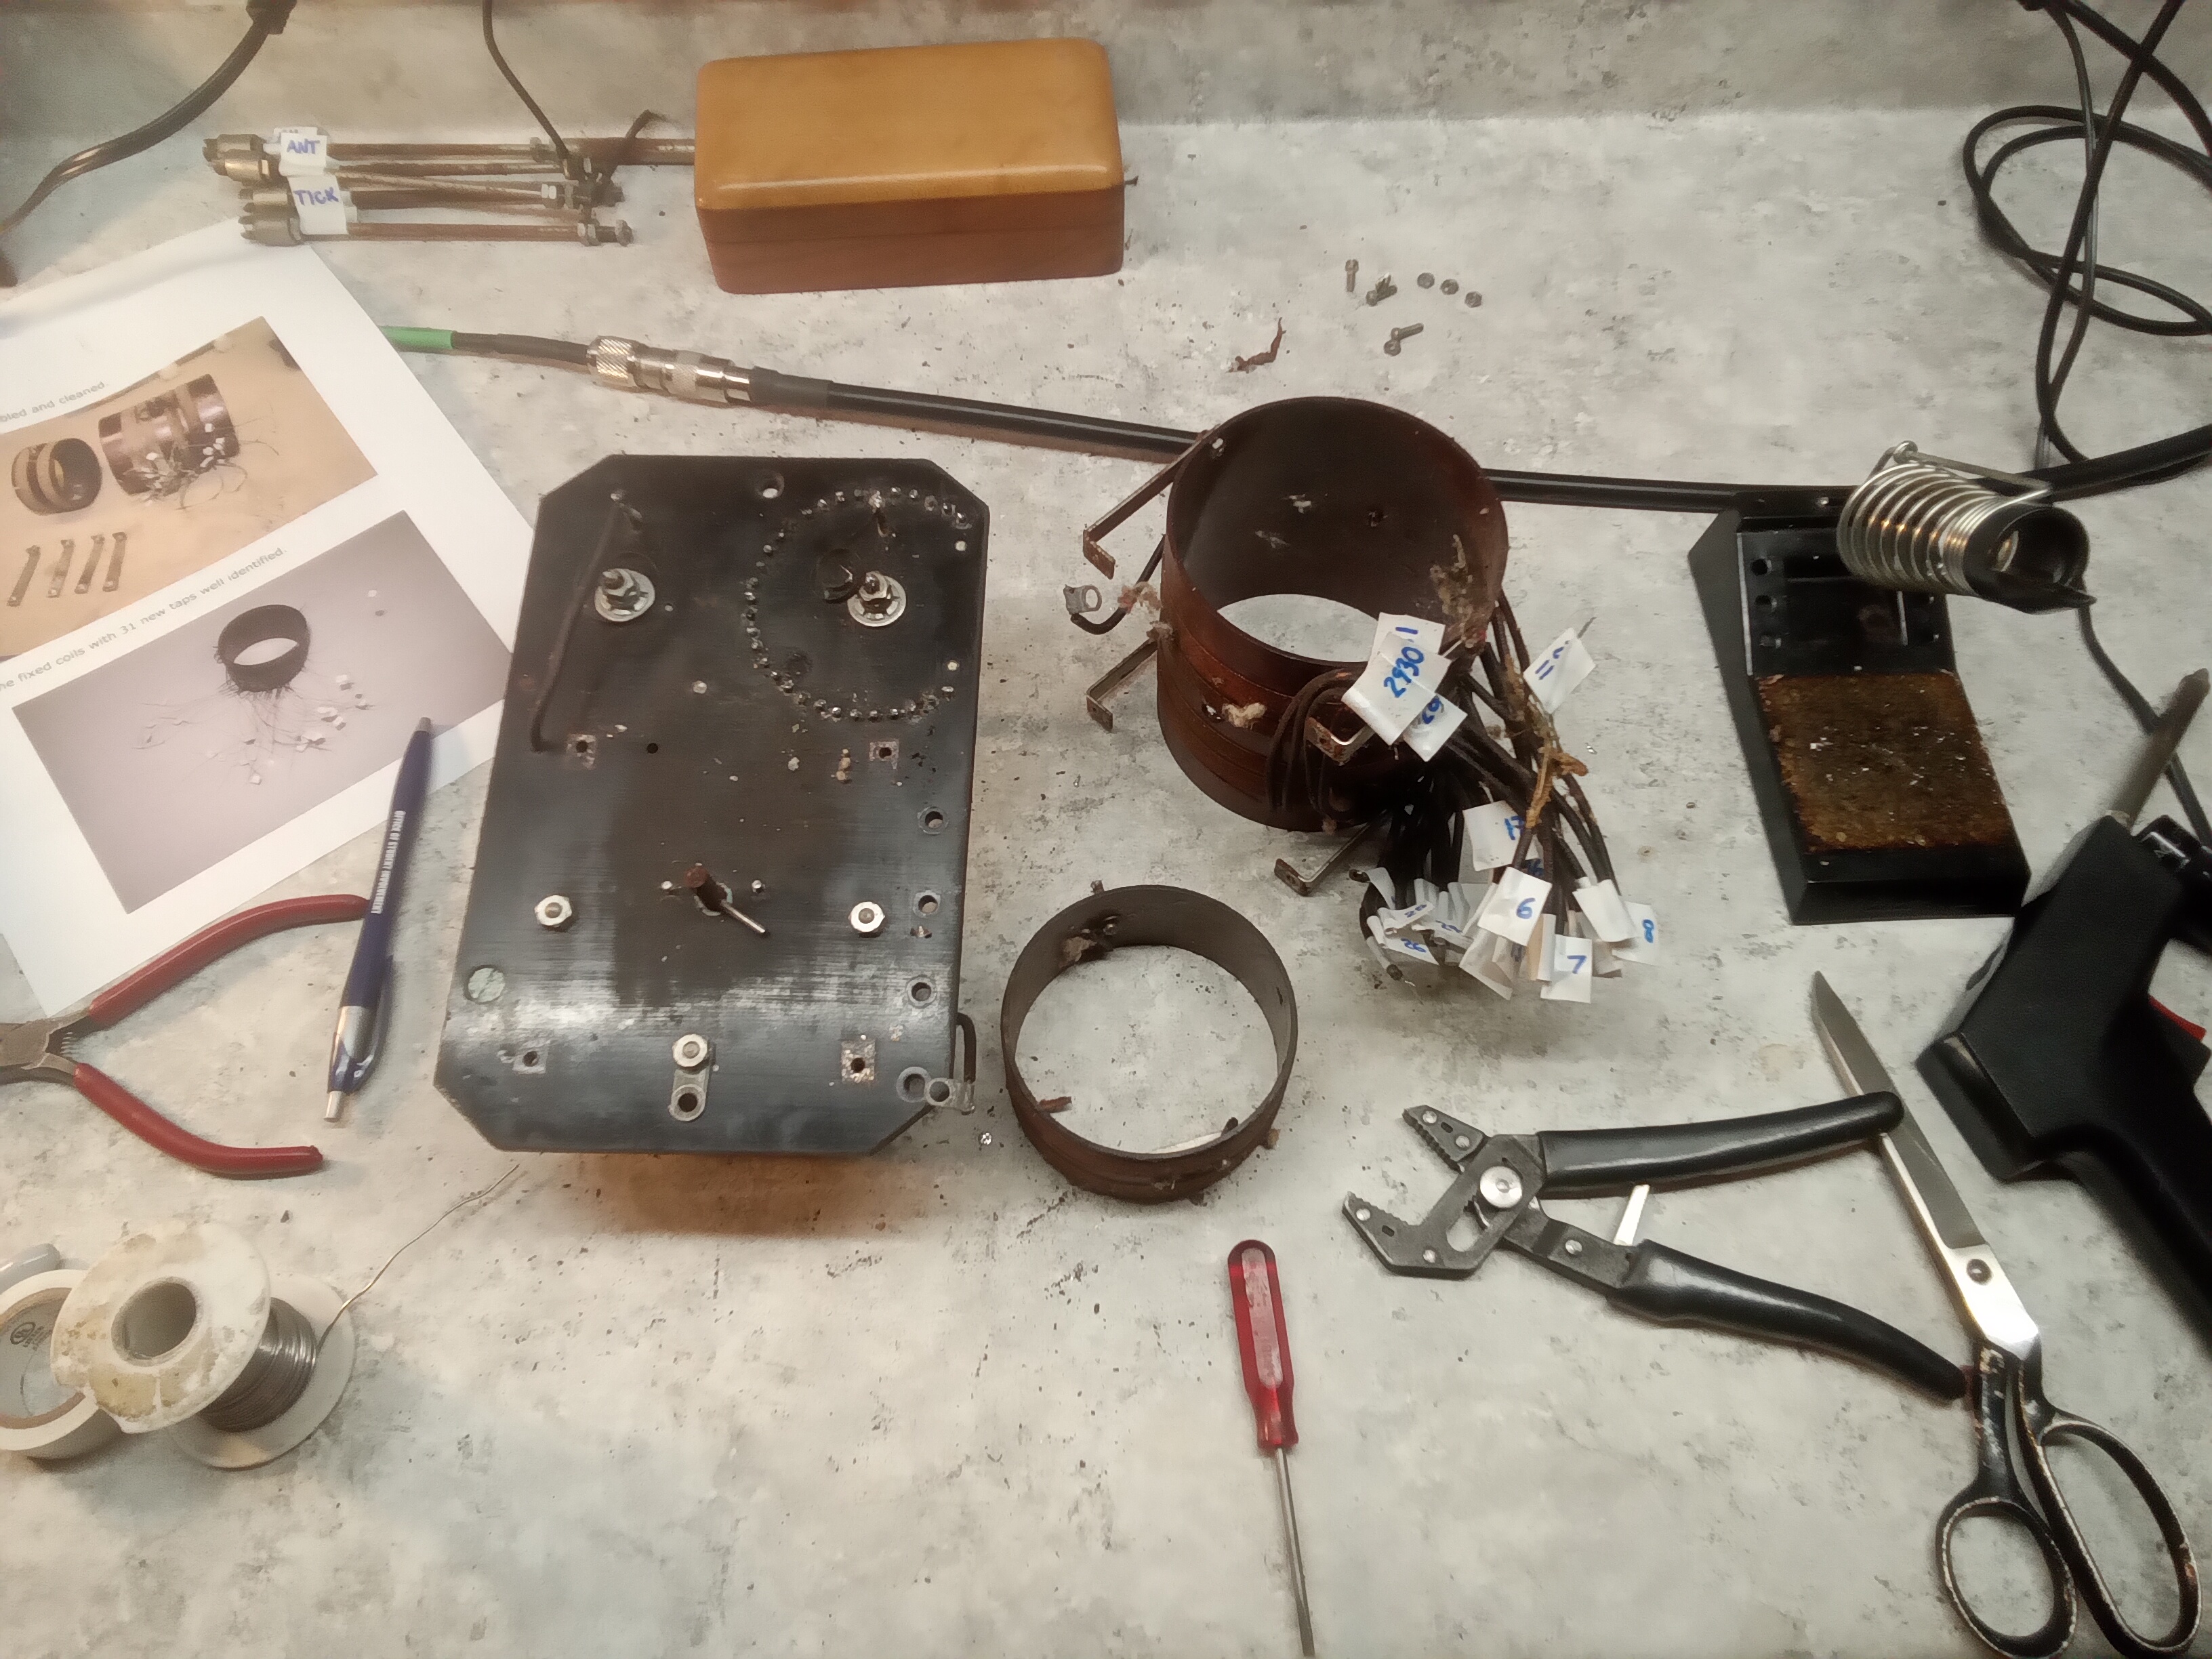
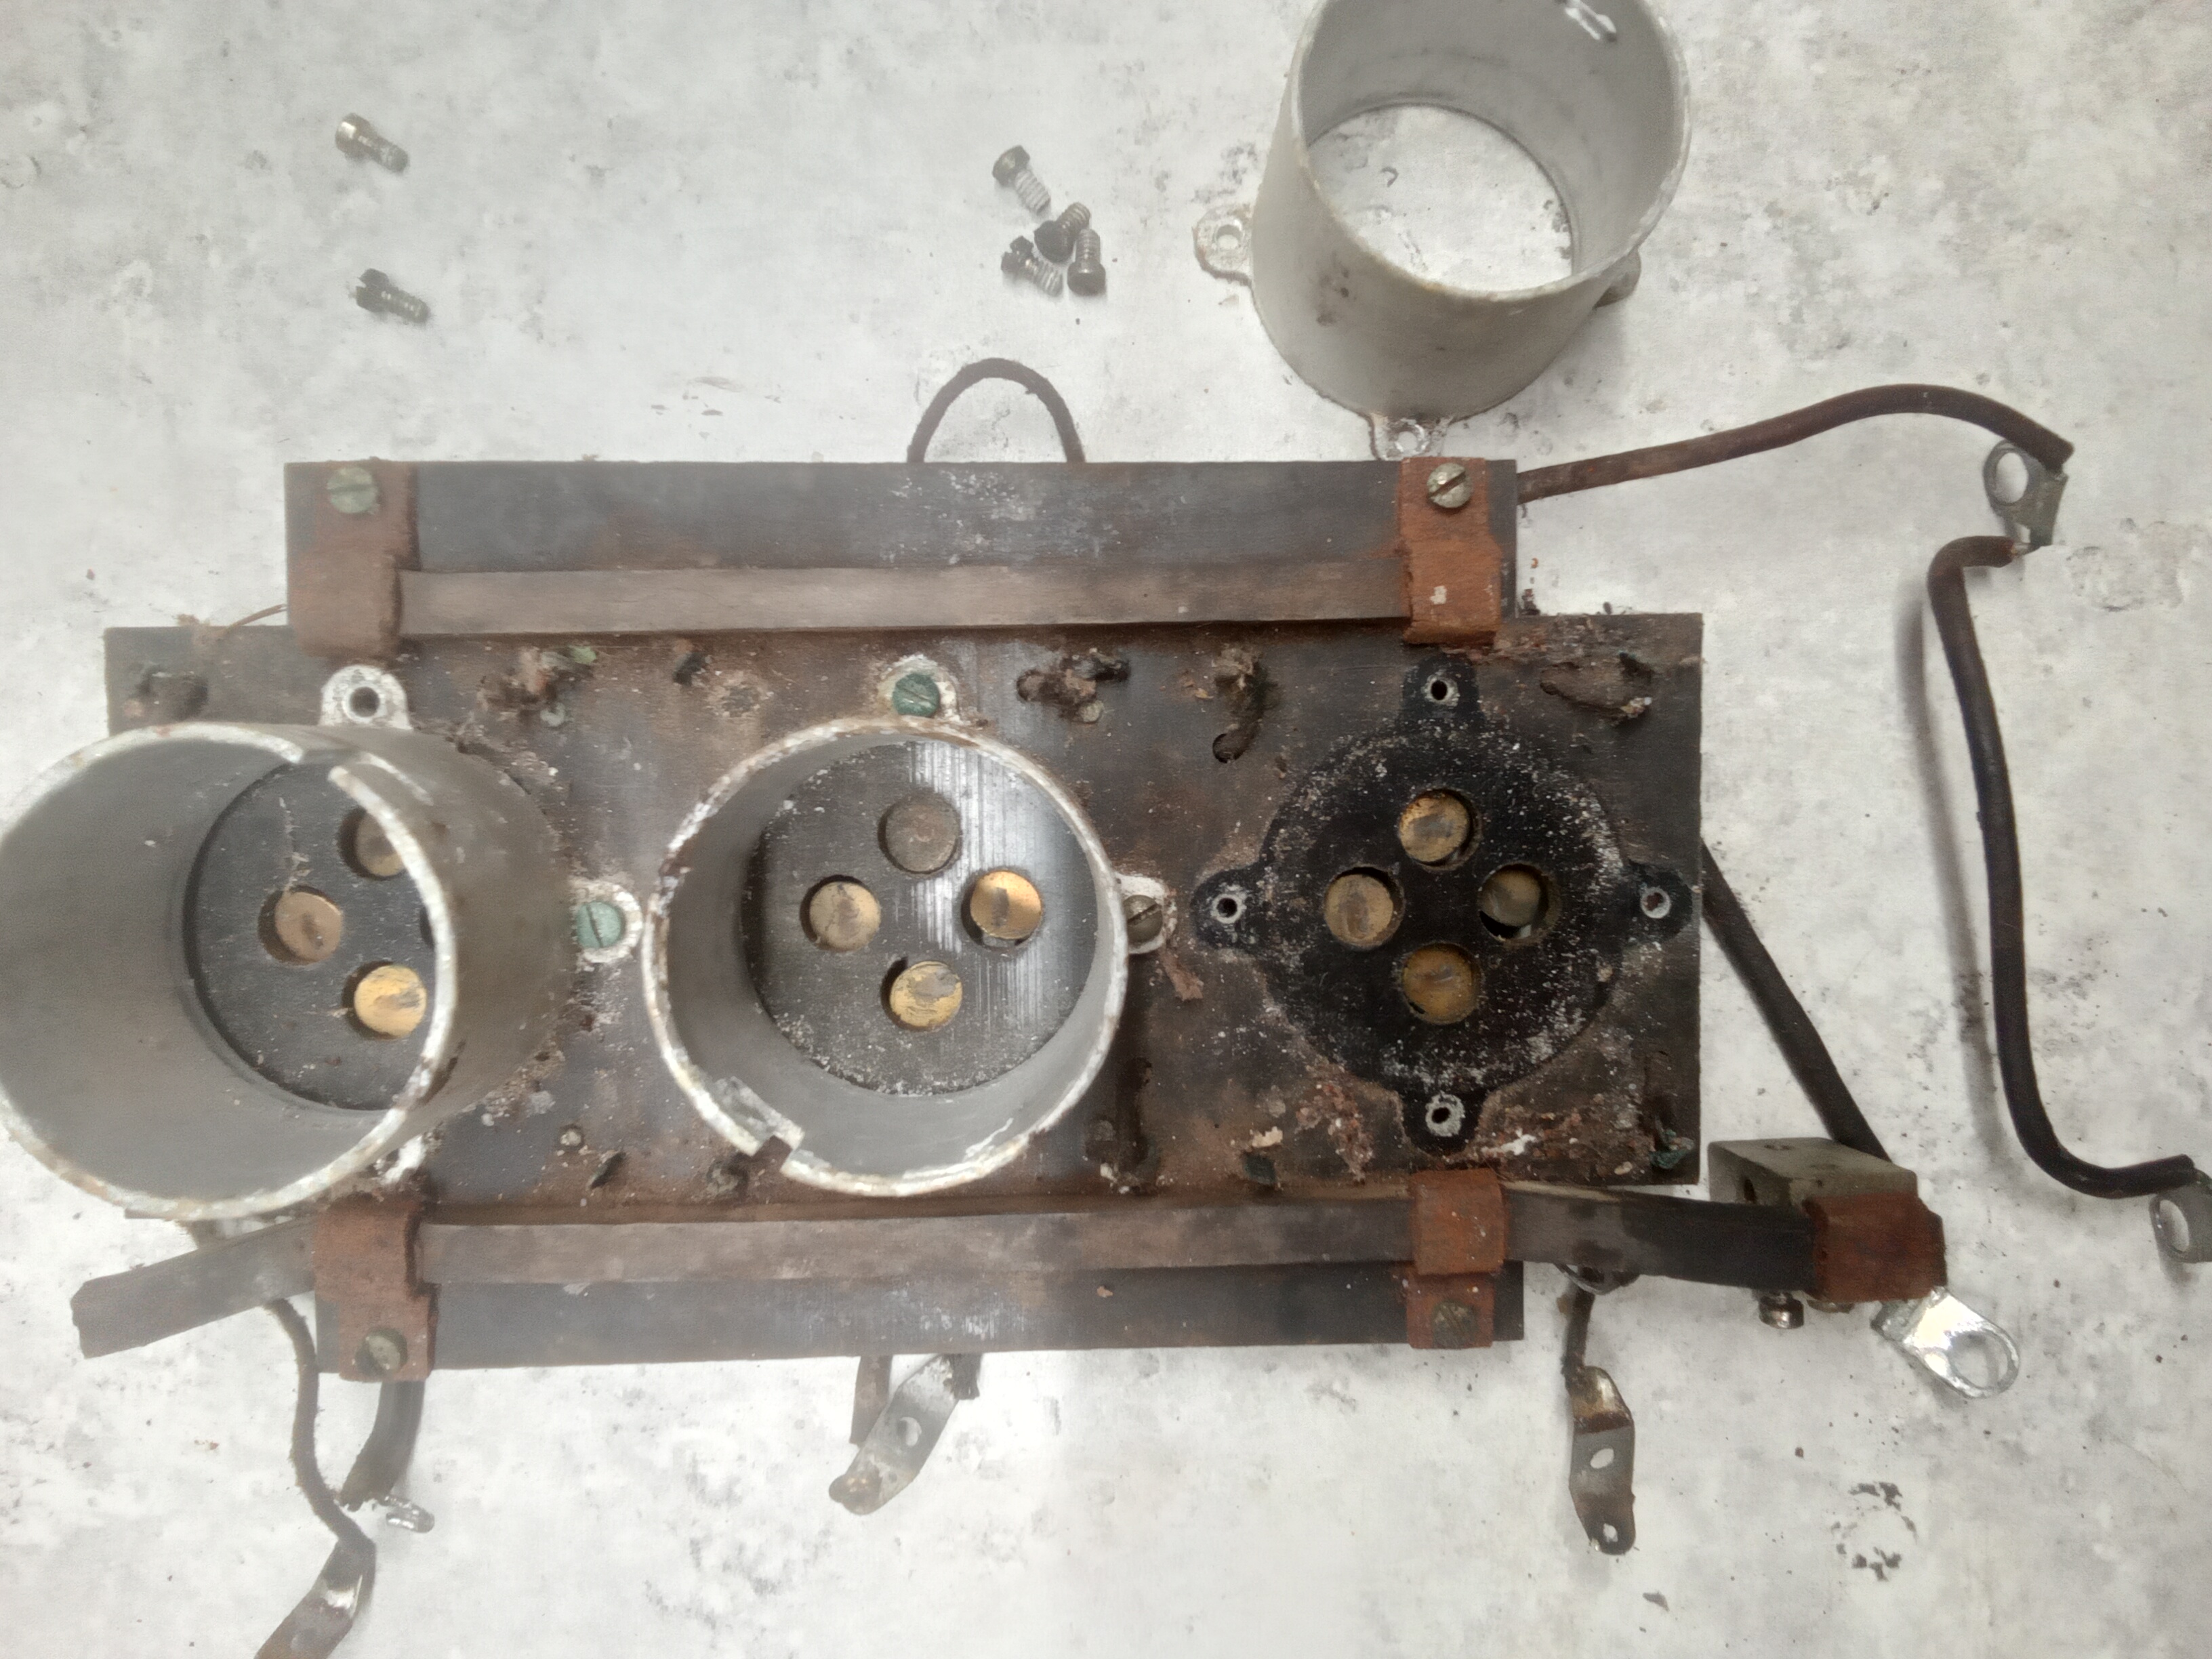
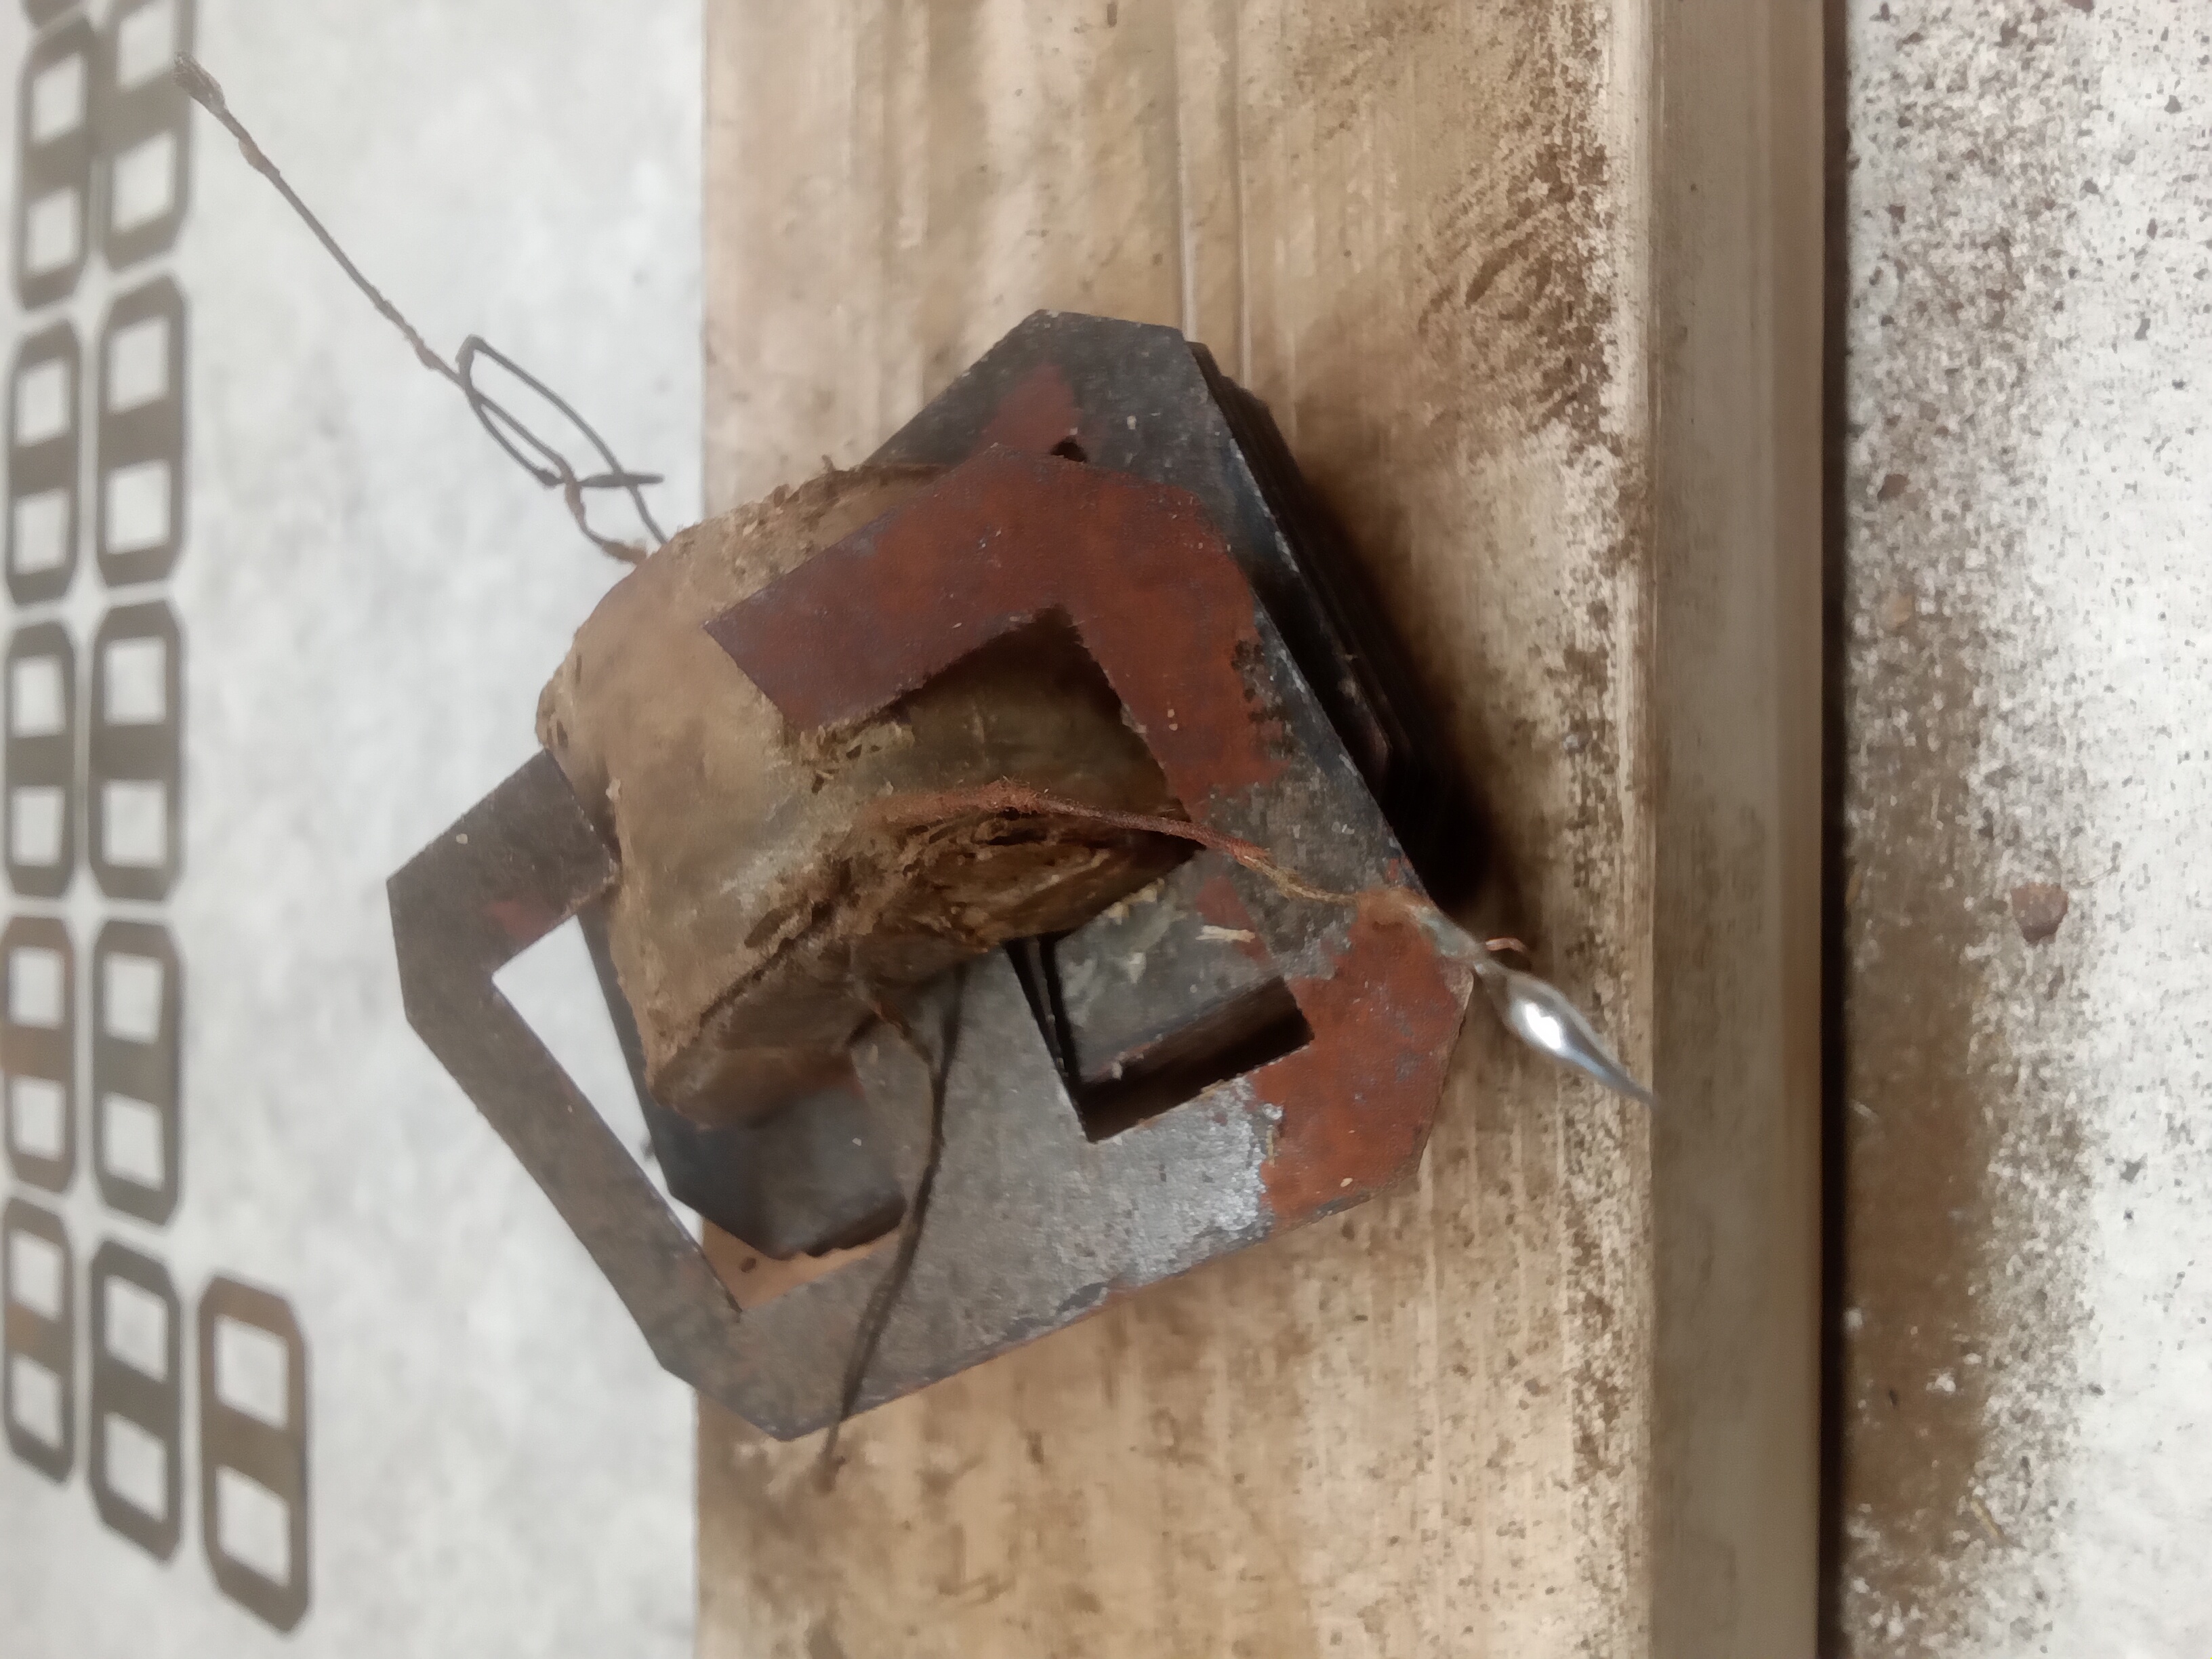
Another Mouse Hotel 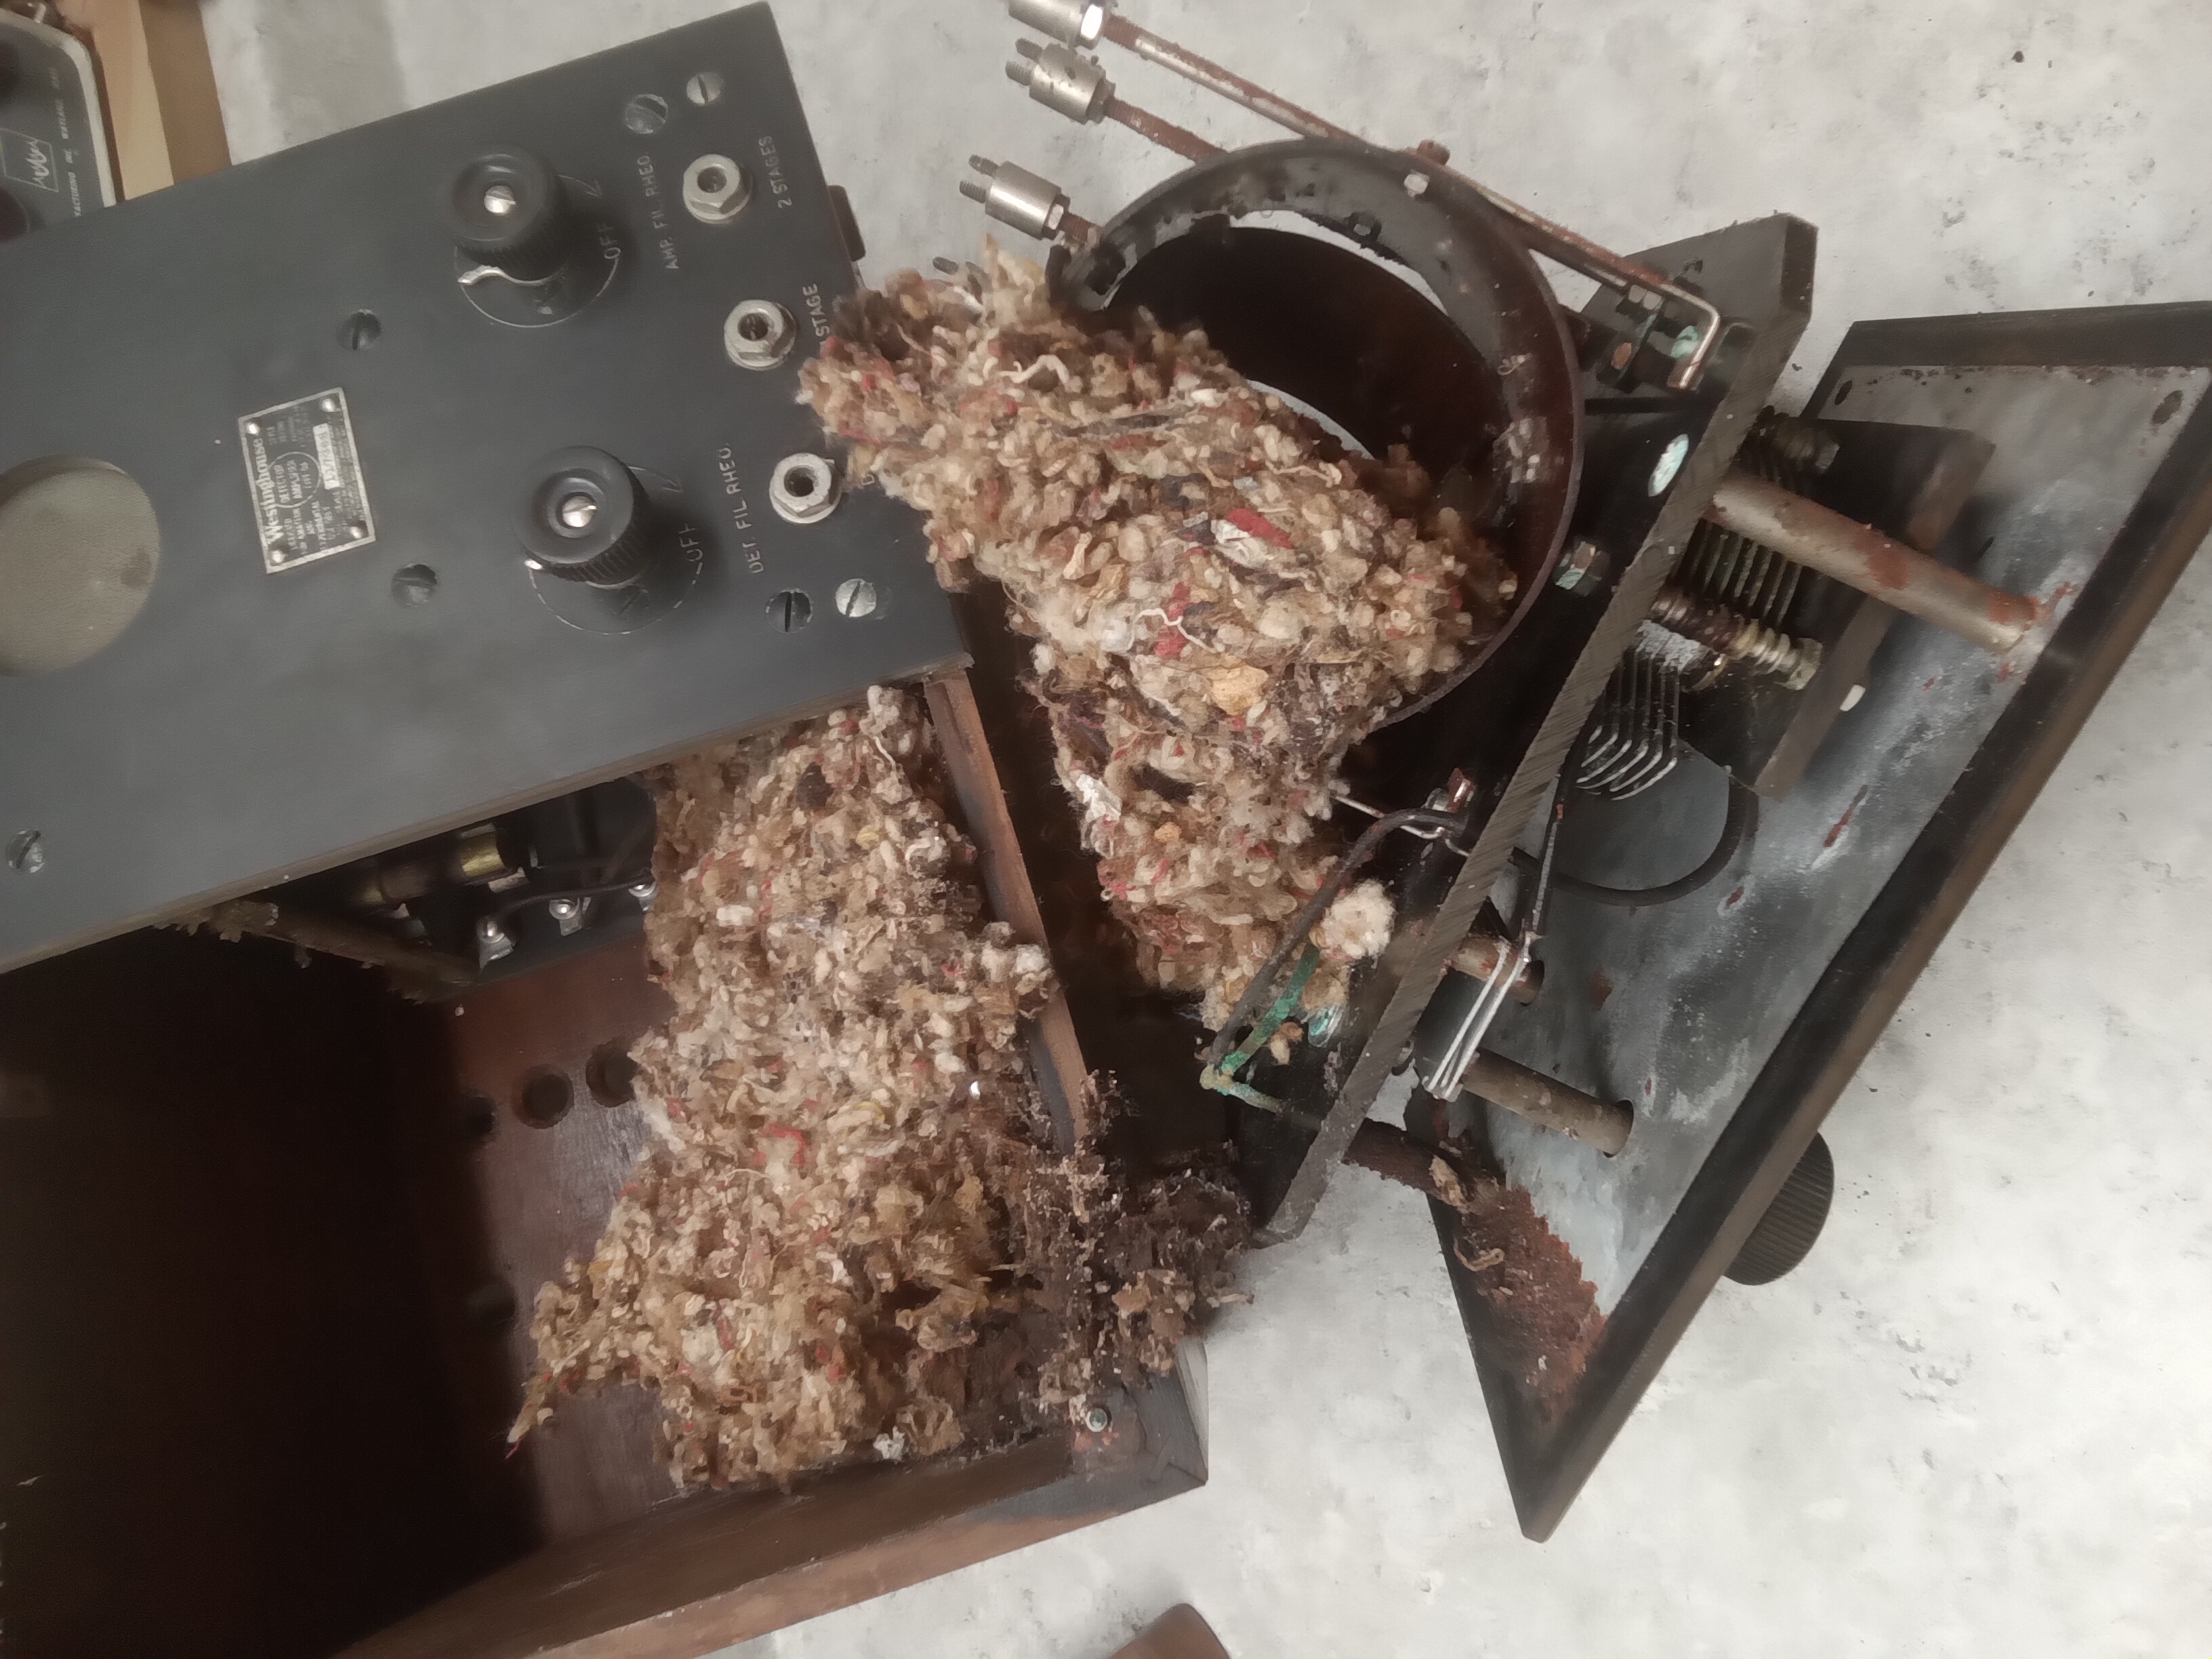
|
|
|
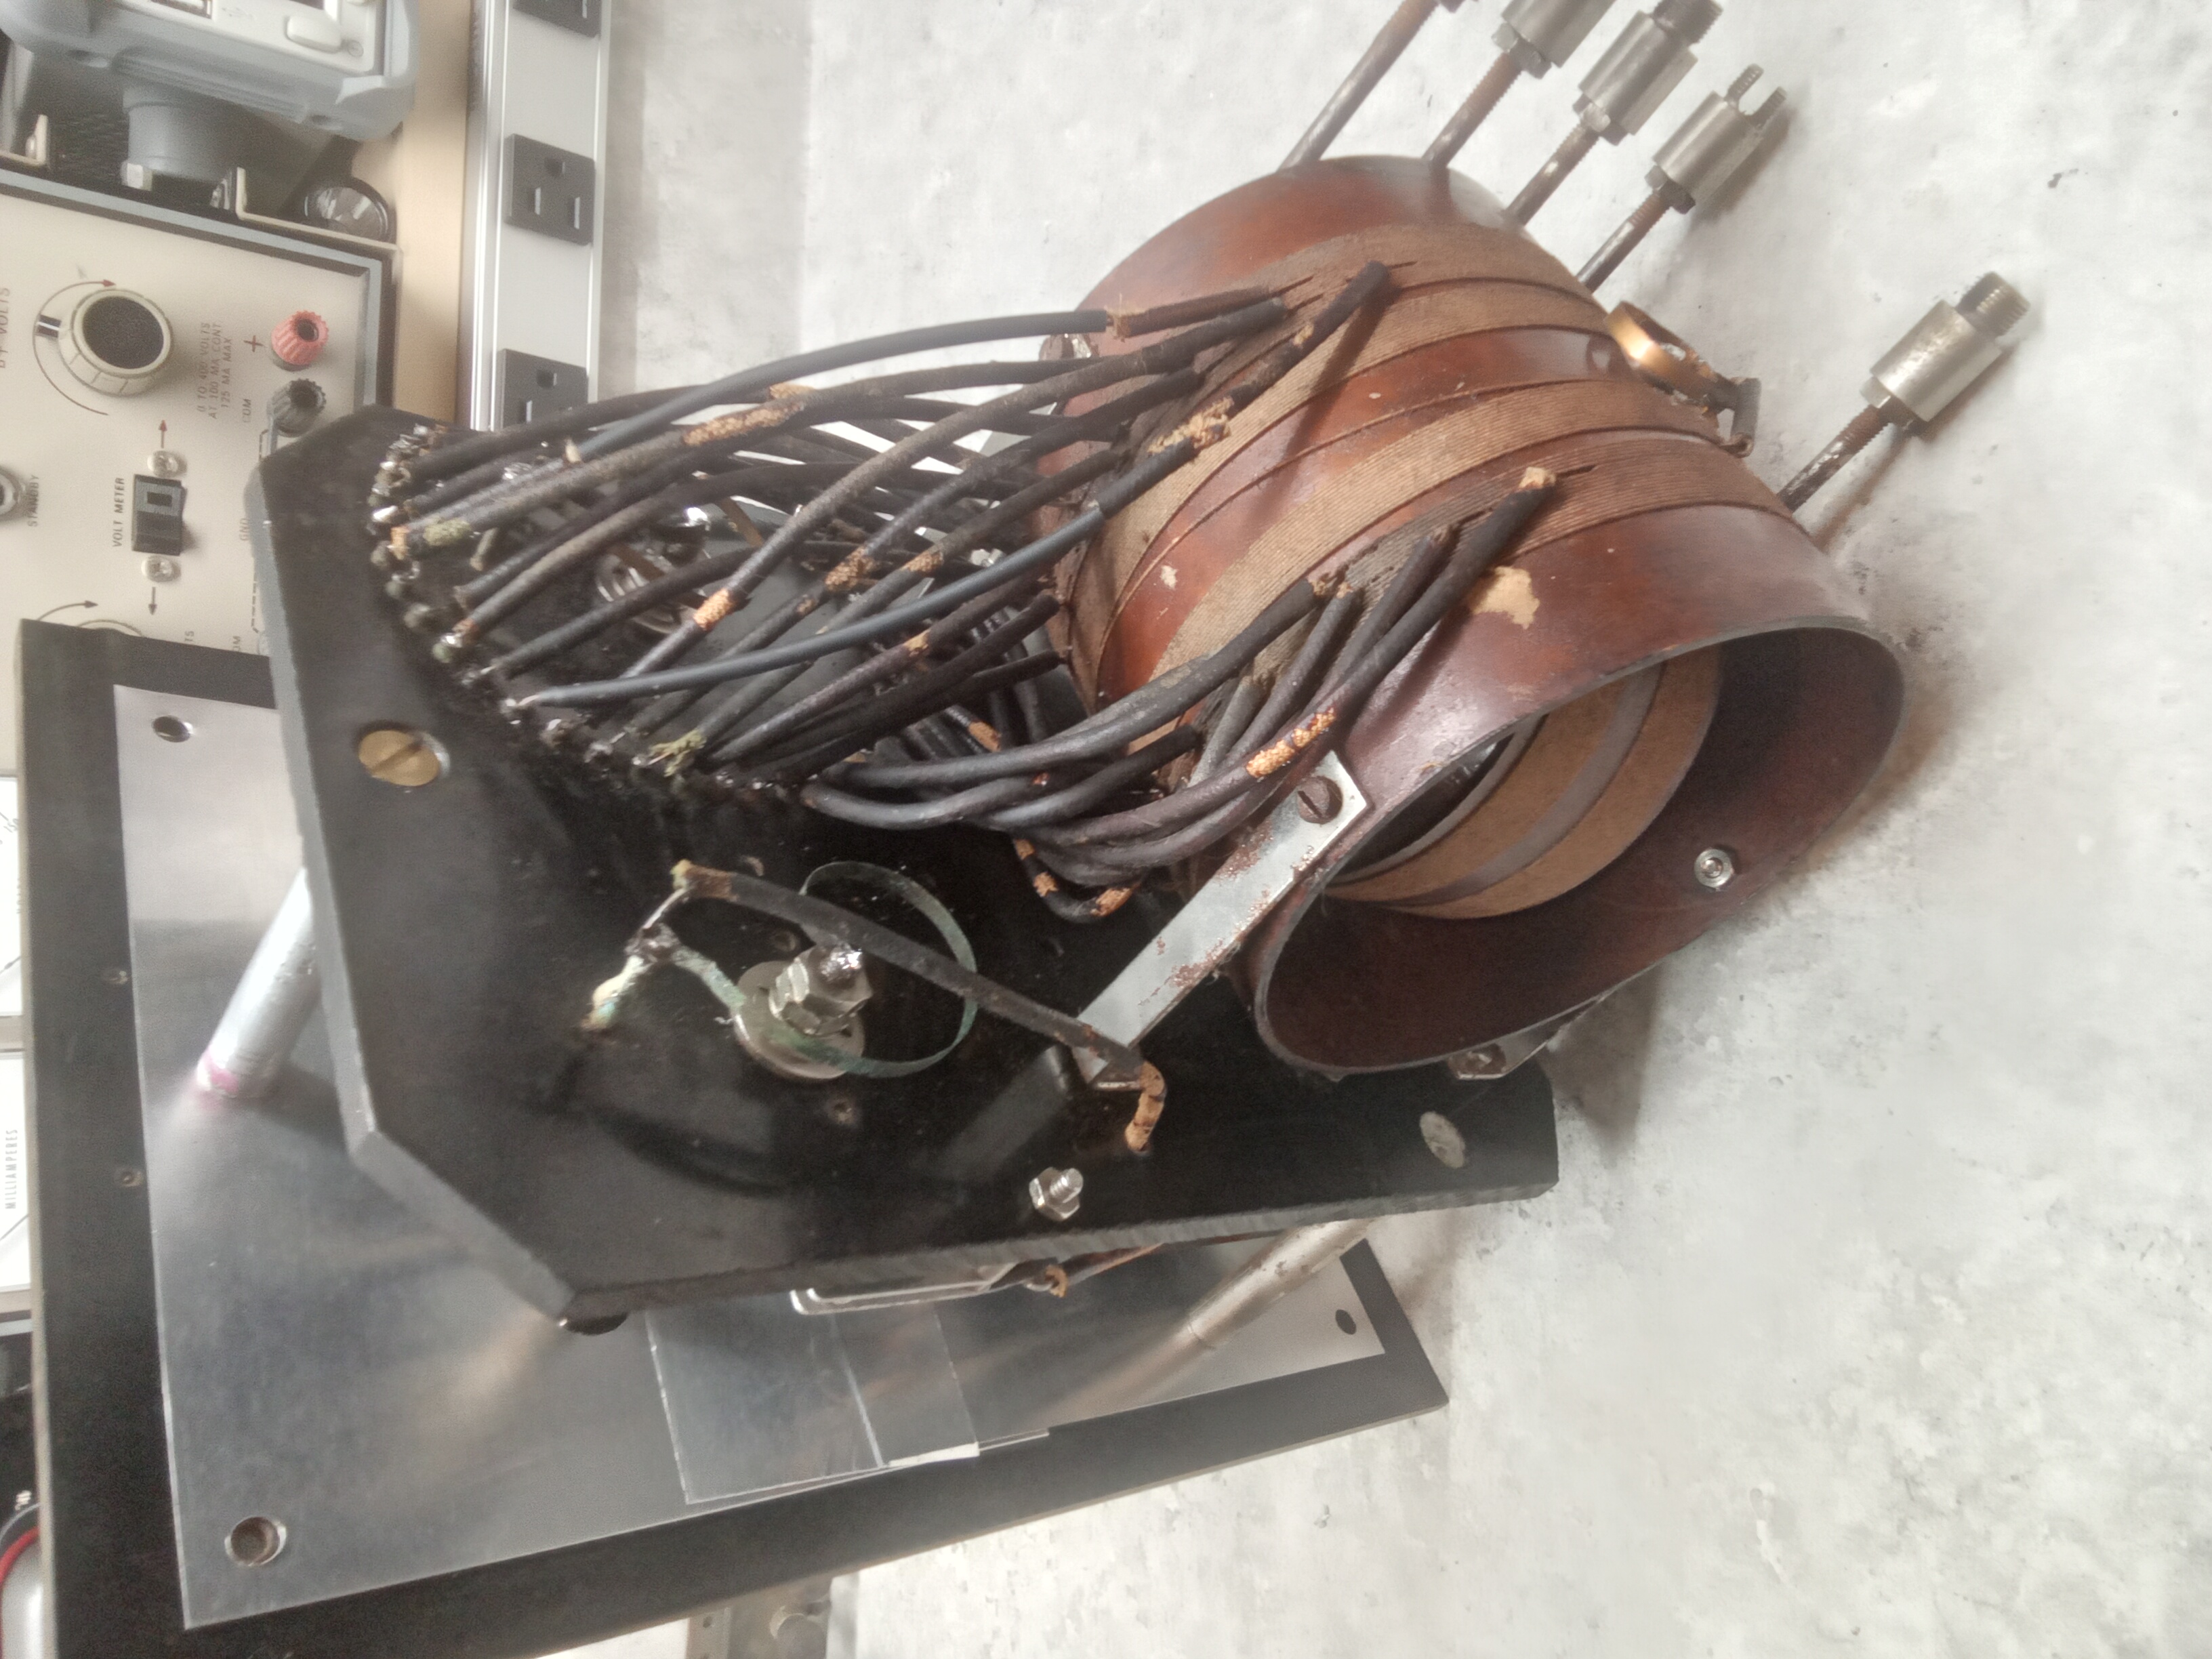
I started with the RA unit and the mess inside here is worse than the Freed-Eisemann mouse hotel I tried to save last year. I'm able to scoop out wads of dry shredded cloth and paper, but the cloth sticks to the wiring insulation. It's hard to tell the cloth strips from the insulated wire strands in the wire bundle coming off the vario-coupler. |
|
|
There's lots of corrosion. |
|
|
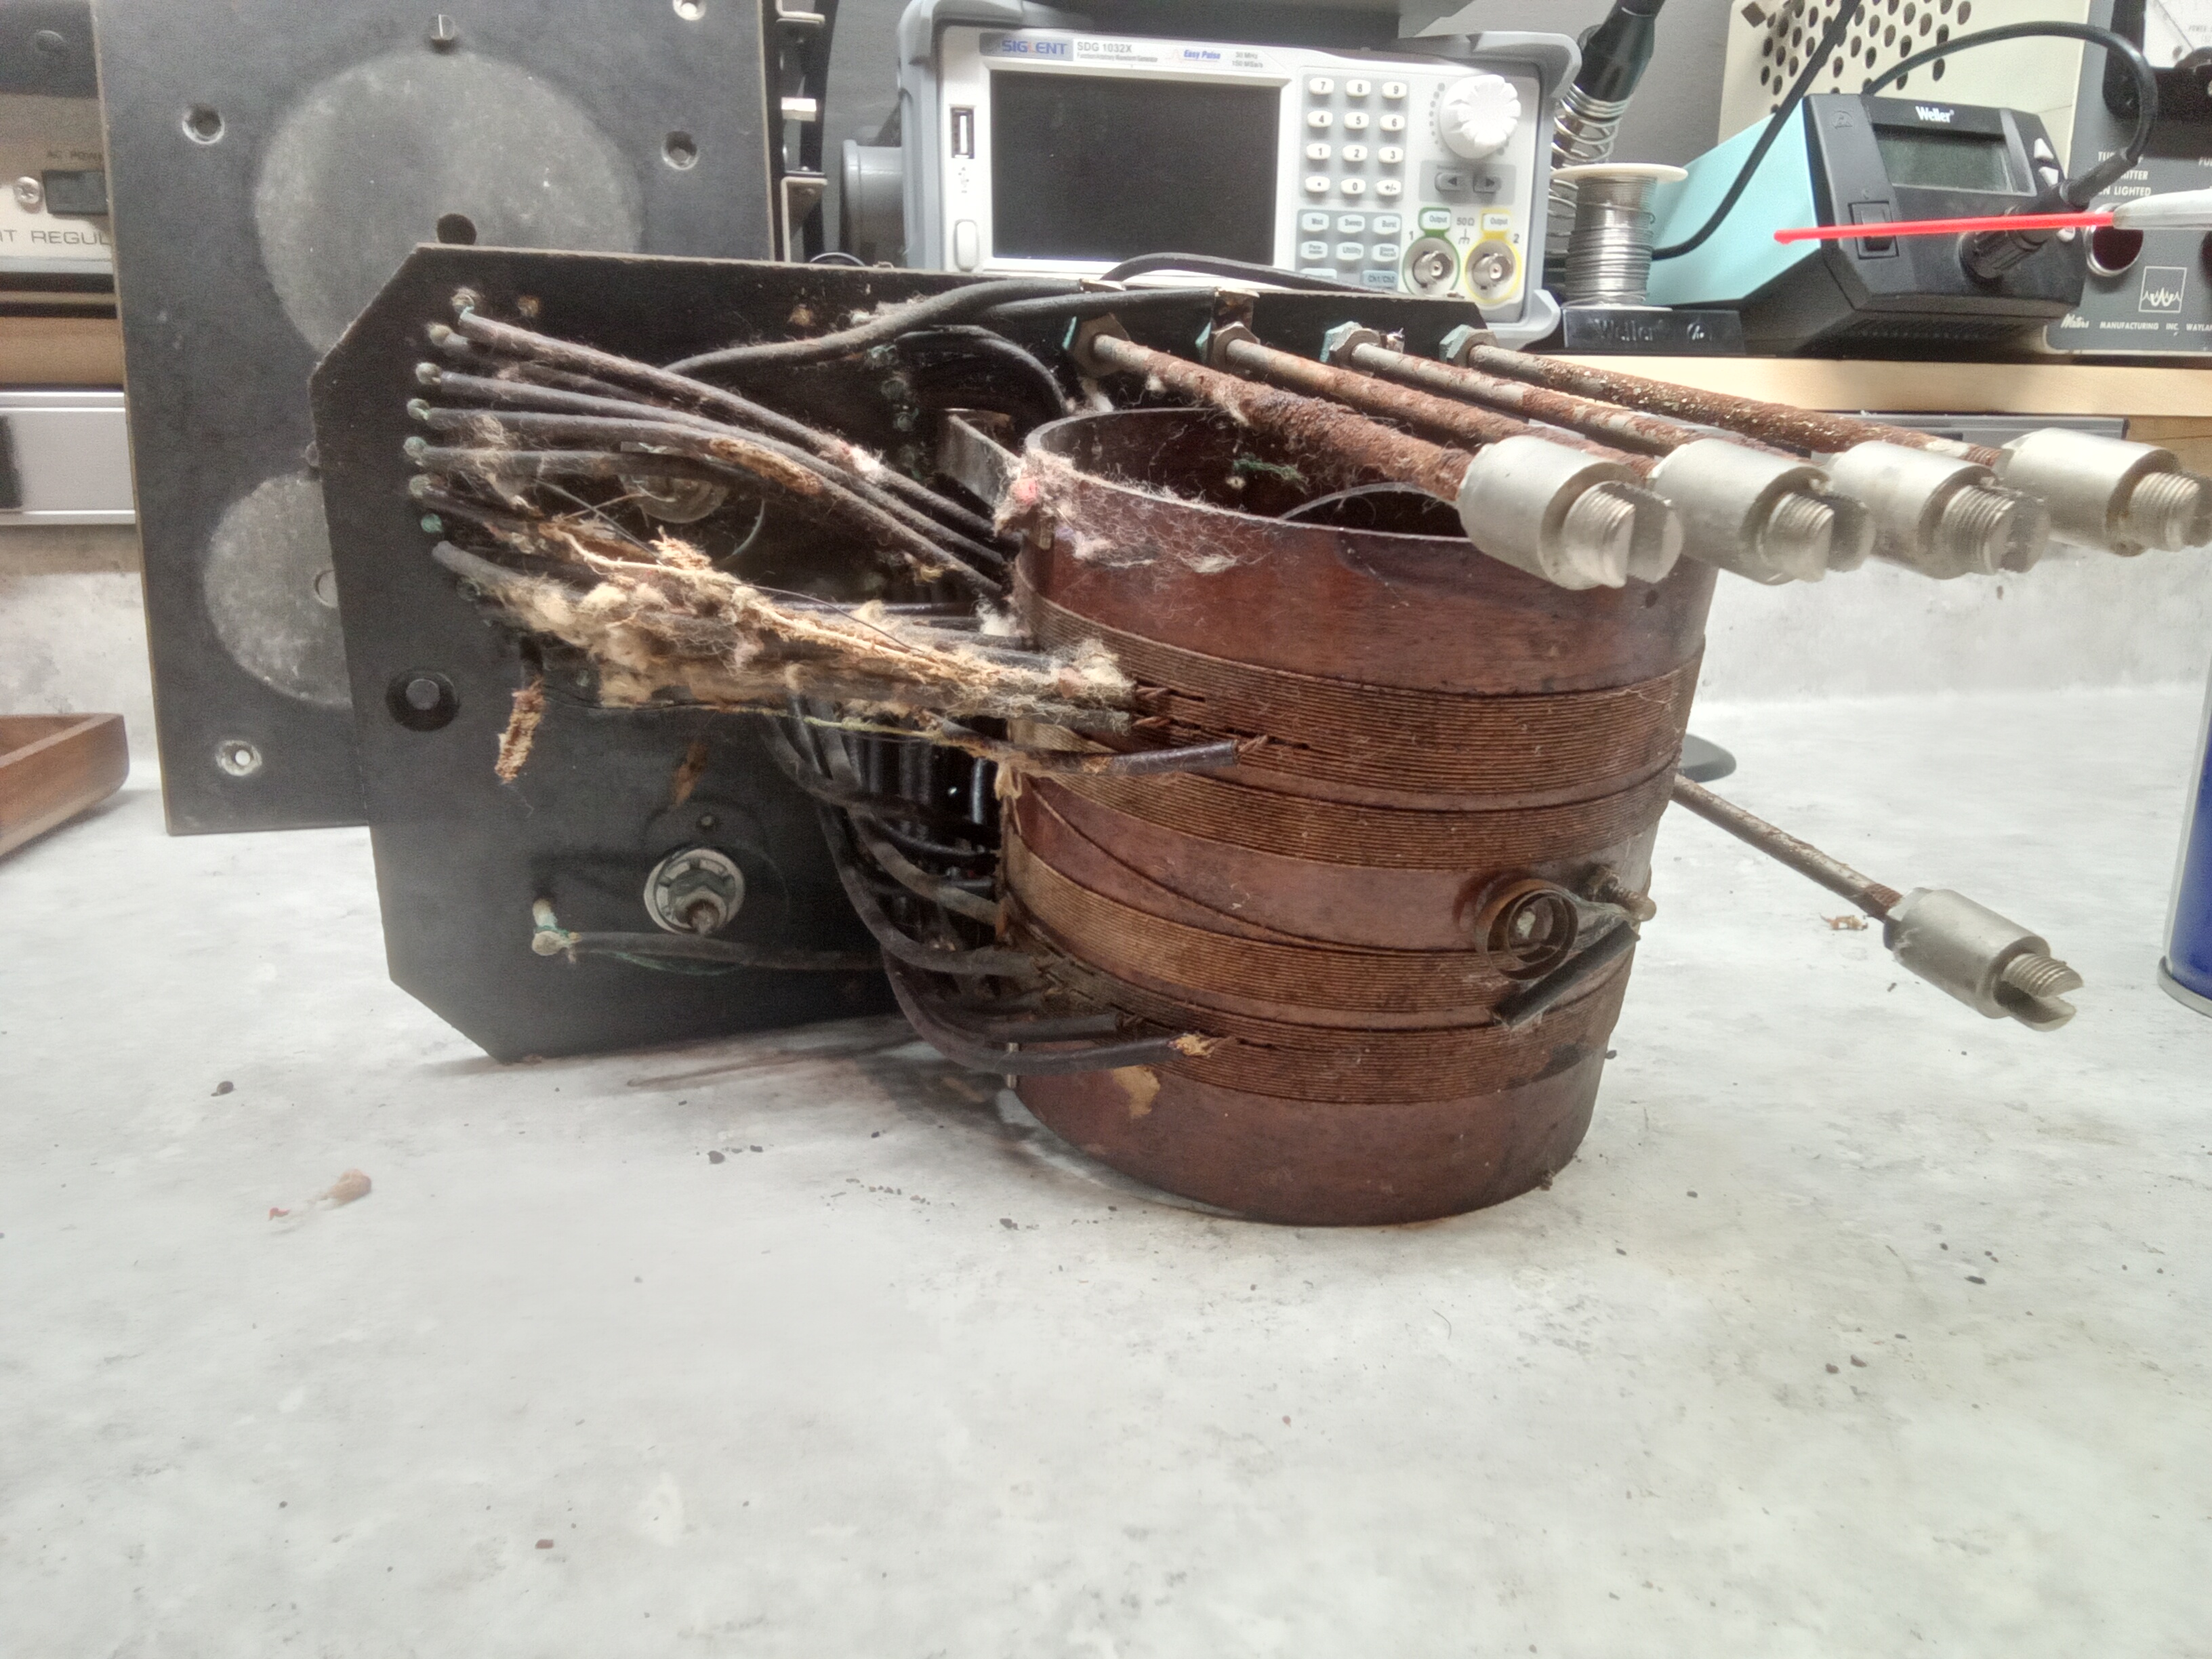
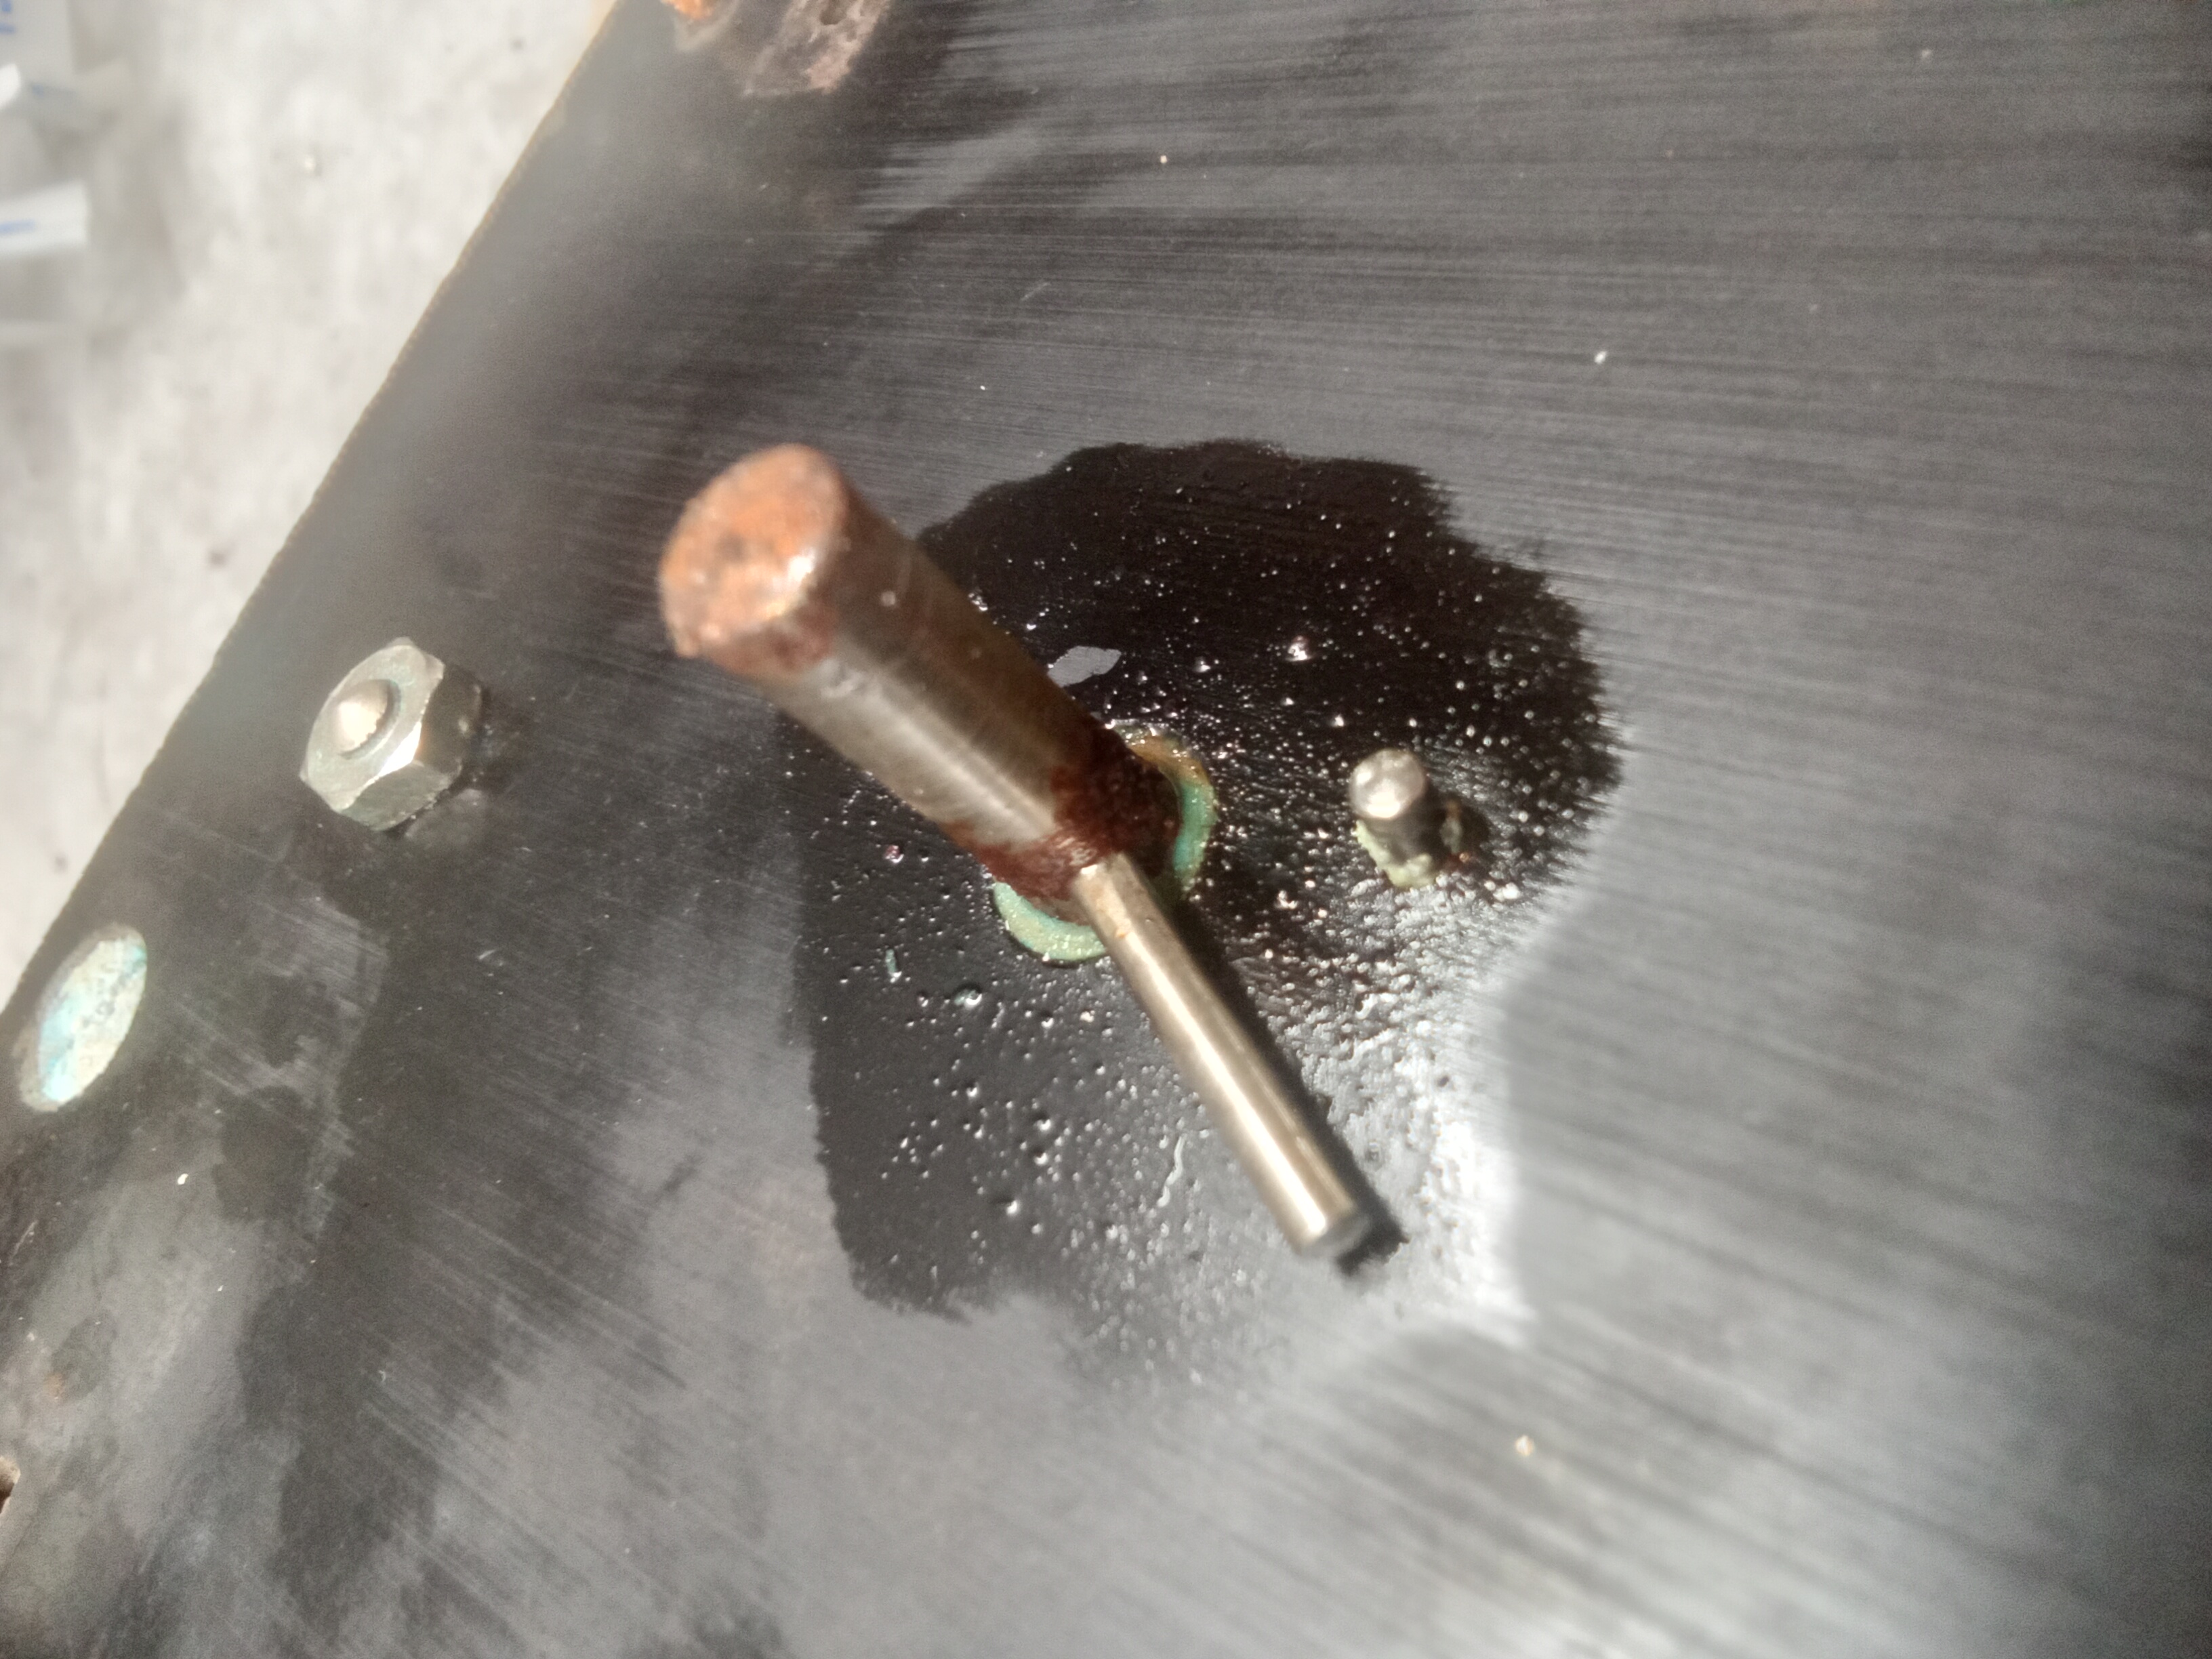
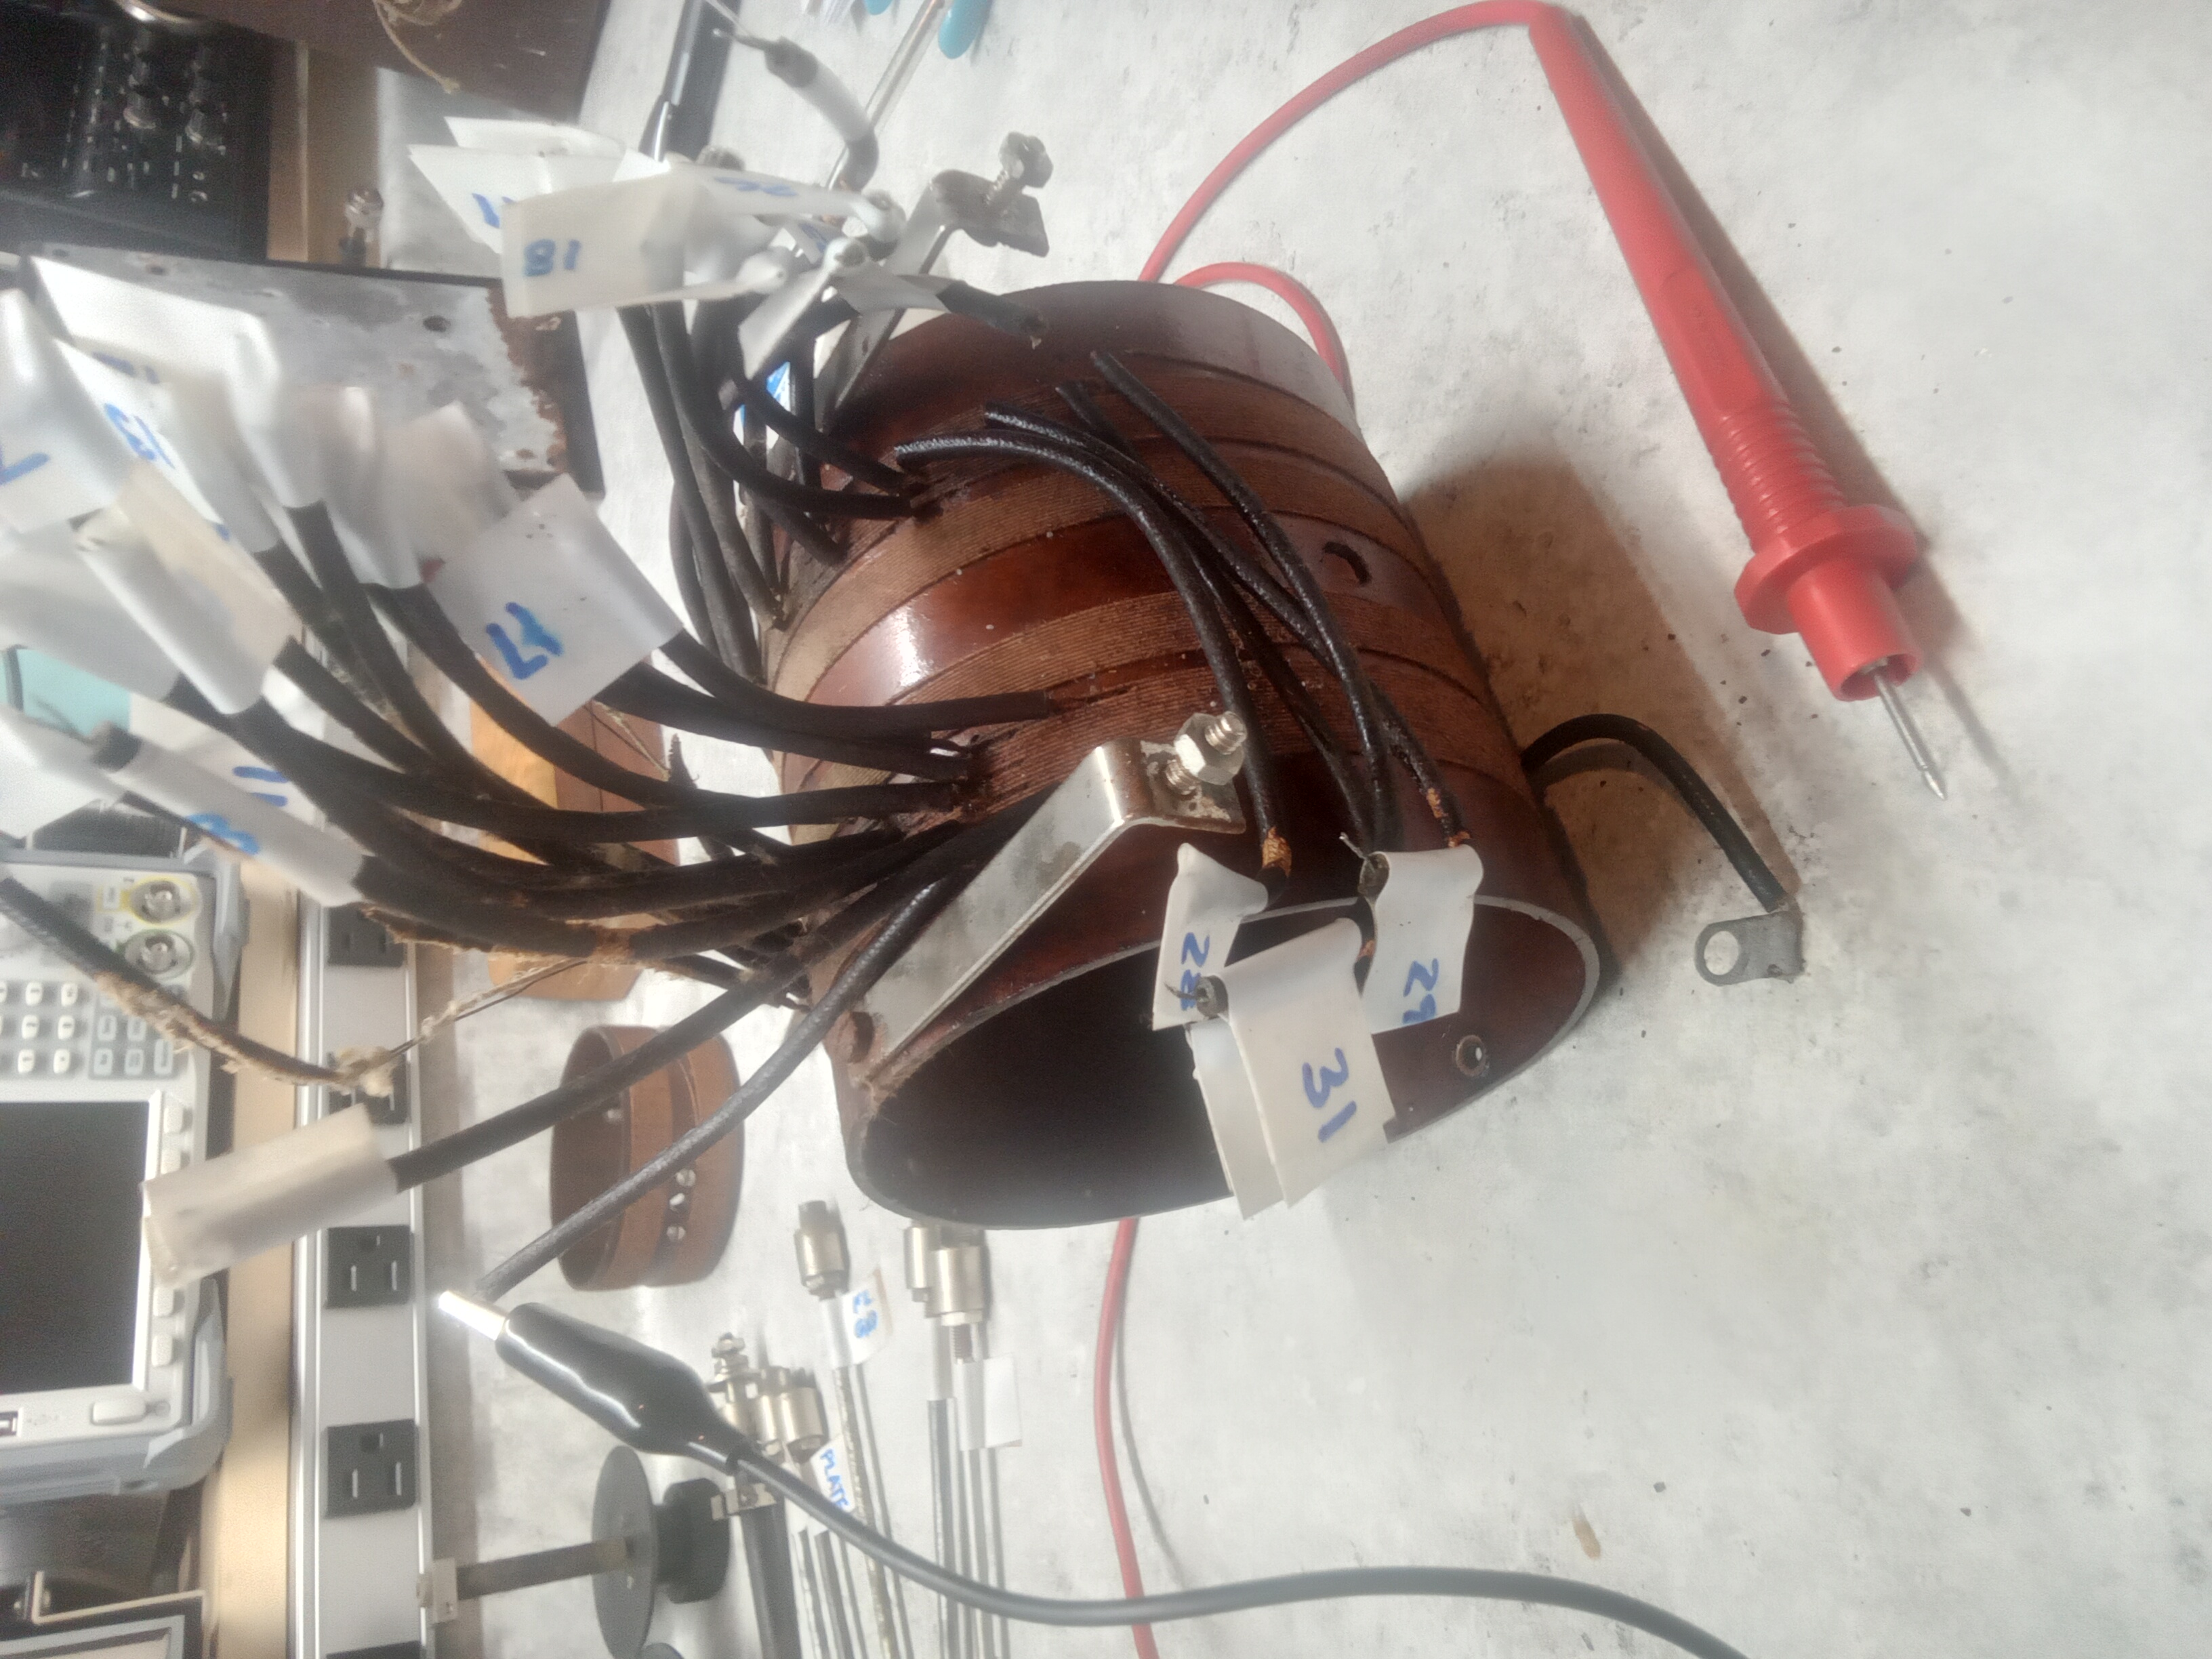
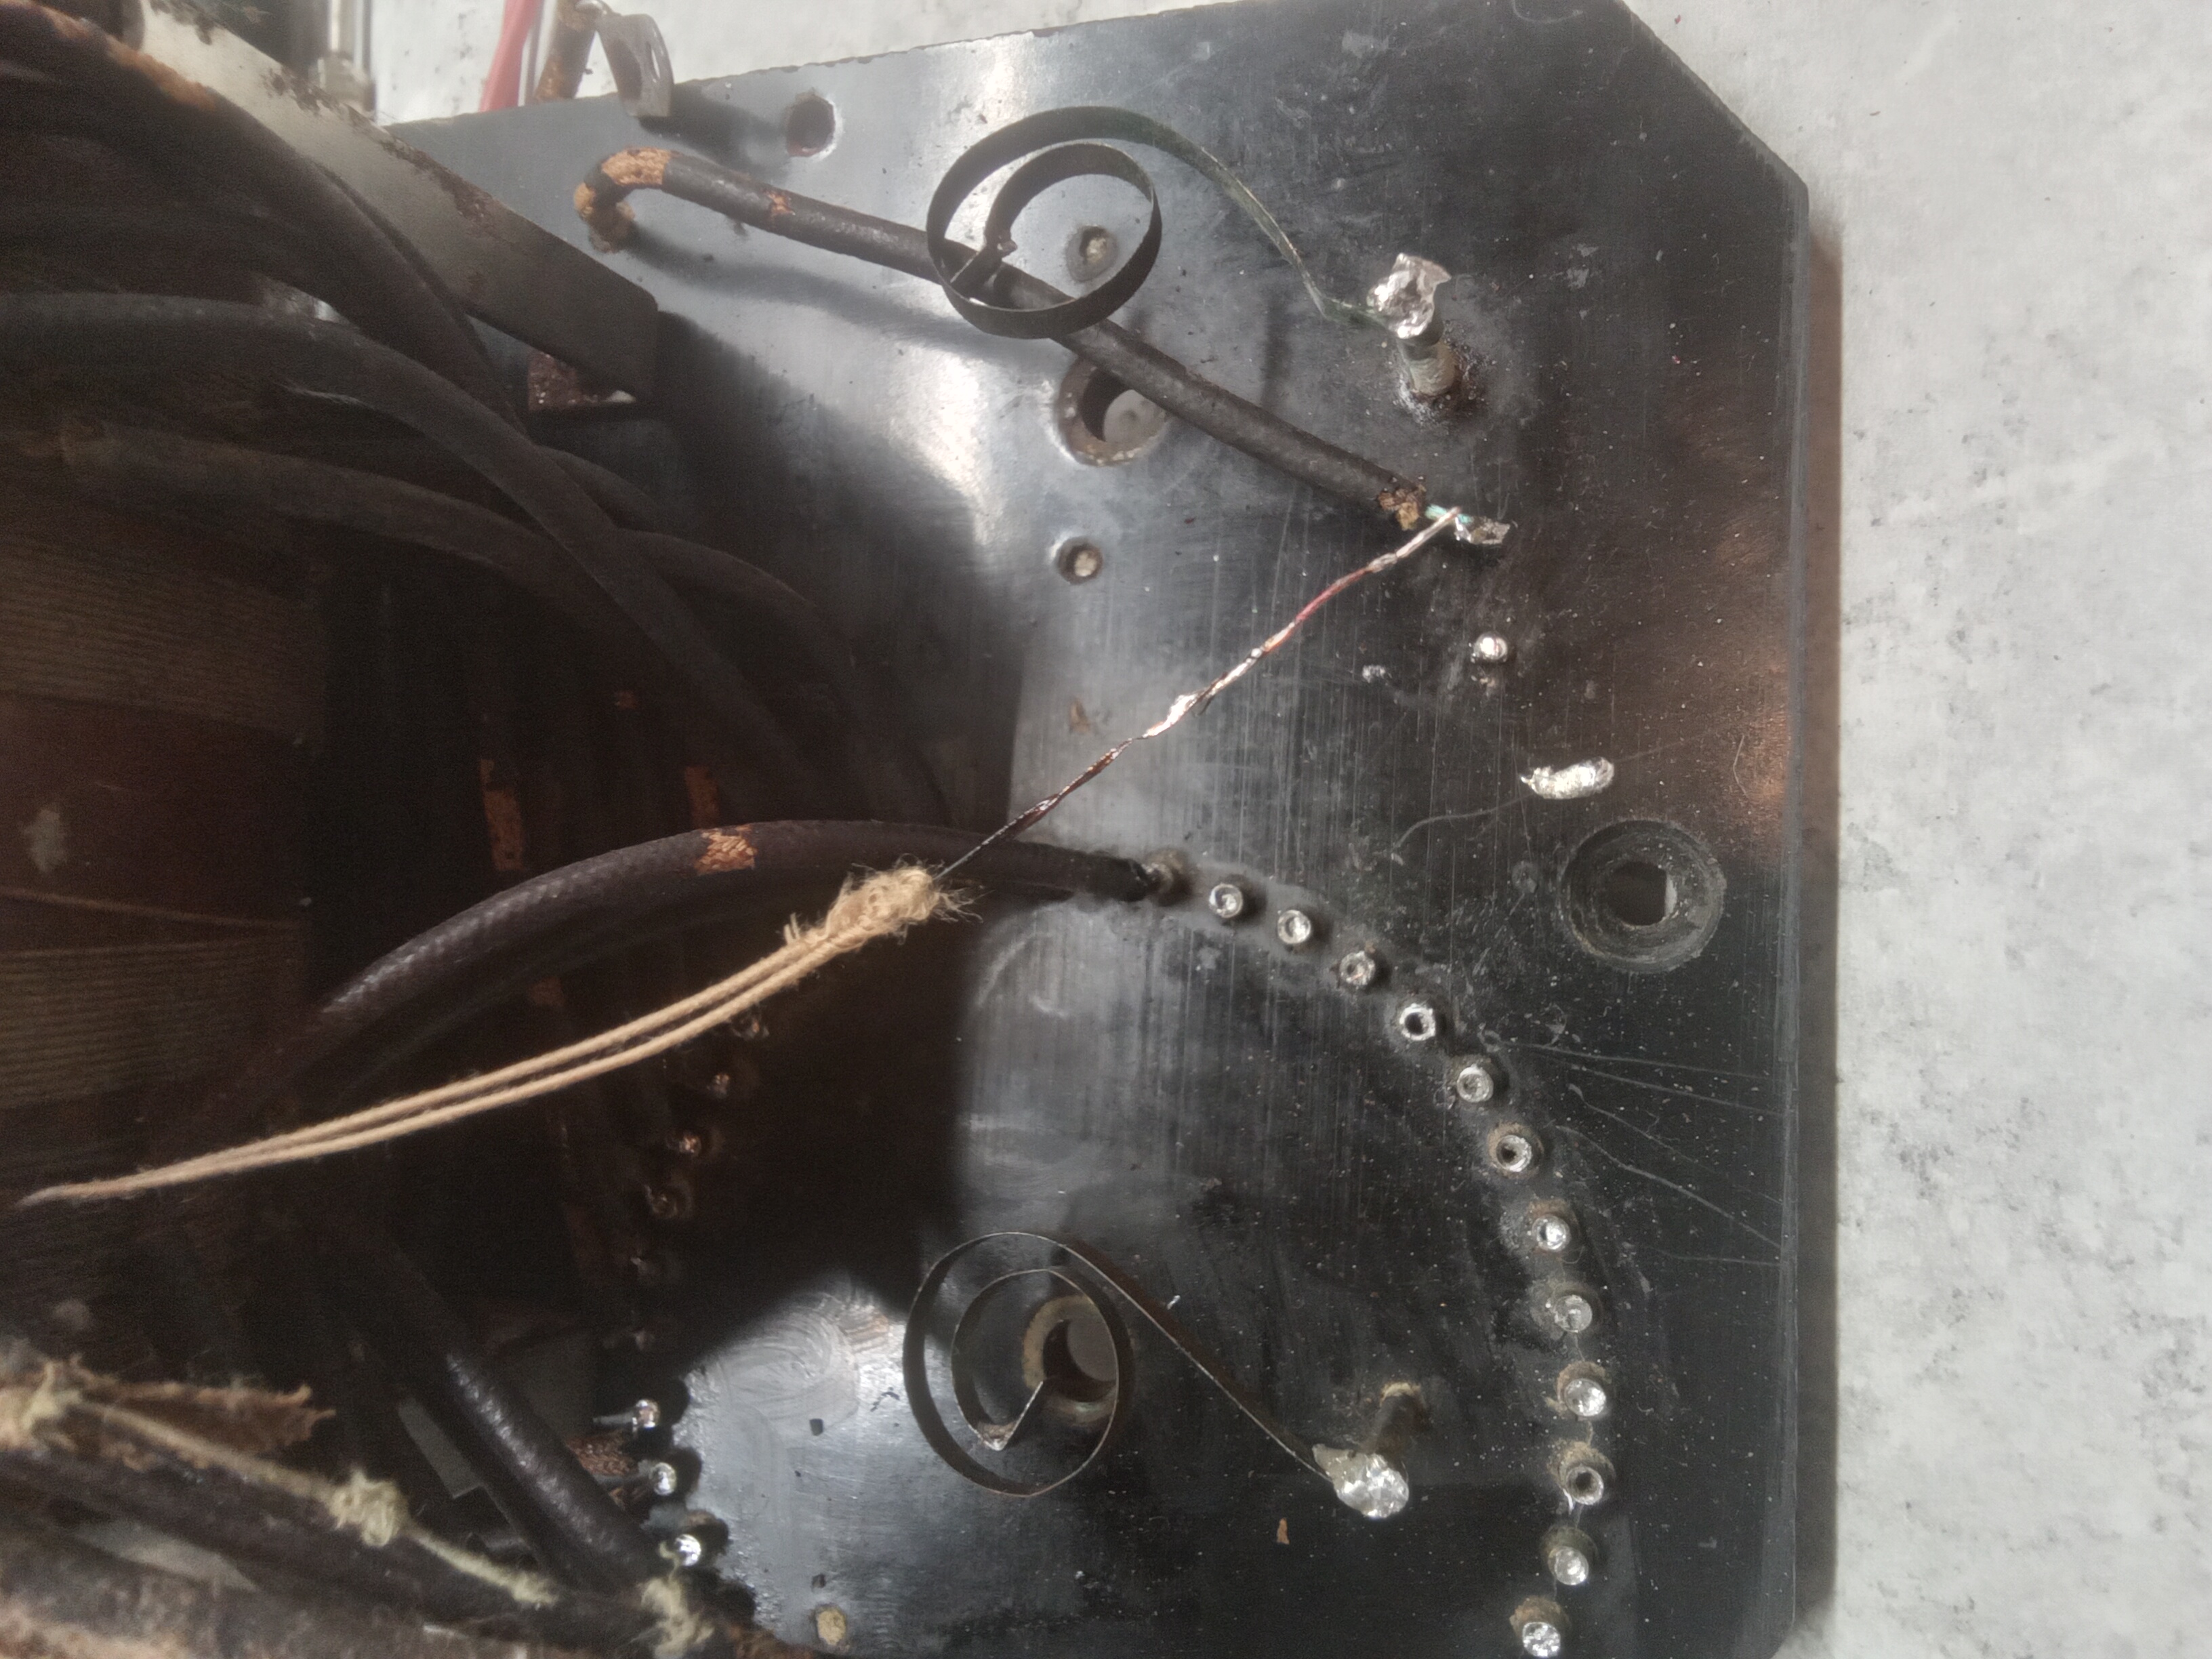
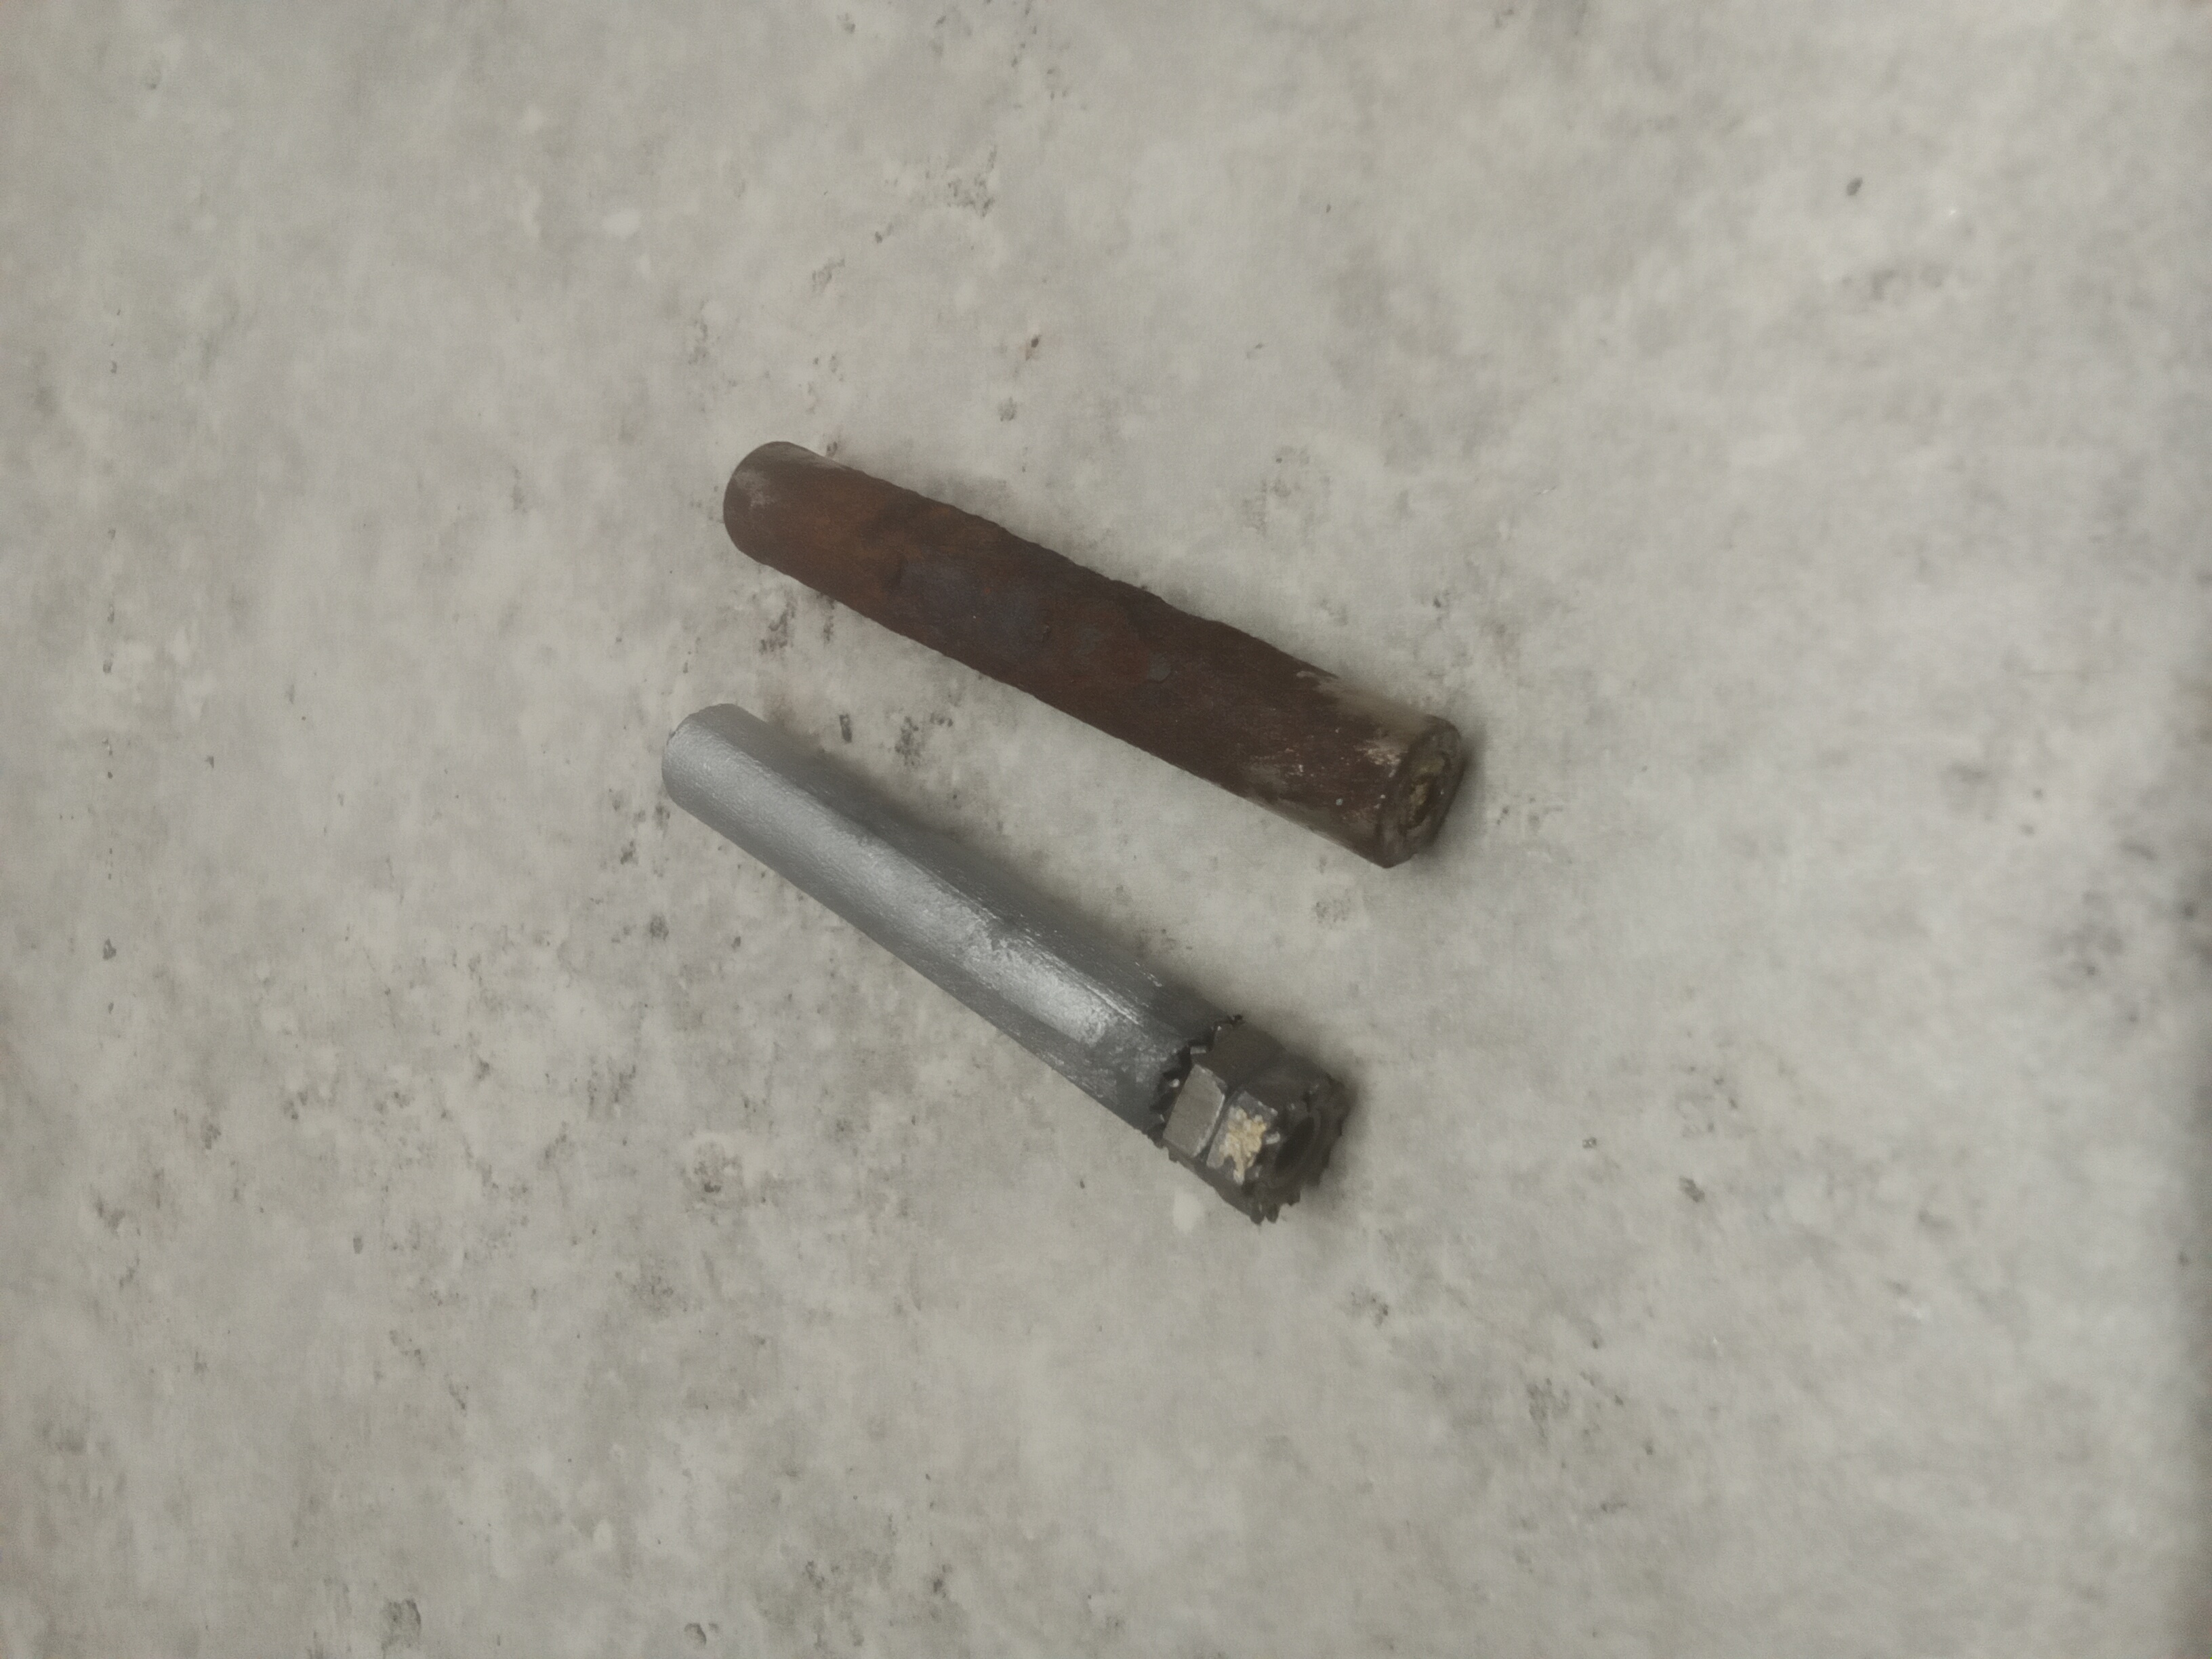
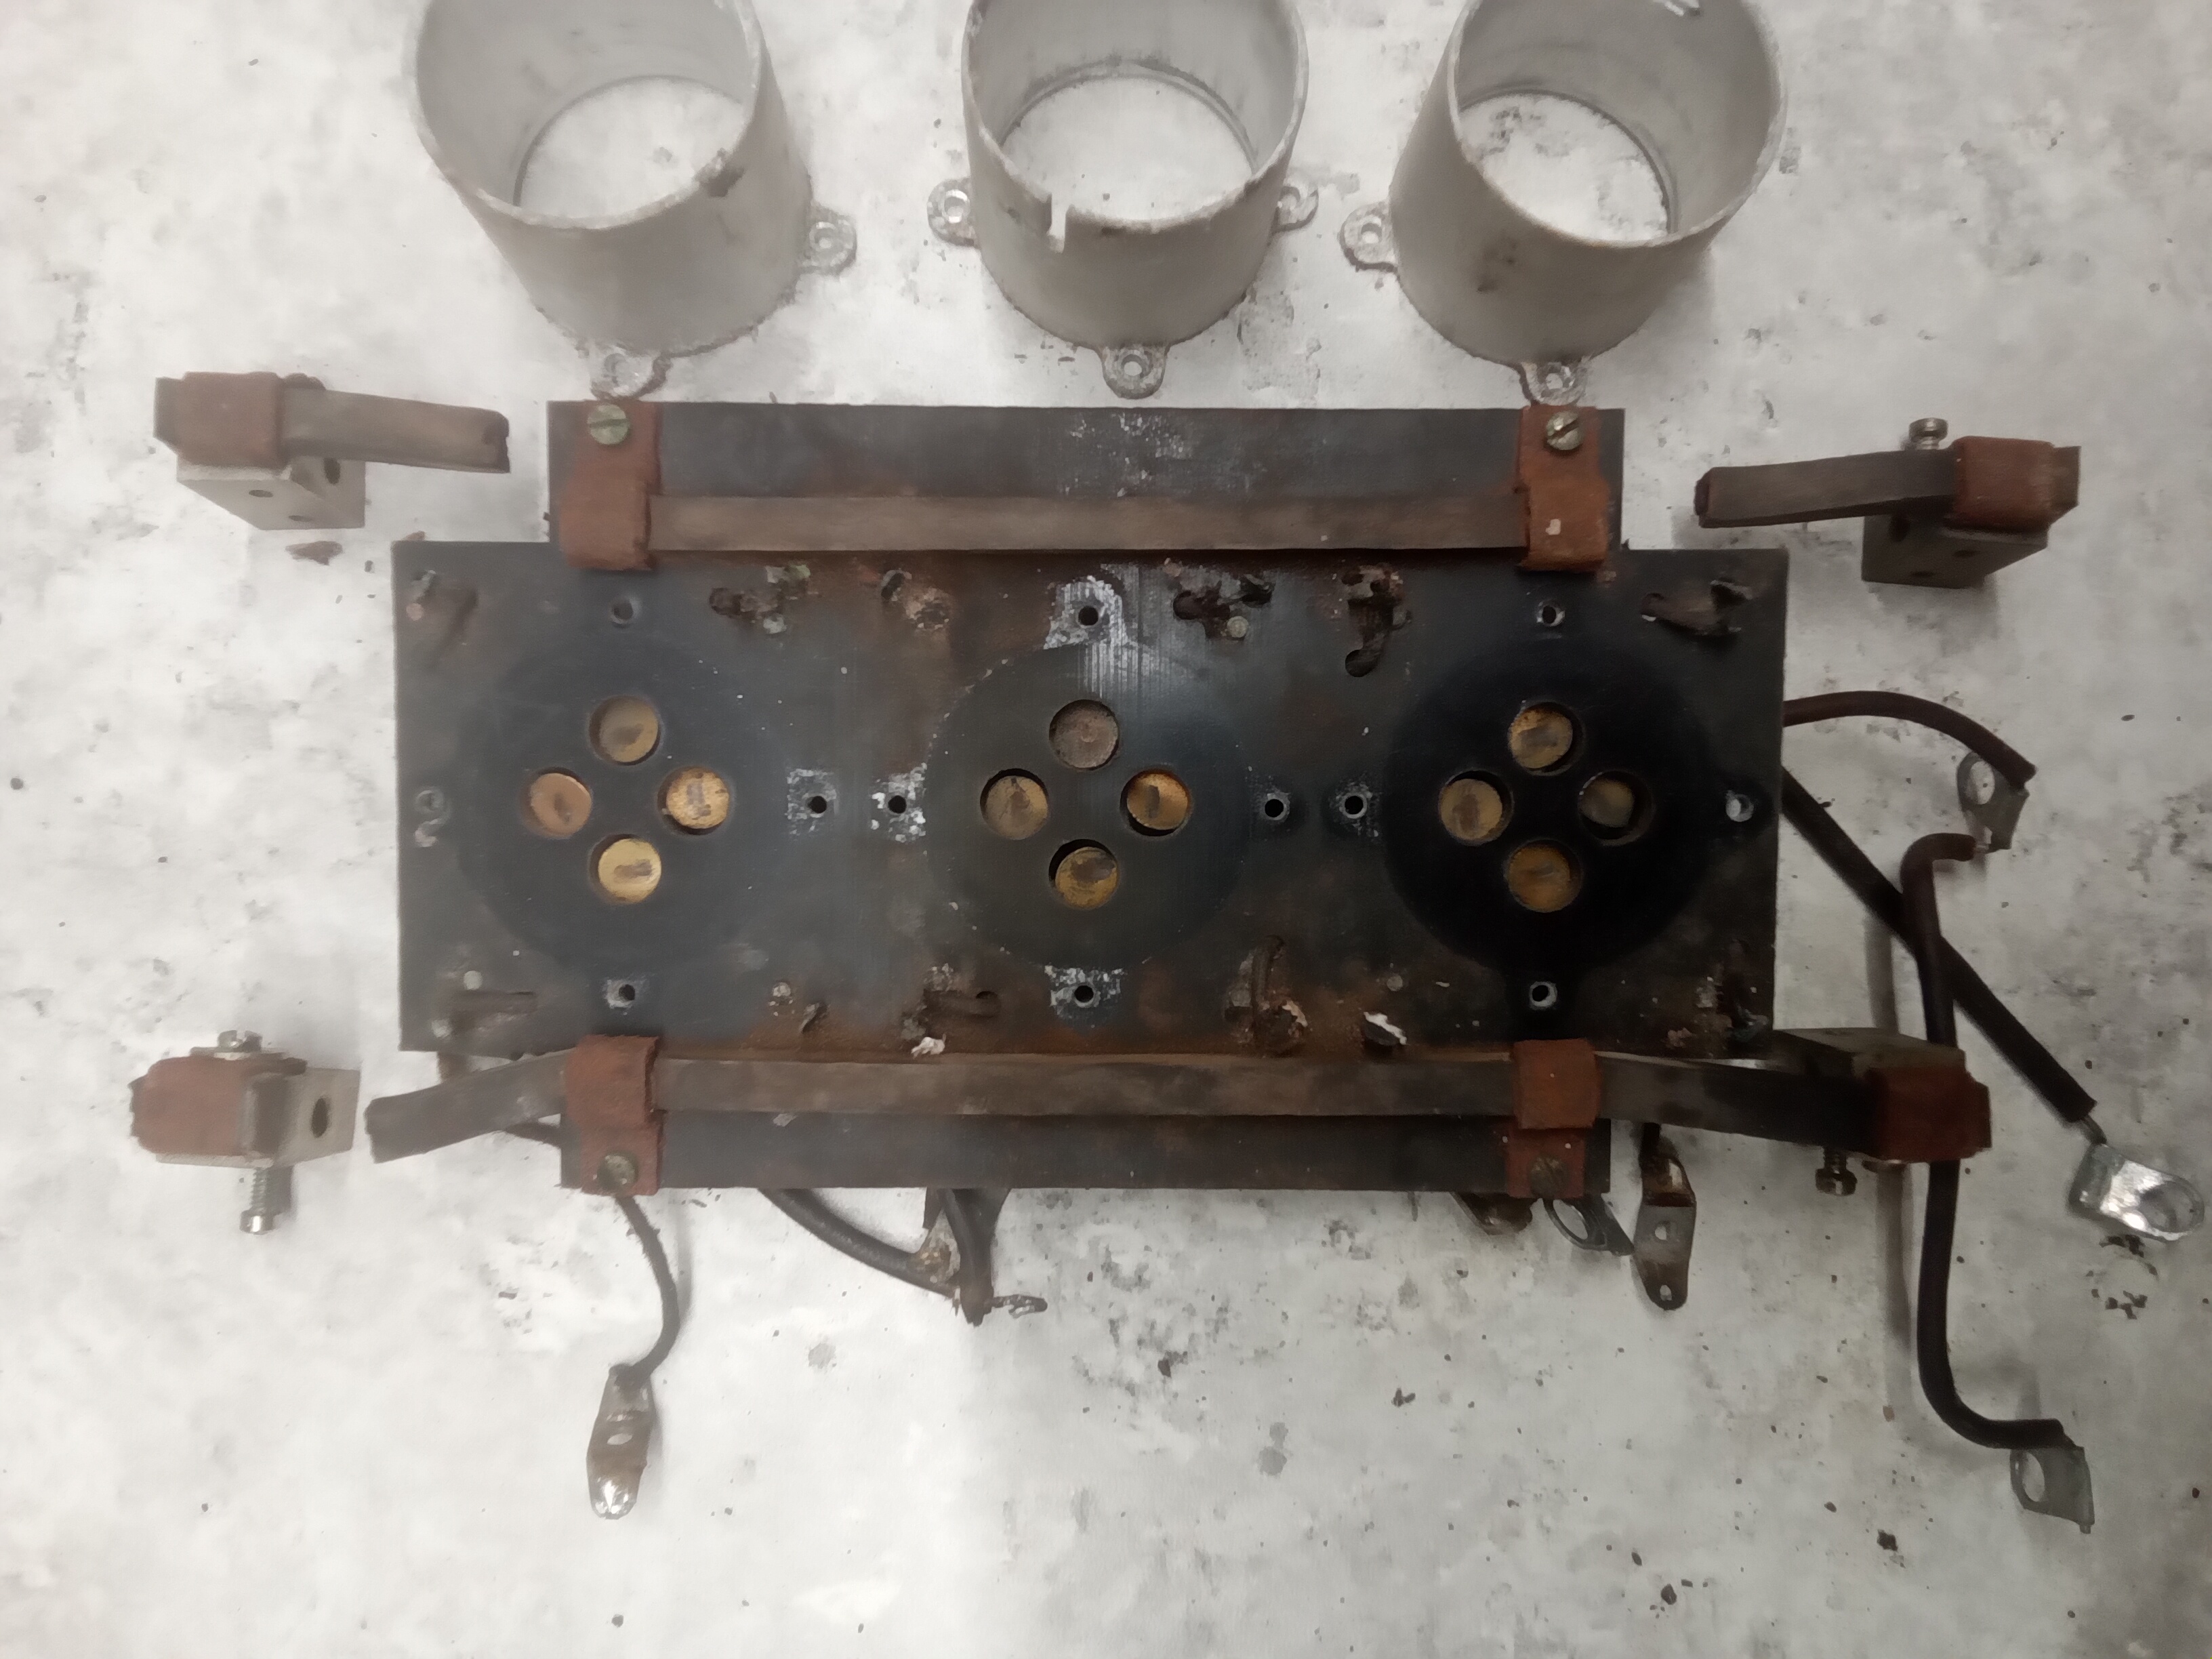
The head of the screw on the rusted steel standoff sheared right off, even after being soaked with WD-40. I was almost able to drill the threads out but then the drill bit got stuck and broke off inside the hole. I guess I'll be looking for some aluminum rod to make a new standoff. I started pulling the radio apart piece by piece. And the first big job was unsoldering the 31 variocoupler wires from the Tickler switch. This required the 150 watt soldering gun with the wide flat tip and a little coaxing from some modern solder melted onto the brass cup to heat it up enough to melt the 100 year old solder. Sometimes it took up to 3 minutes for the heat to finally get there. I carefully worked my way through the forest of wires labelling each wire and trying to save as much of the original insulation as I could. |
|
|
|
|
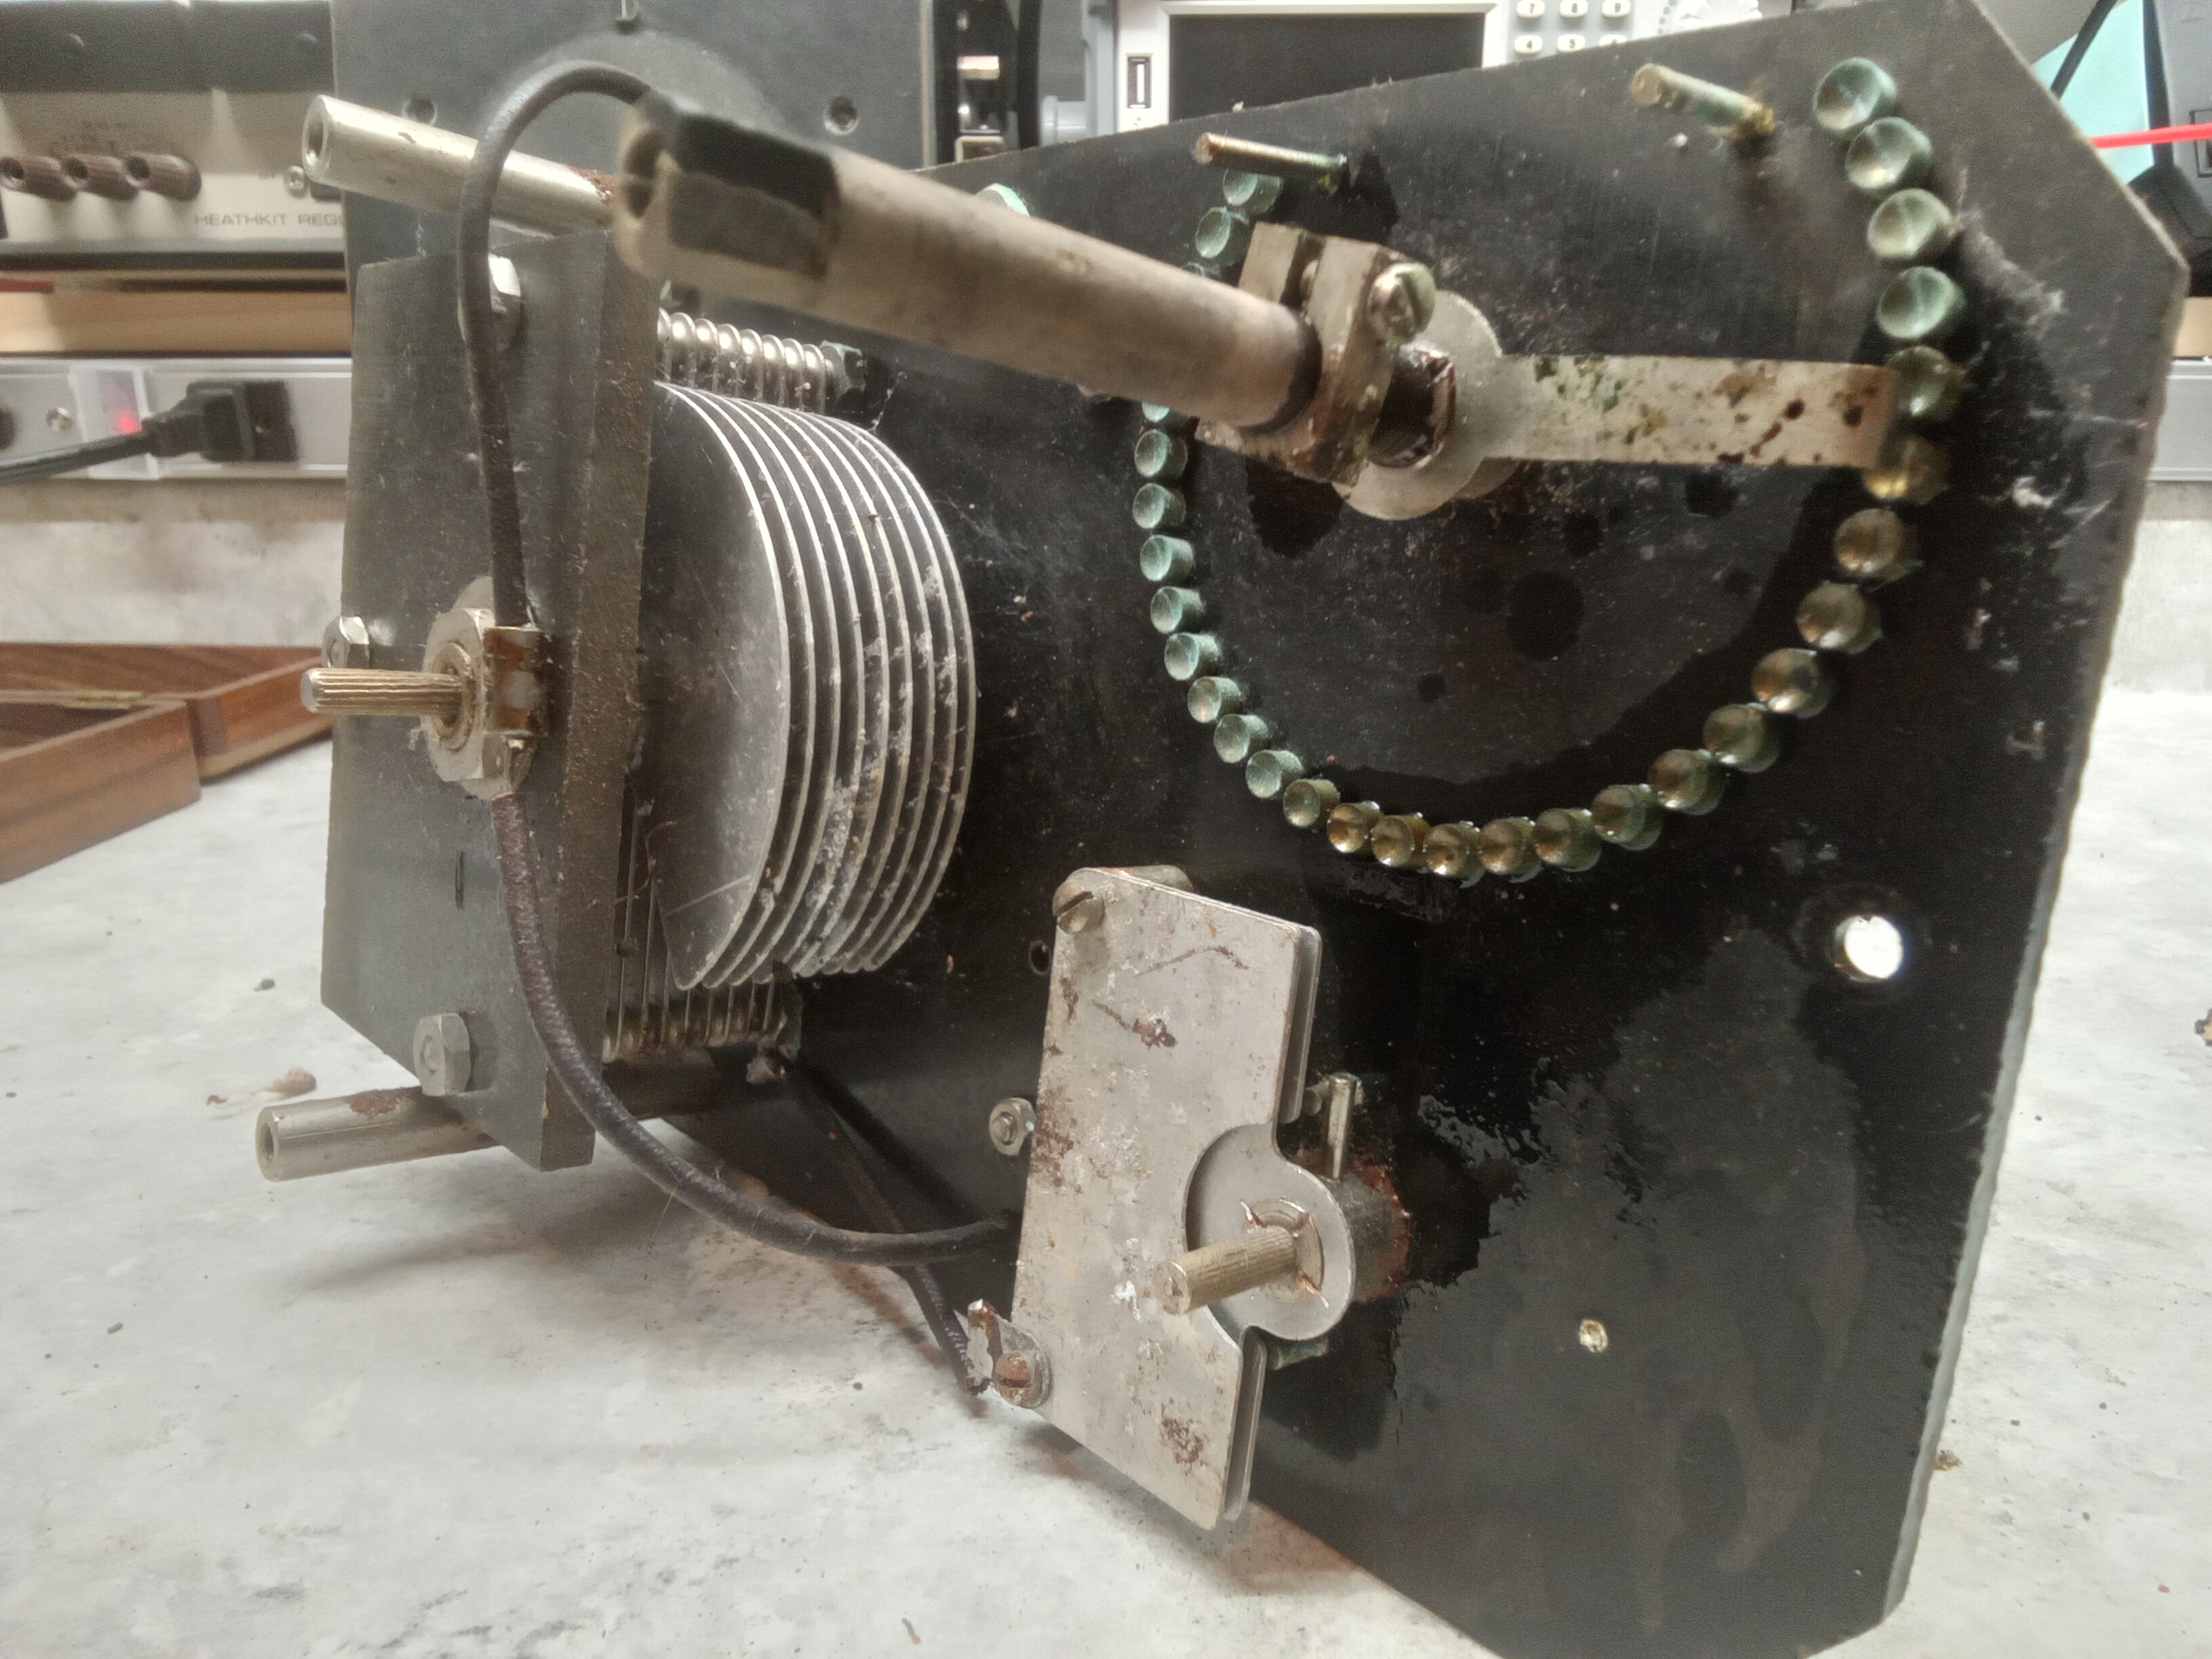
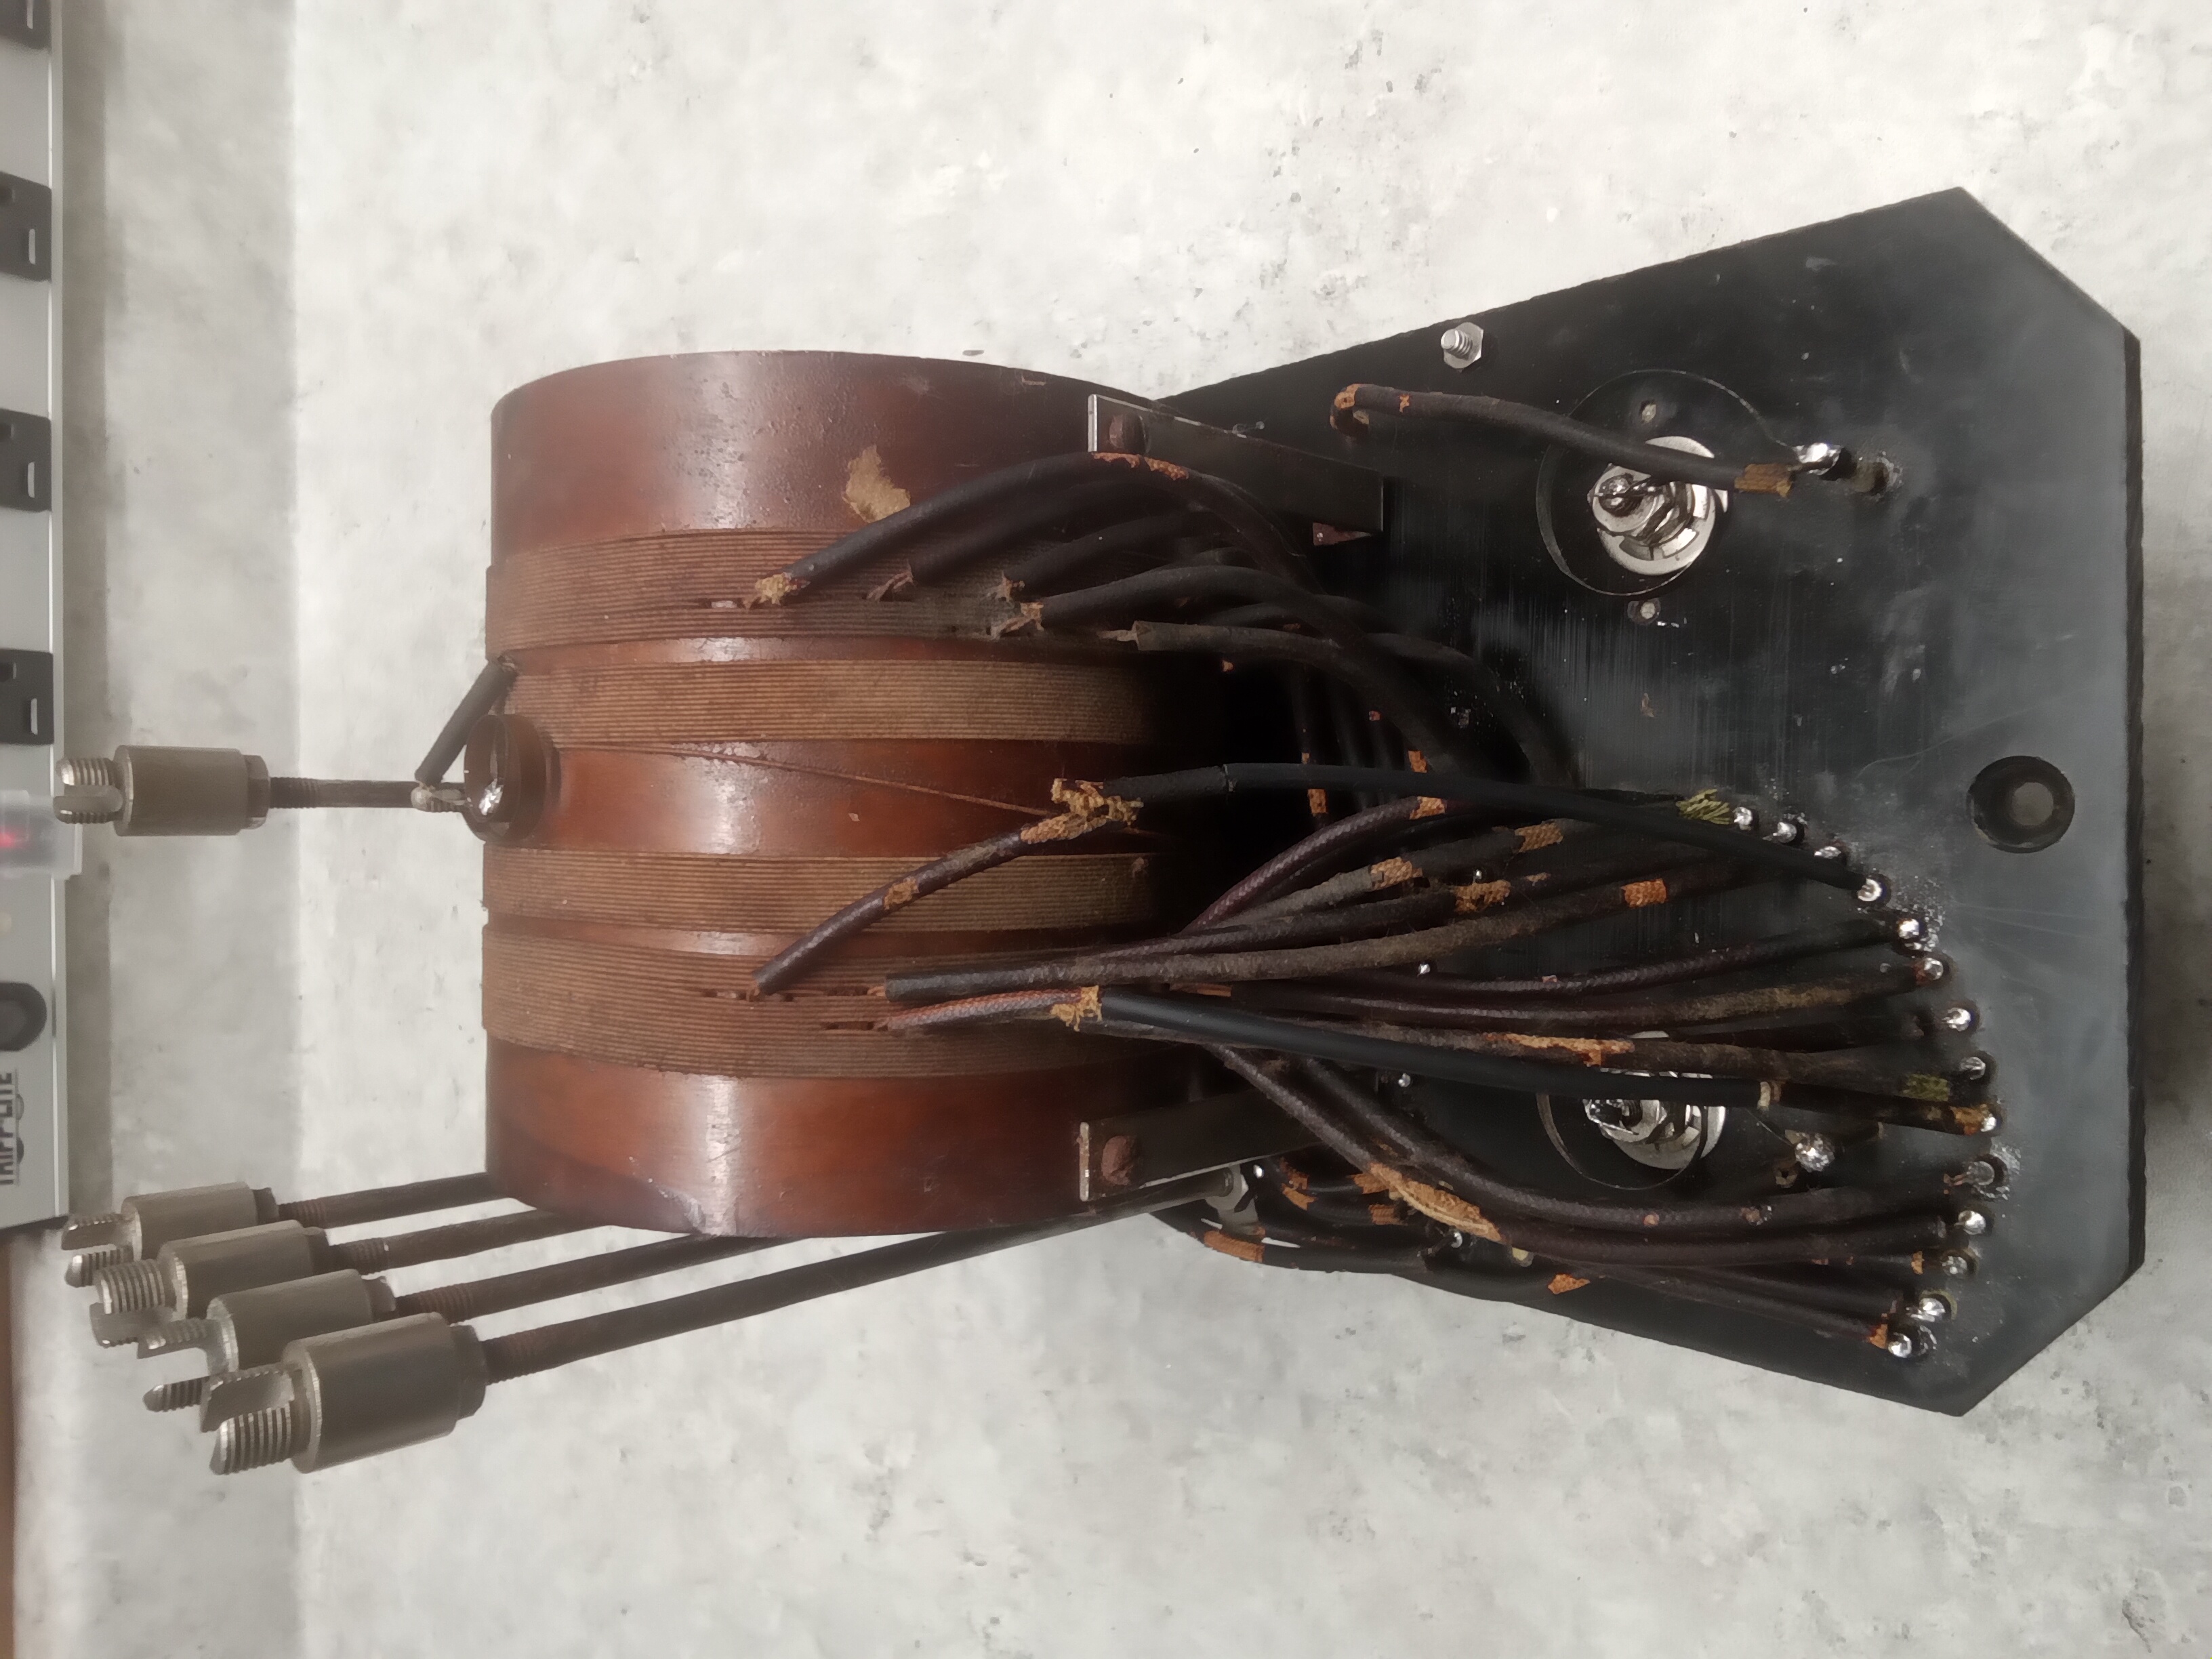
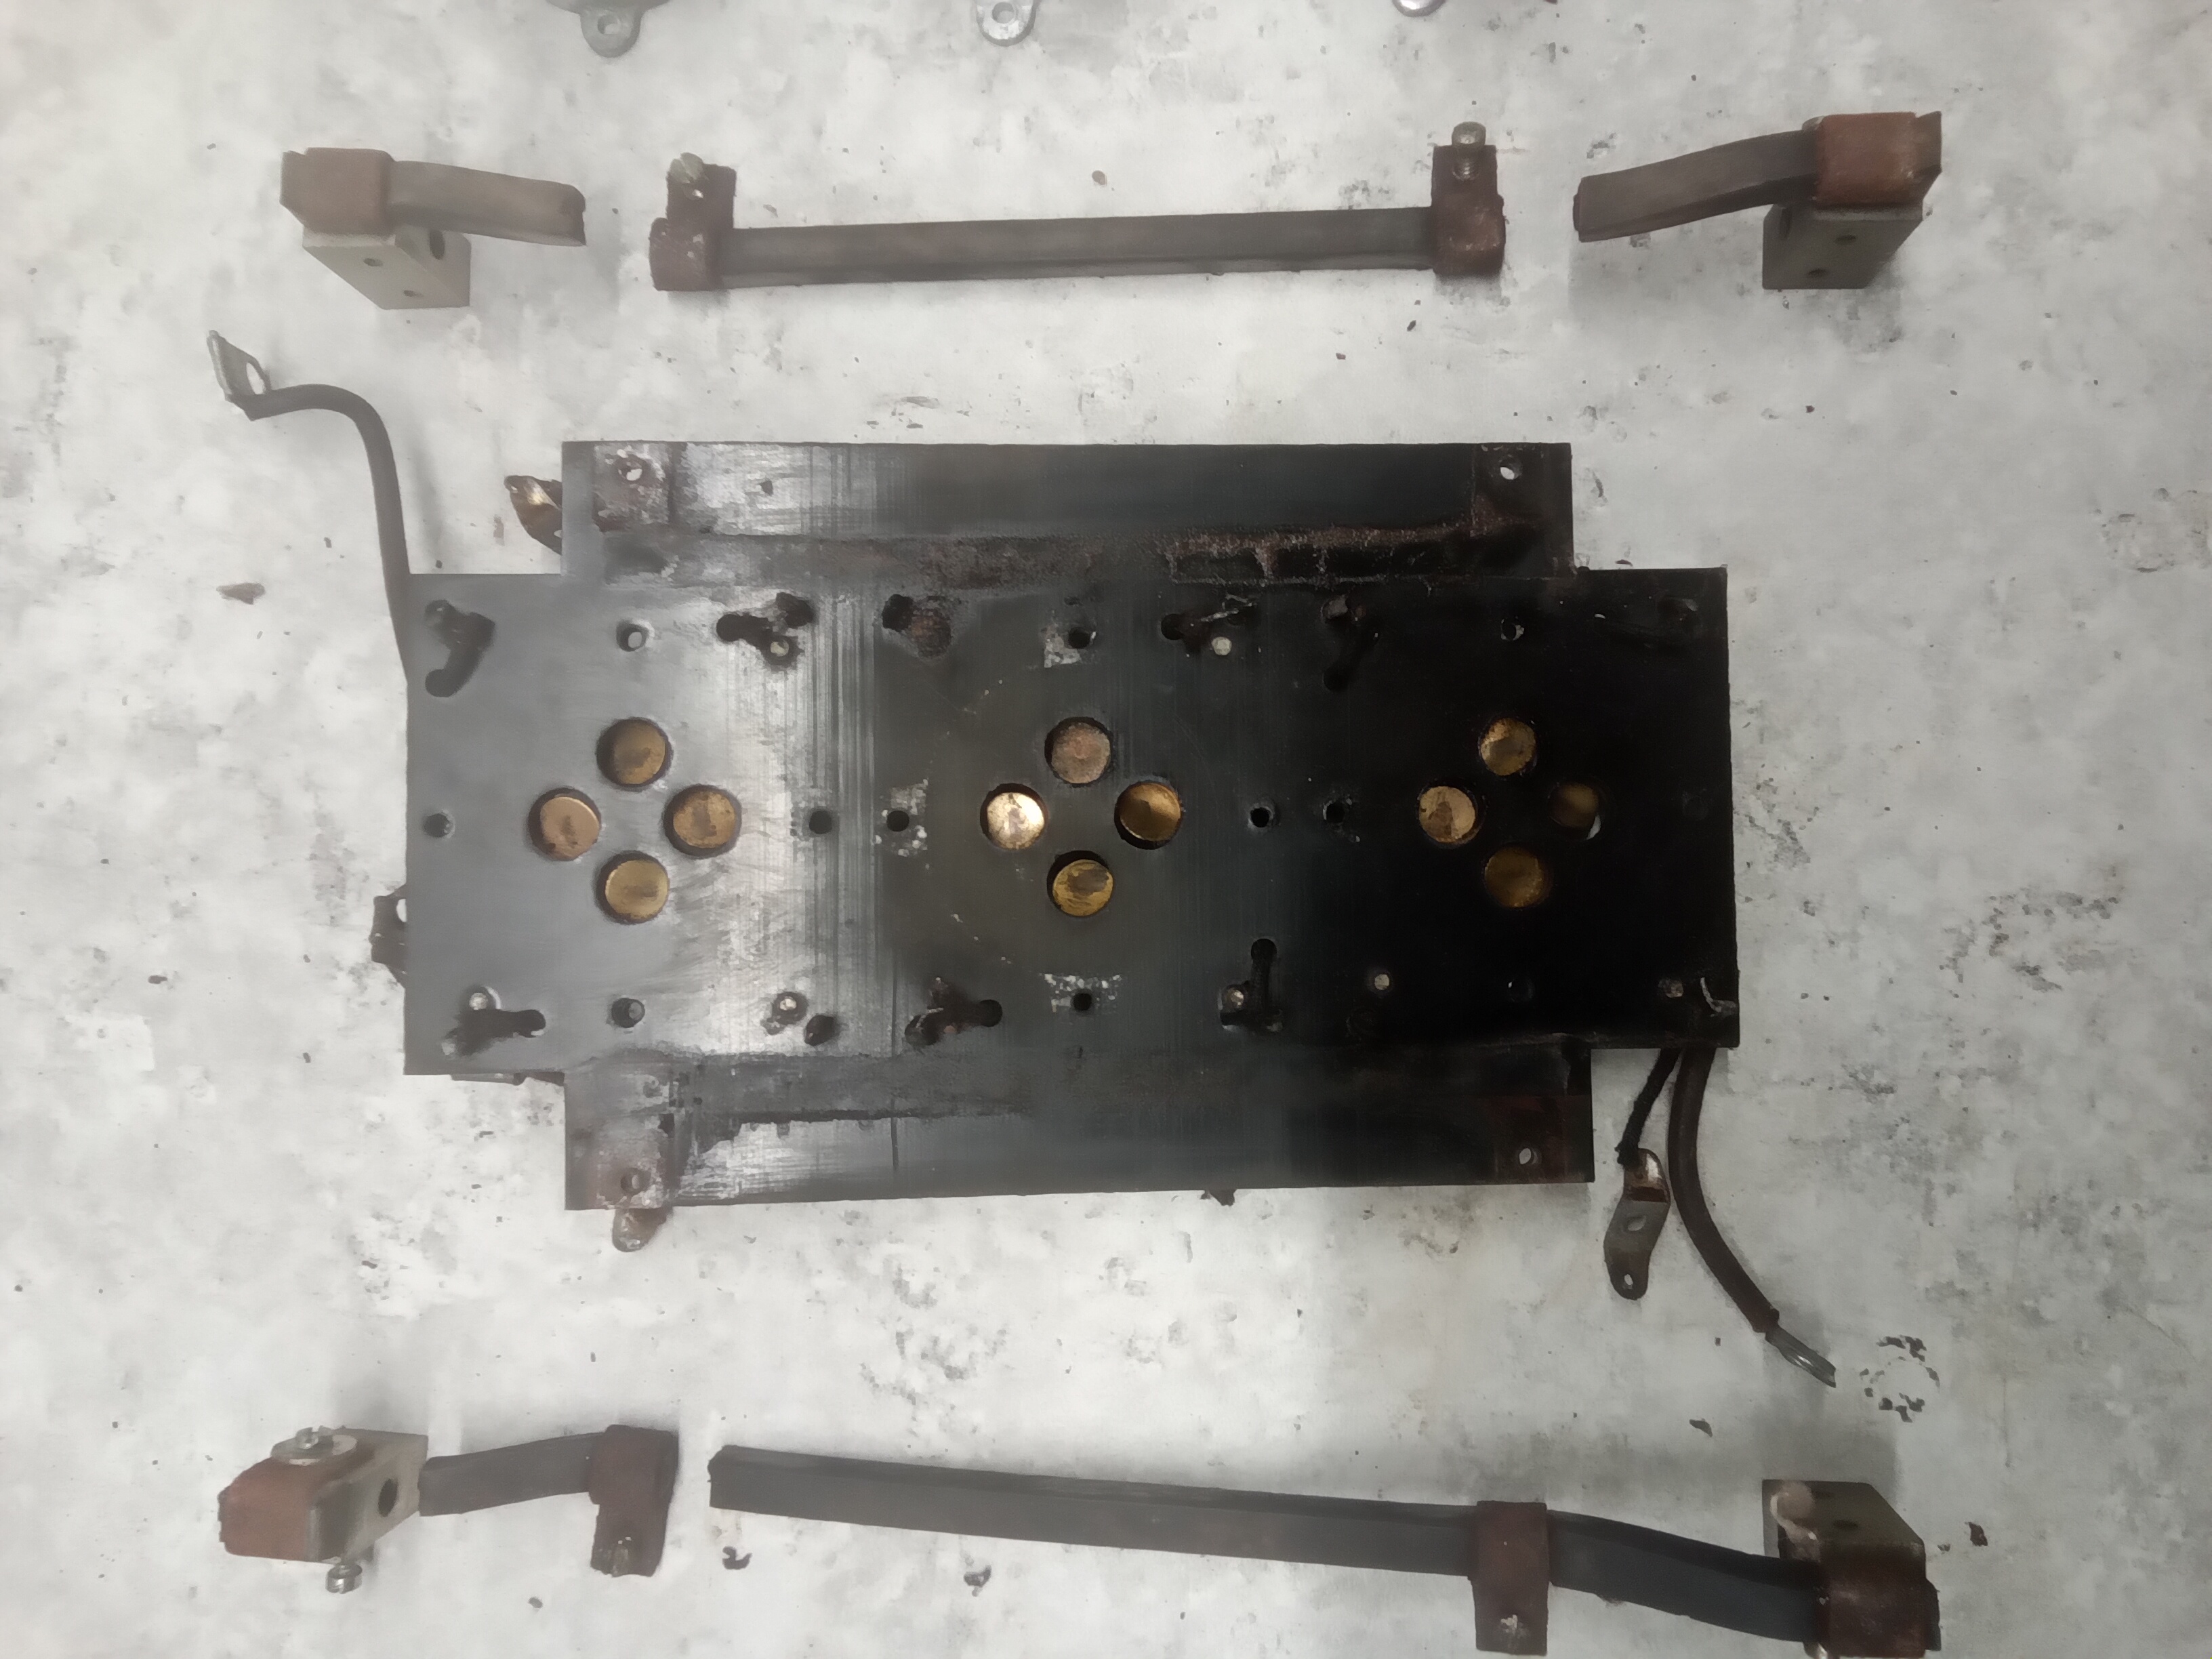
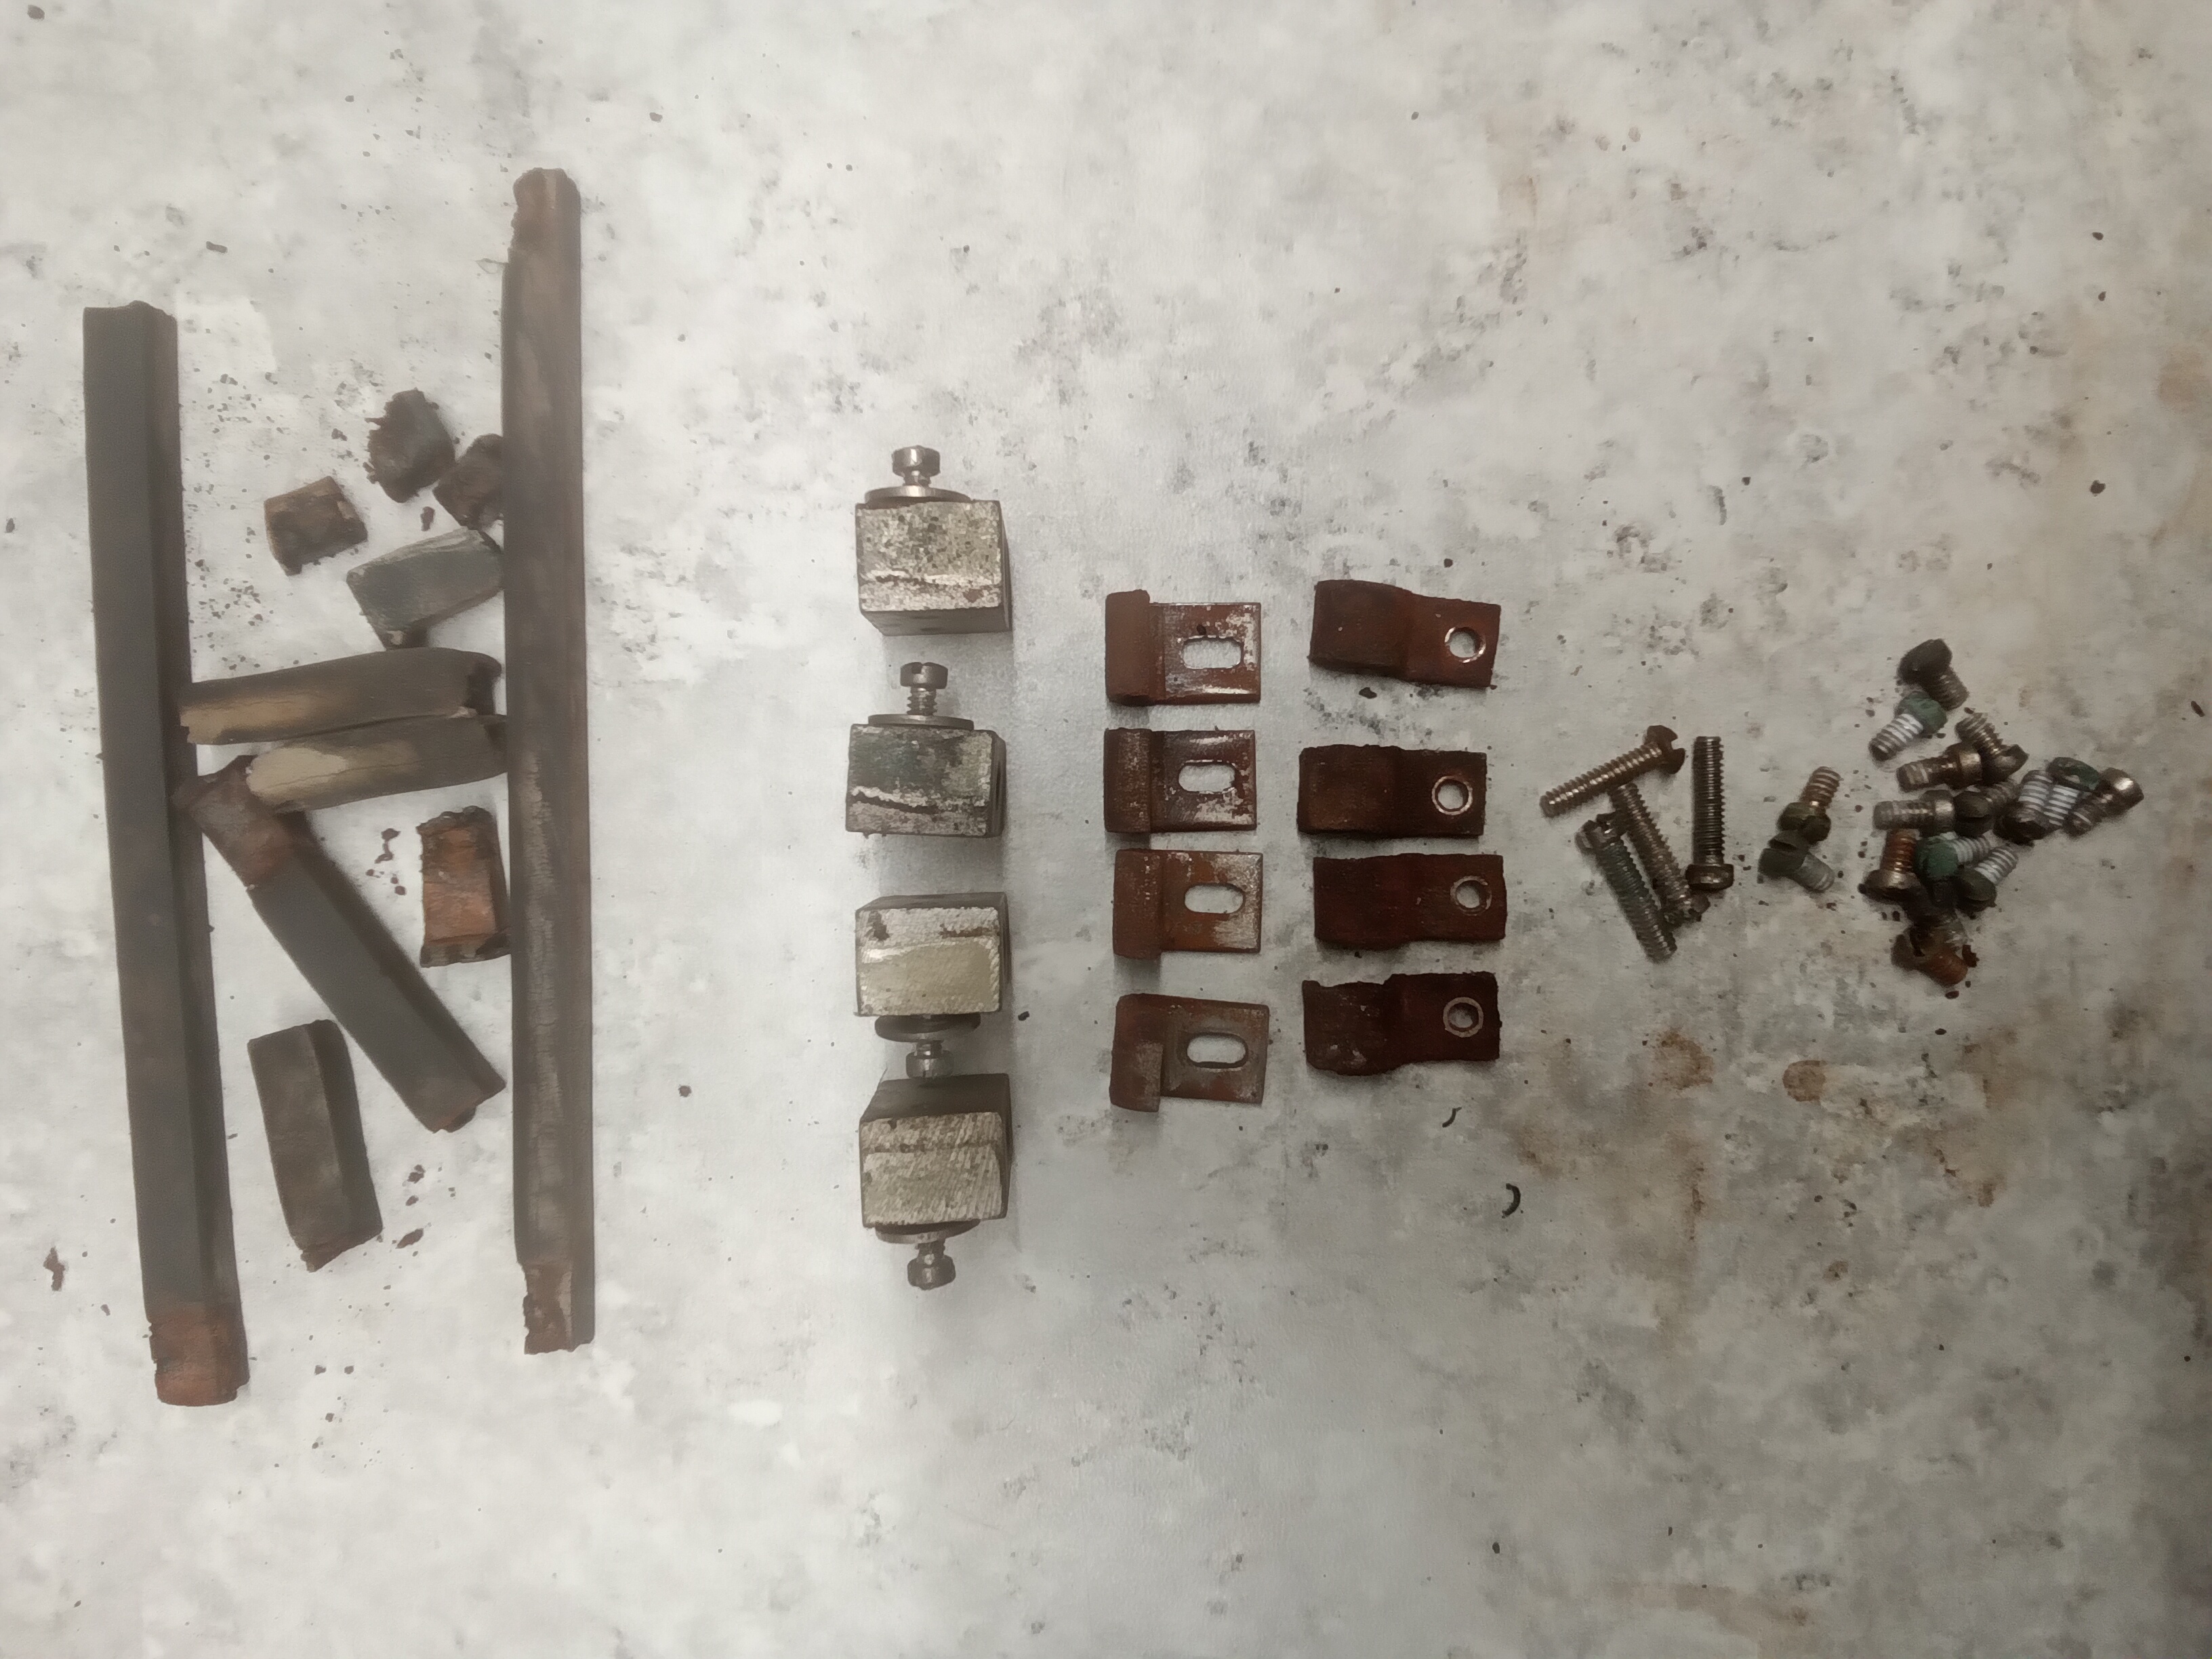
Next came disassembly of the variocoupler. I was able to get it off the bakelite panel easily and the rotating coil assembly also came out without a problem. But the 4 brackets on the assembly were pretty corroded. I decided to leave them be lest I damage the whole thing trying to free-up the bracket screws.
|
|
|
|
|
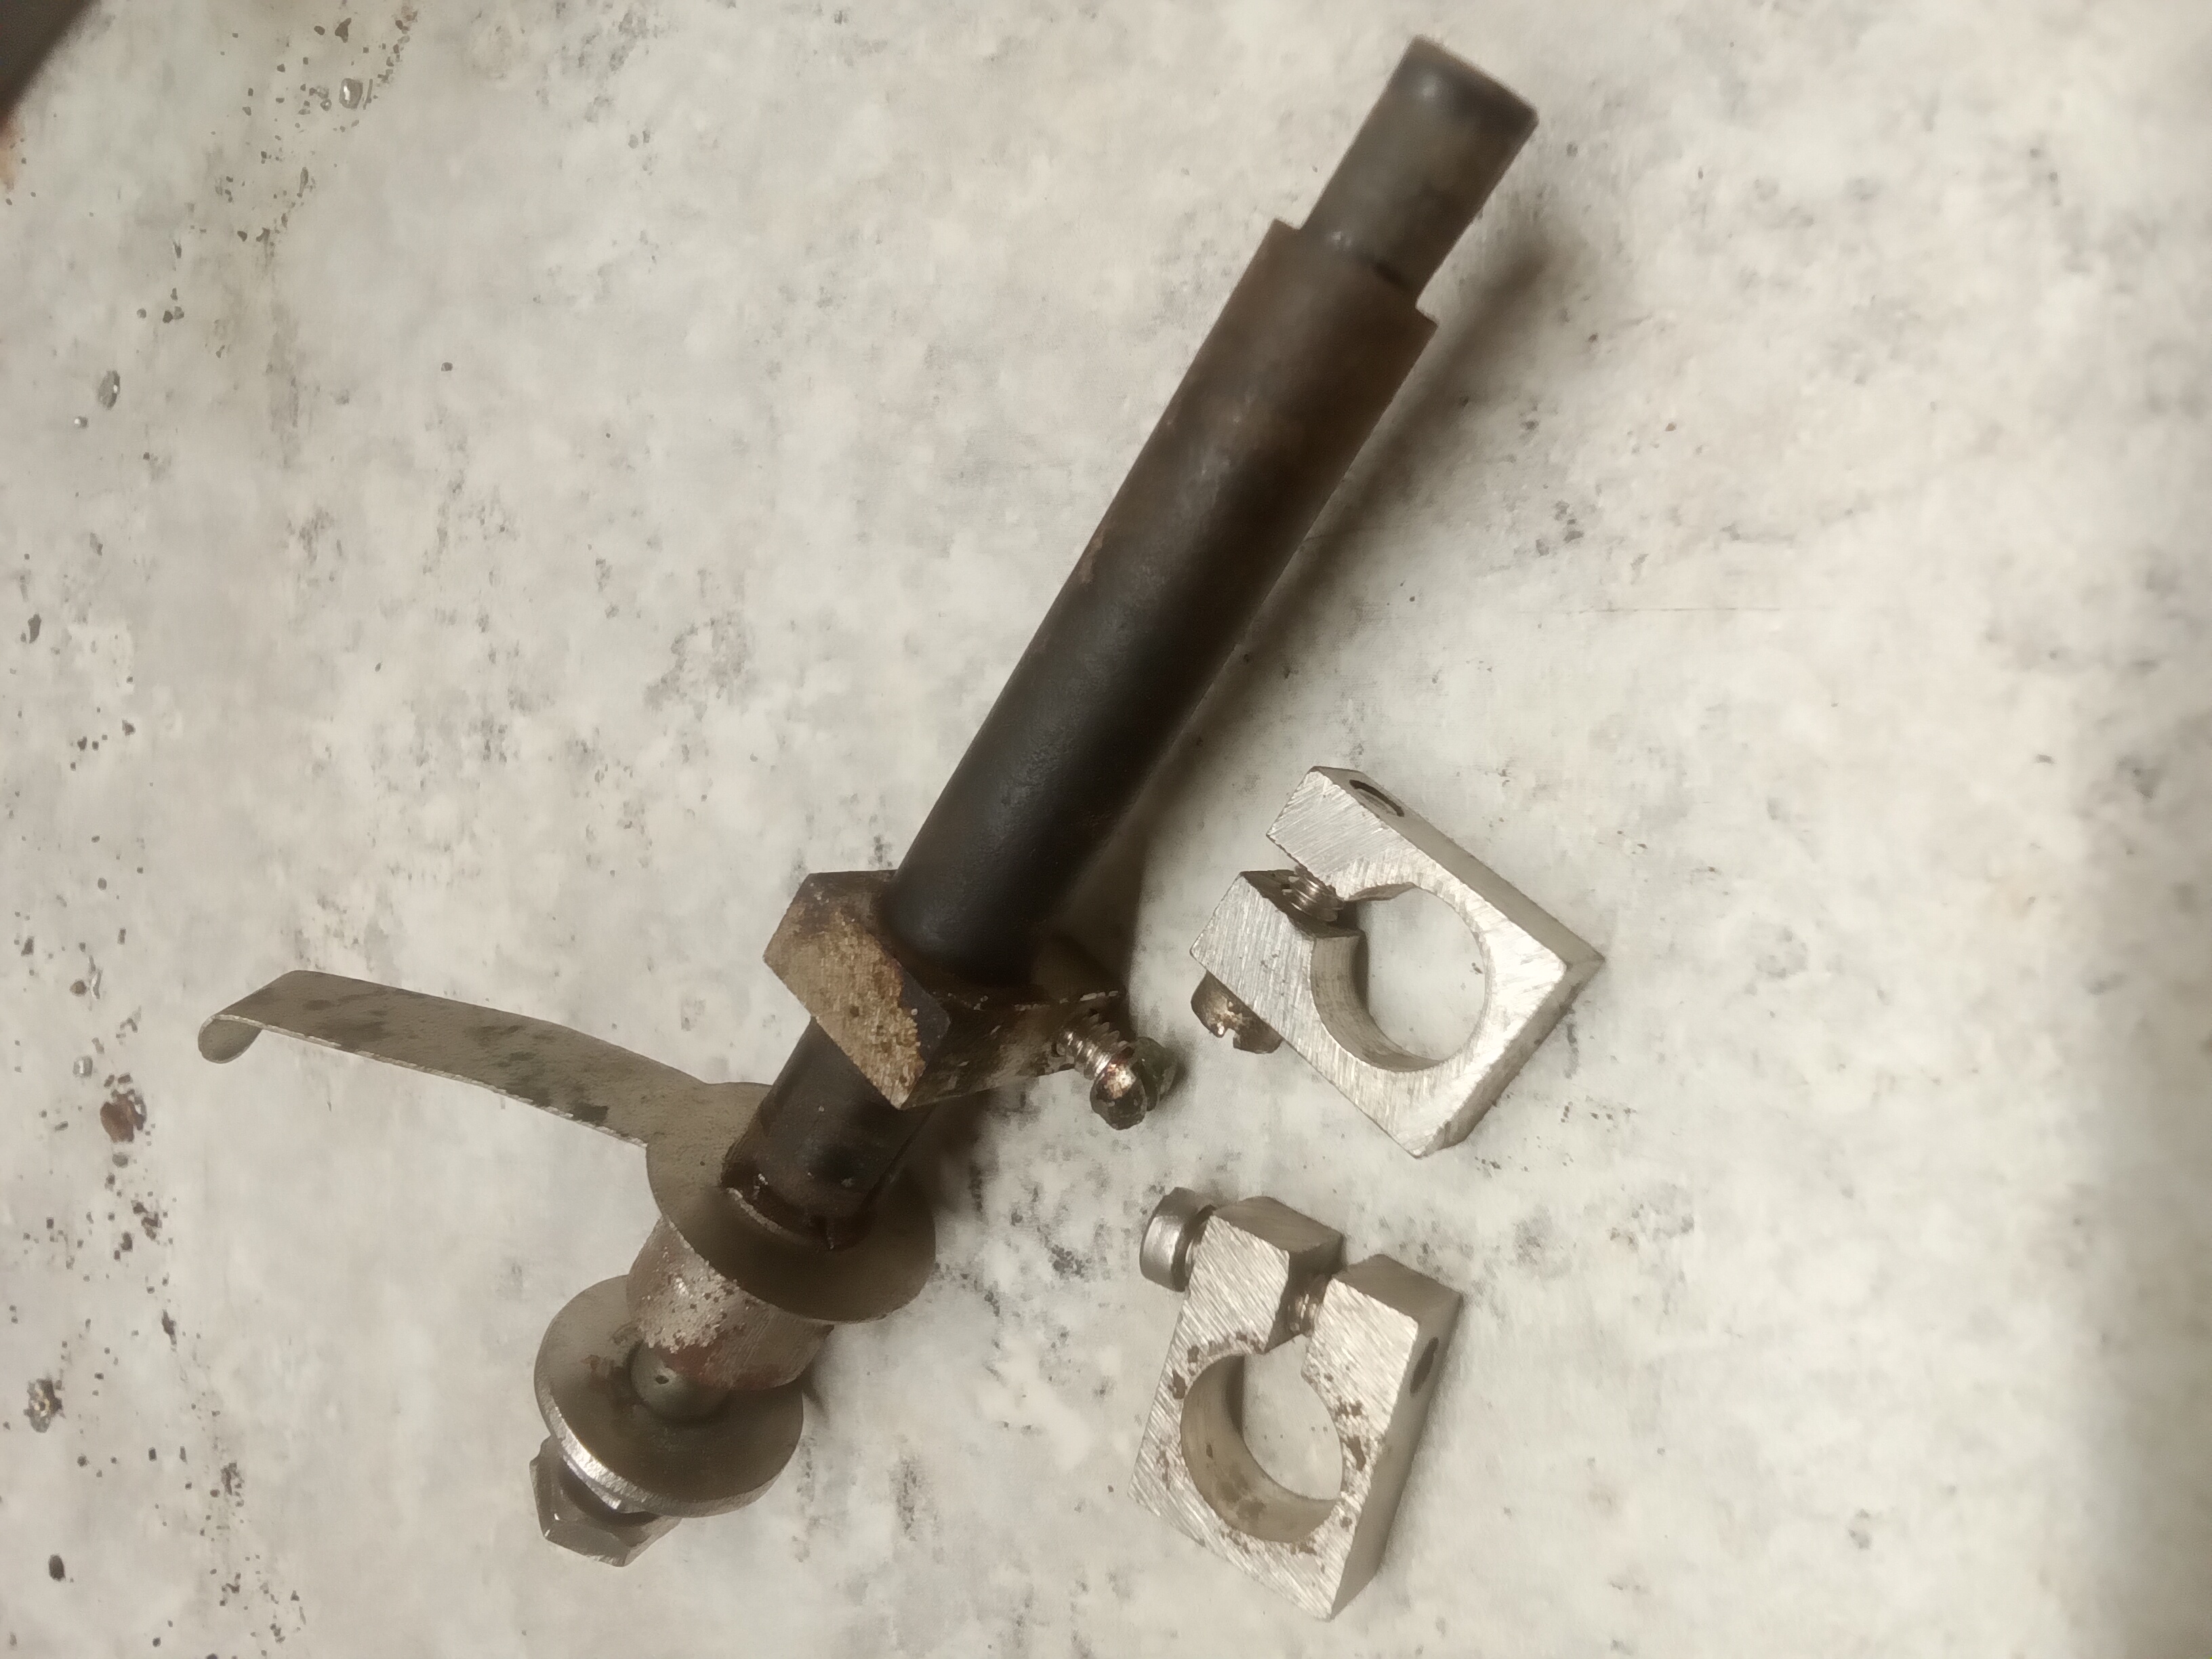
The main tuning shaft that controlled the variocoupler secondary coil and the main tuning condenser was frozen solid. I doused both sides of the shaft with WD-40 and left it to soak overnight. In the morning I was able to slowly start to free it by gently rocking the shaft back and forth with a vice grip. Eventually it came free and I had full rotation. |
|
|
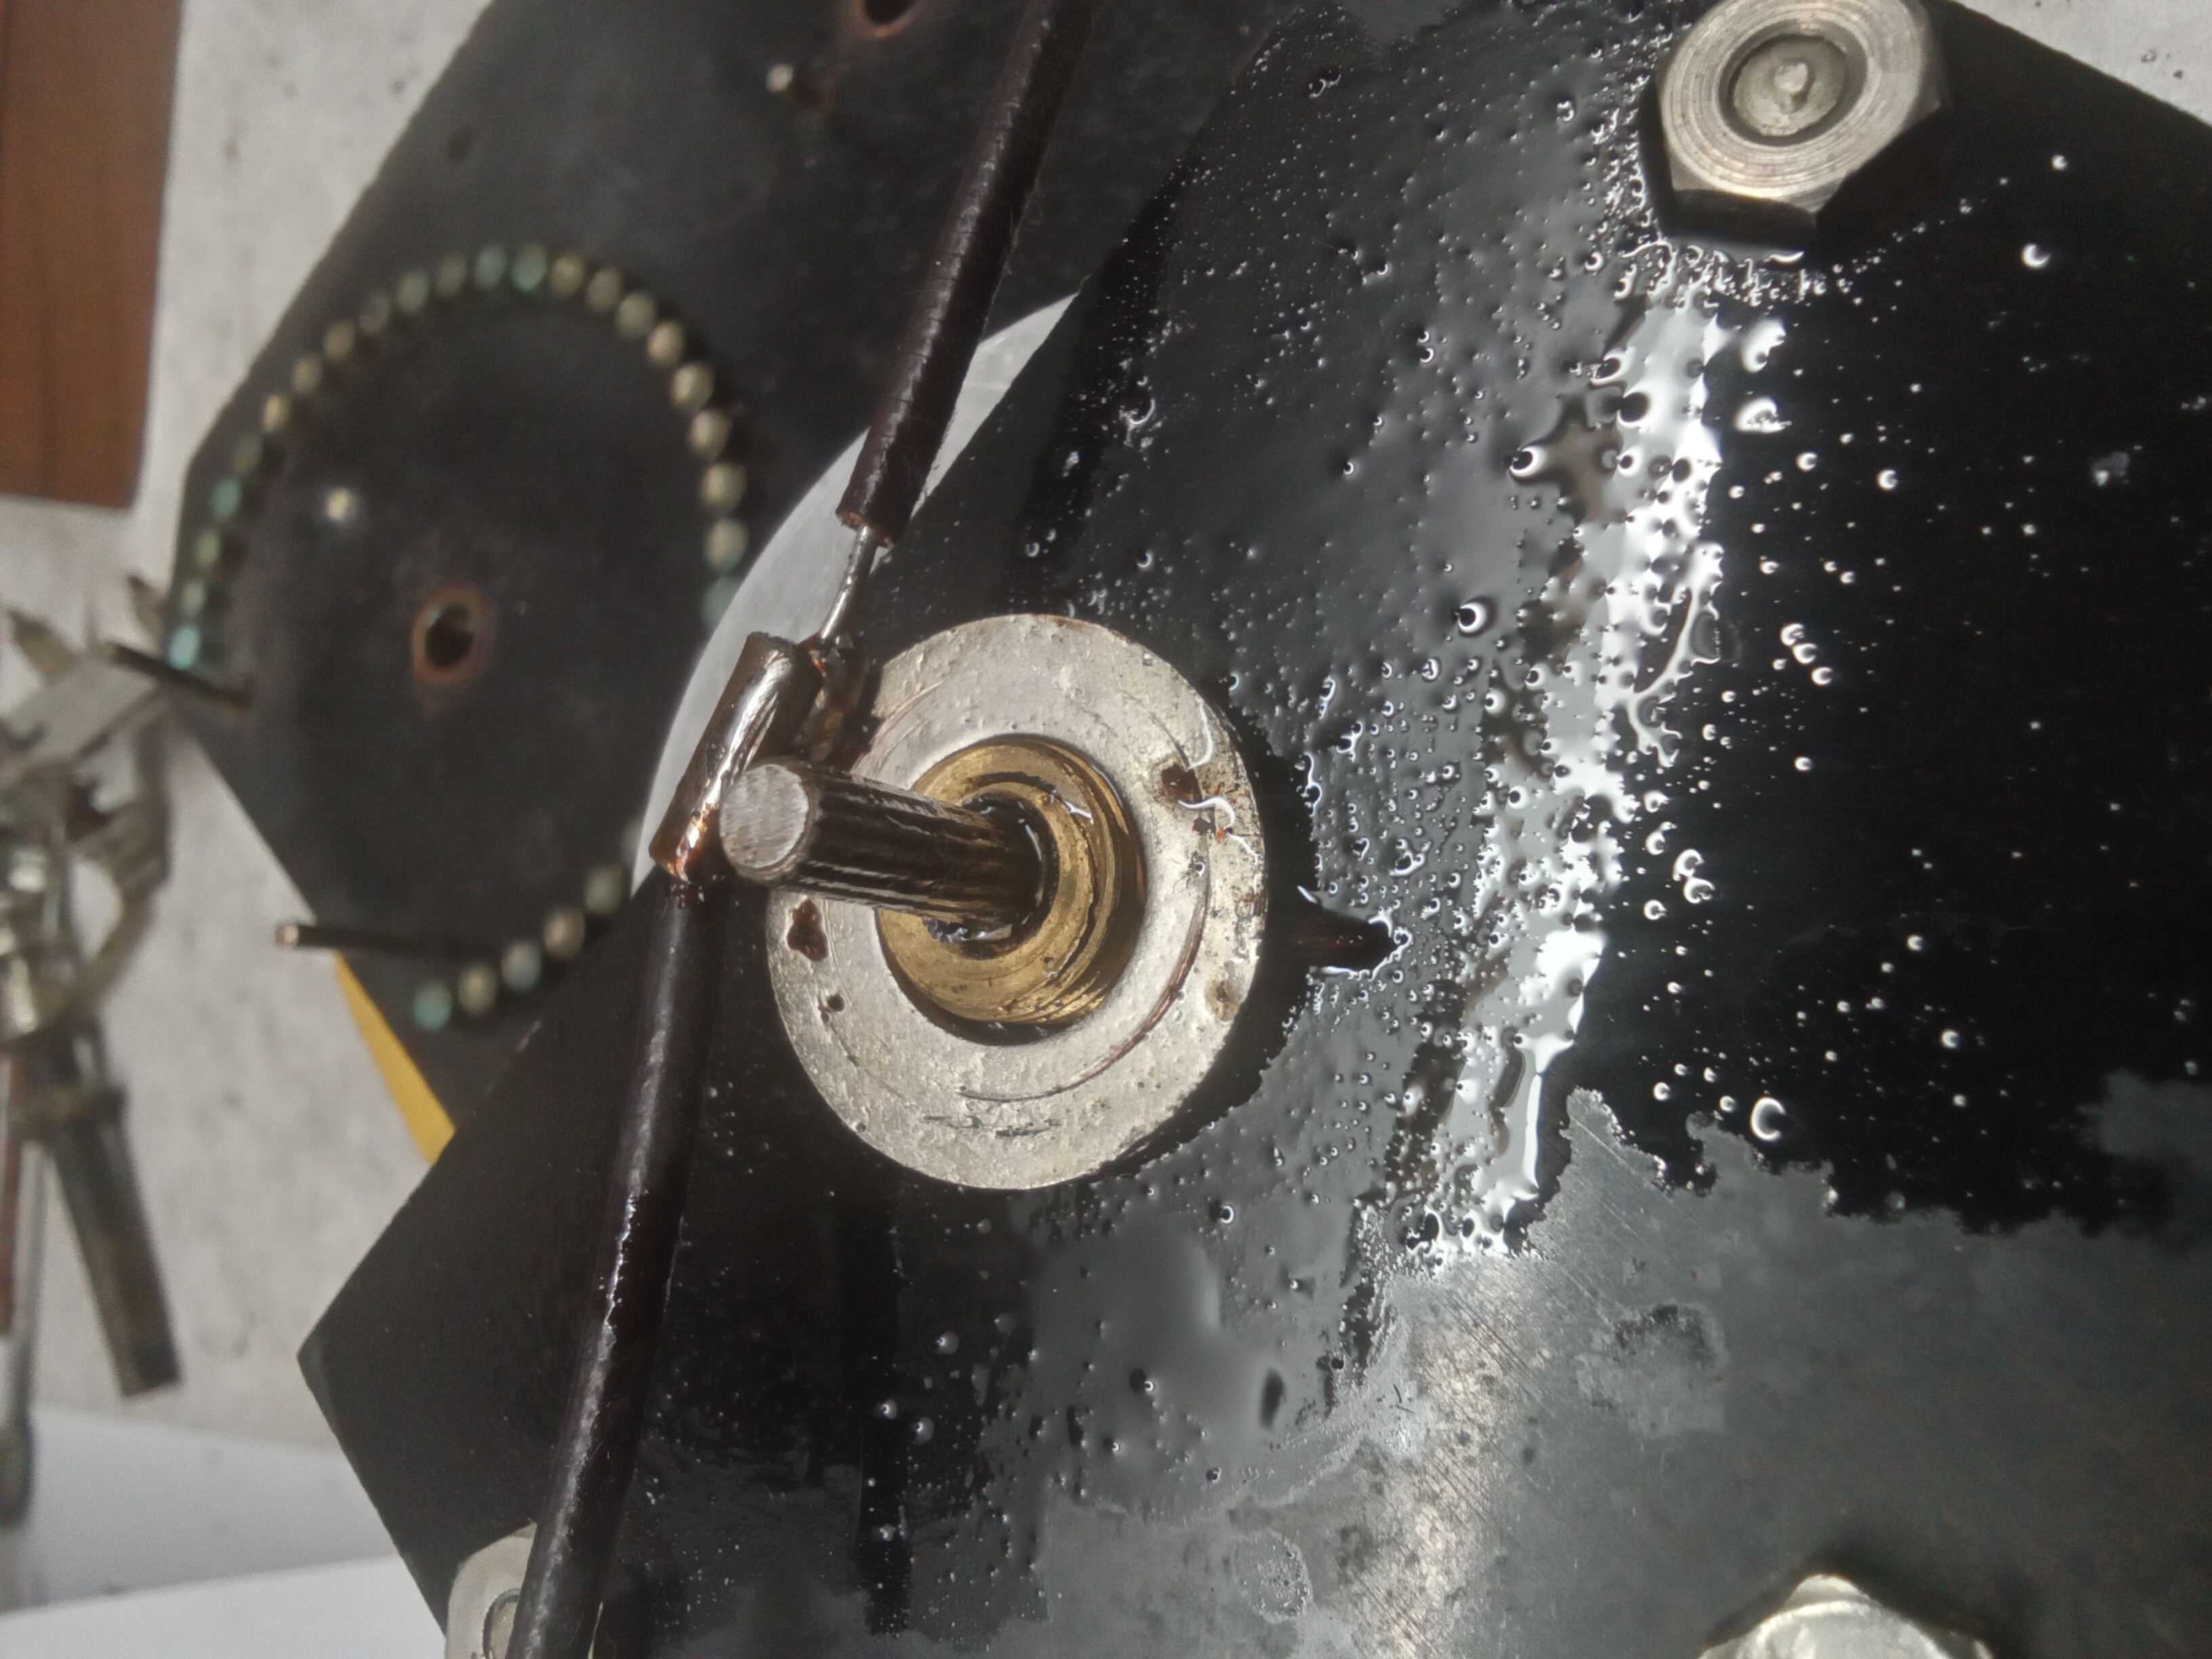
The Tickler switch contacts cleaned up nicely with a dab of DeOxit on each one. The fiber extension for the switch was pretty stuck on the shaft so I let it be. And all three shaft lock assemblies were in good shape with no cracks. |
|
|
Remounting the Variocoupler With the variocoupler put back together and all wires labelled I double checked continuity and it was good across both coils. |
|
|
|
|
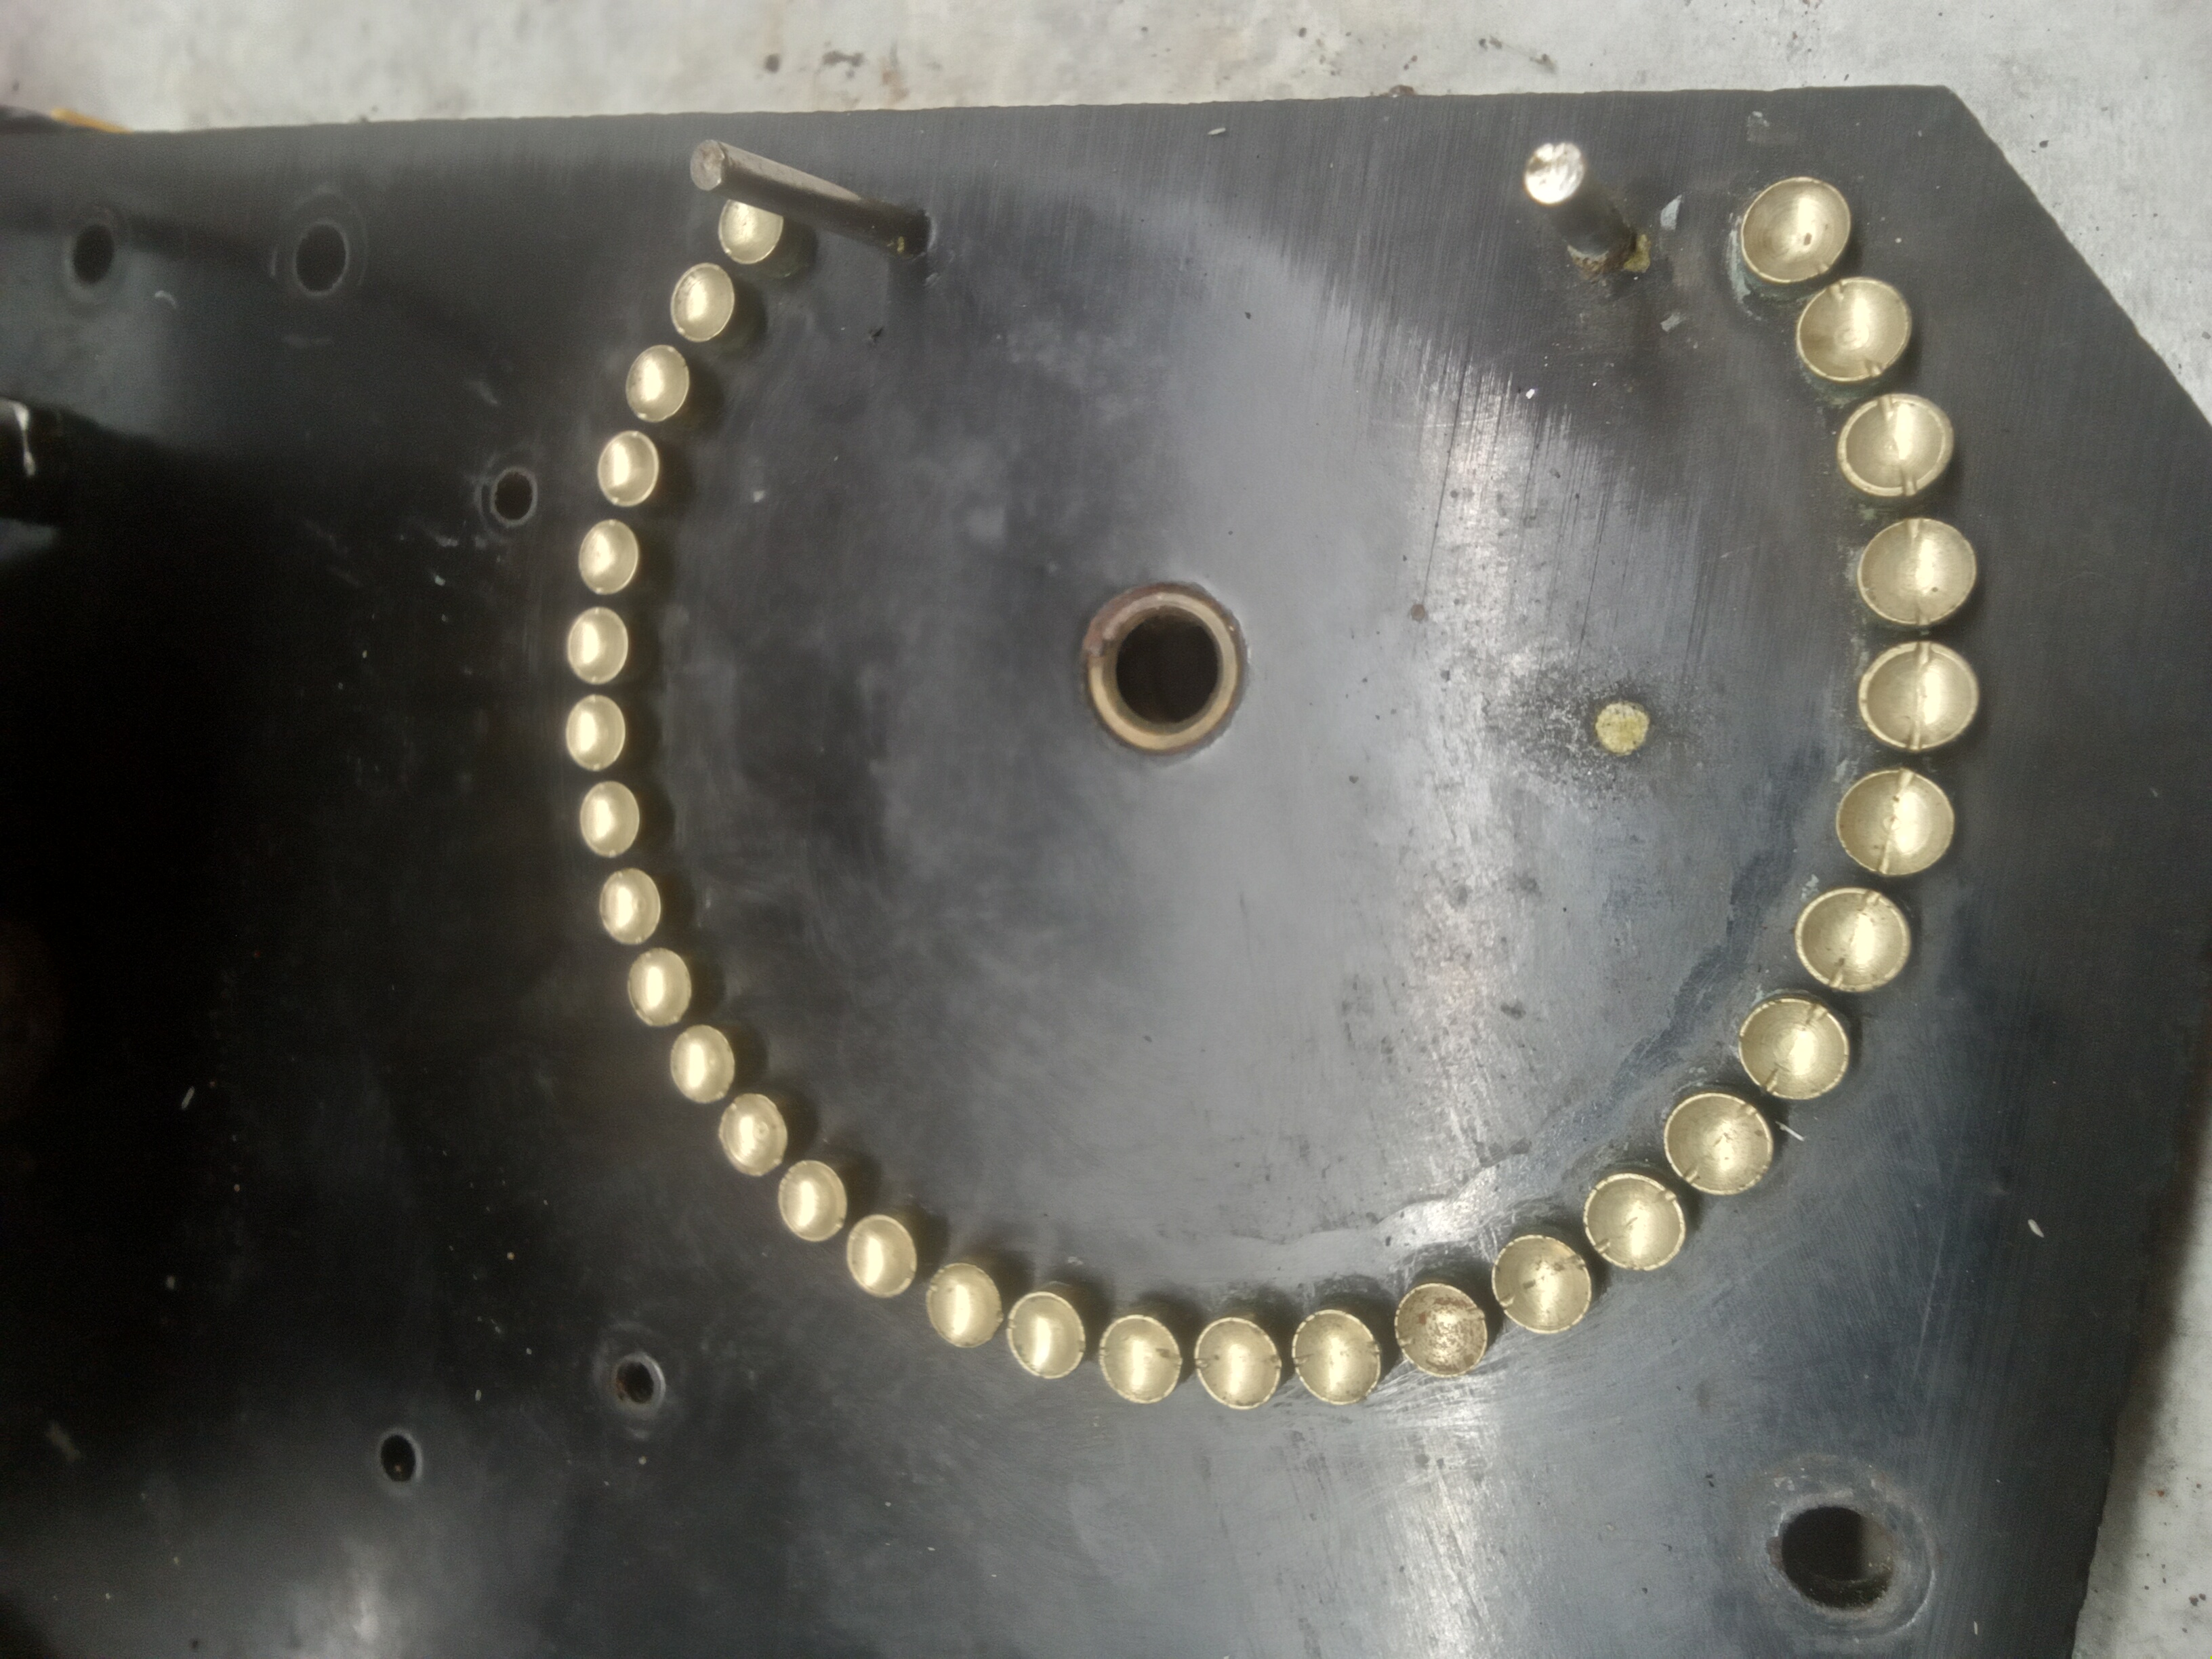
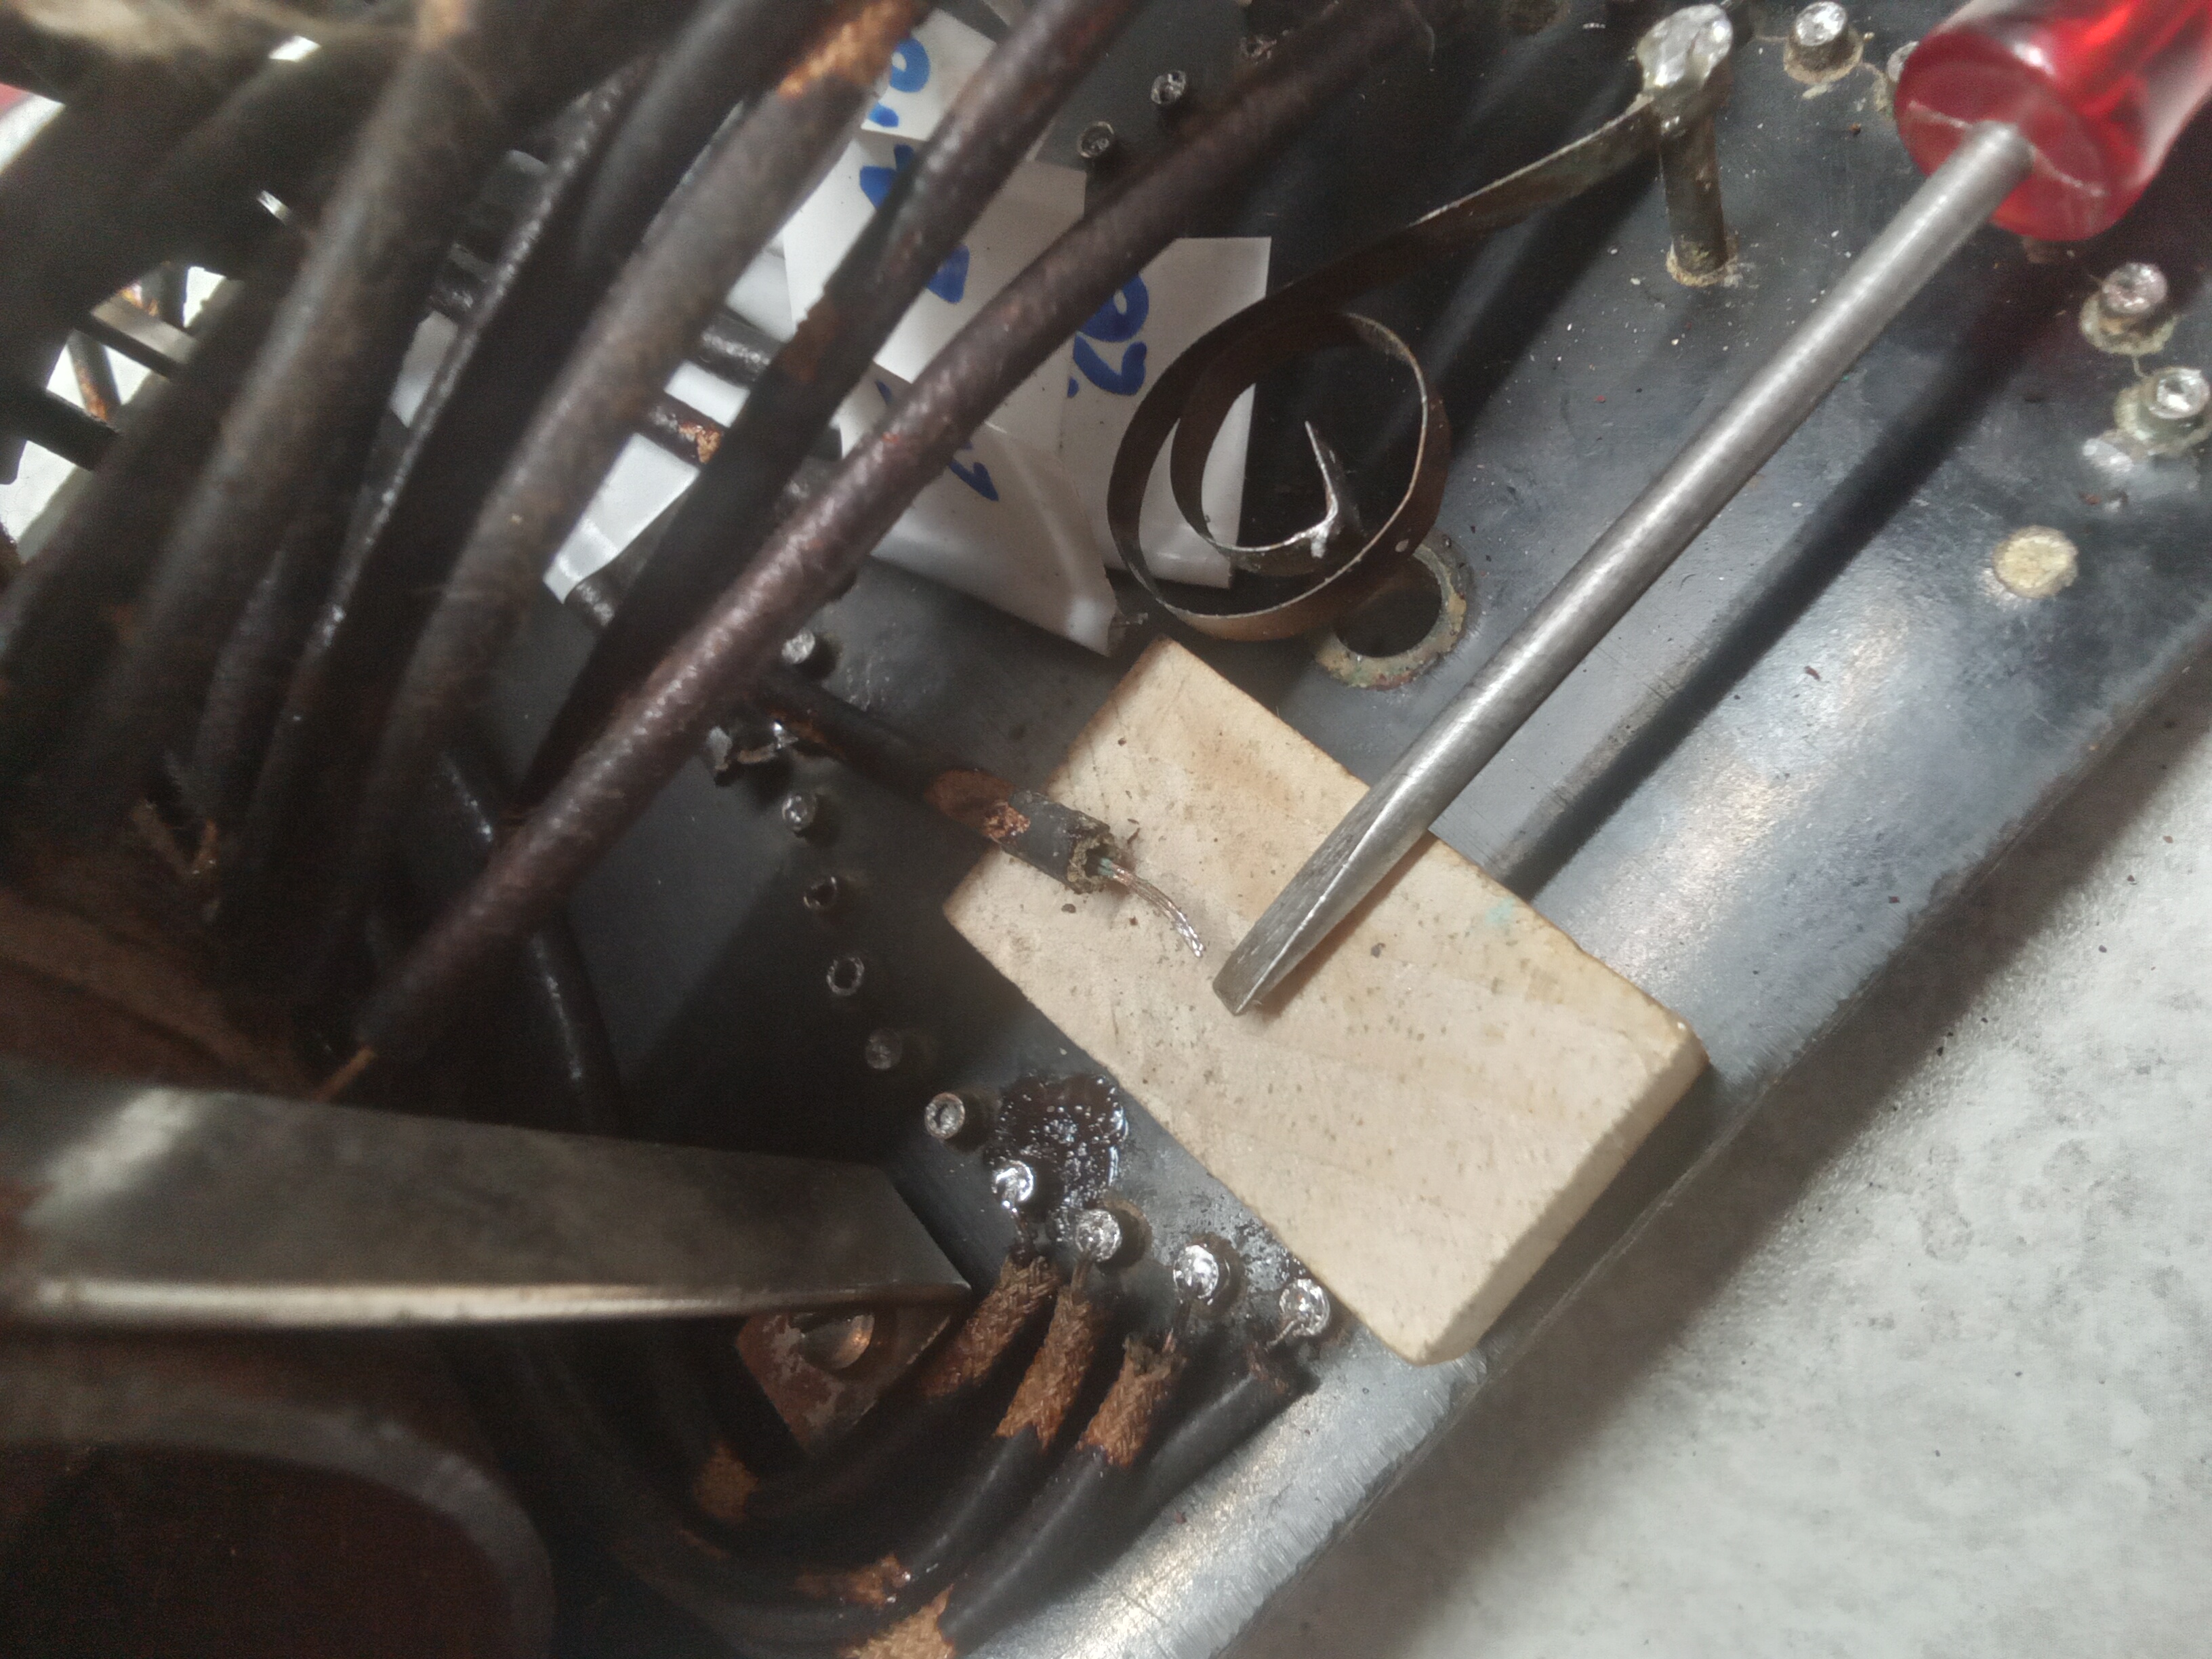
So I started the slow arduous process of resoldering the leads back to the Tickler switch contacts. I was getting the hang of heating up the solder contacts this time around and most of the wires were in good shape. Each lead was actually 2 separate wires coming directly from the coil windings. A little scraping at the ends of the wires and a dab of solder flux made the process go fairly smoothly. Until I got to wire #14. This is where the mouse had started to do most of its damage. The next 5 or 6 wires were corroded a few inches up the lead and some of the insulation was gone. Extending the leads to reach the switch contacts is the closest I've come in old radio restoration to what "brain surgery" may feel like. I took a small 2 inch piece of #26 enamel wire and scraped the insulation off of both ends. I tinned the broken wires with a blob of solder. Then I tinned the enamel wire with a blob of solder. With my trusty needlenose pliers I held the enamel wire next to the broken lead and trying to keep my left hand steady holding the pliers holding the wire next to the broken lead I touched the soldering gun to both wire blobs. I pulled the gun away from the wires while still trying to keep the pliers holding the enamel wire in contact with the broken wires while the solder cooled. It took a few tries. But eventually the new wire would hold with good continuity. |
|
|
|
|
It was a chore trying to snake the ancient insulation sleeve back over the new wire joints. A couple times the solder joint was too thick and I had to redo it to be able to get the insulation sleeve on. But I only needed to use a few strands of modern shrink wrap. Most of the original insulation was salvageable. Overall I think the variocoupler cleaned up very nicely. |
|
|
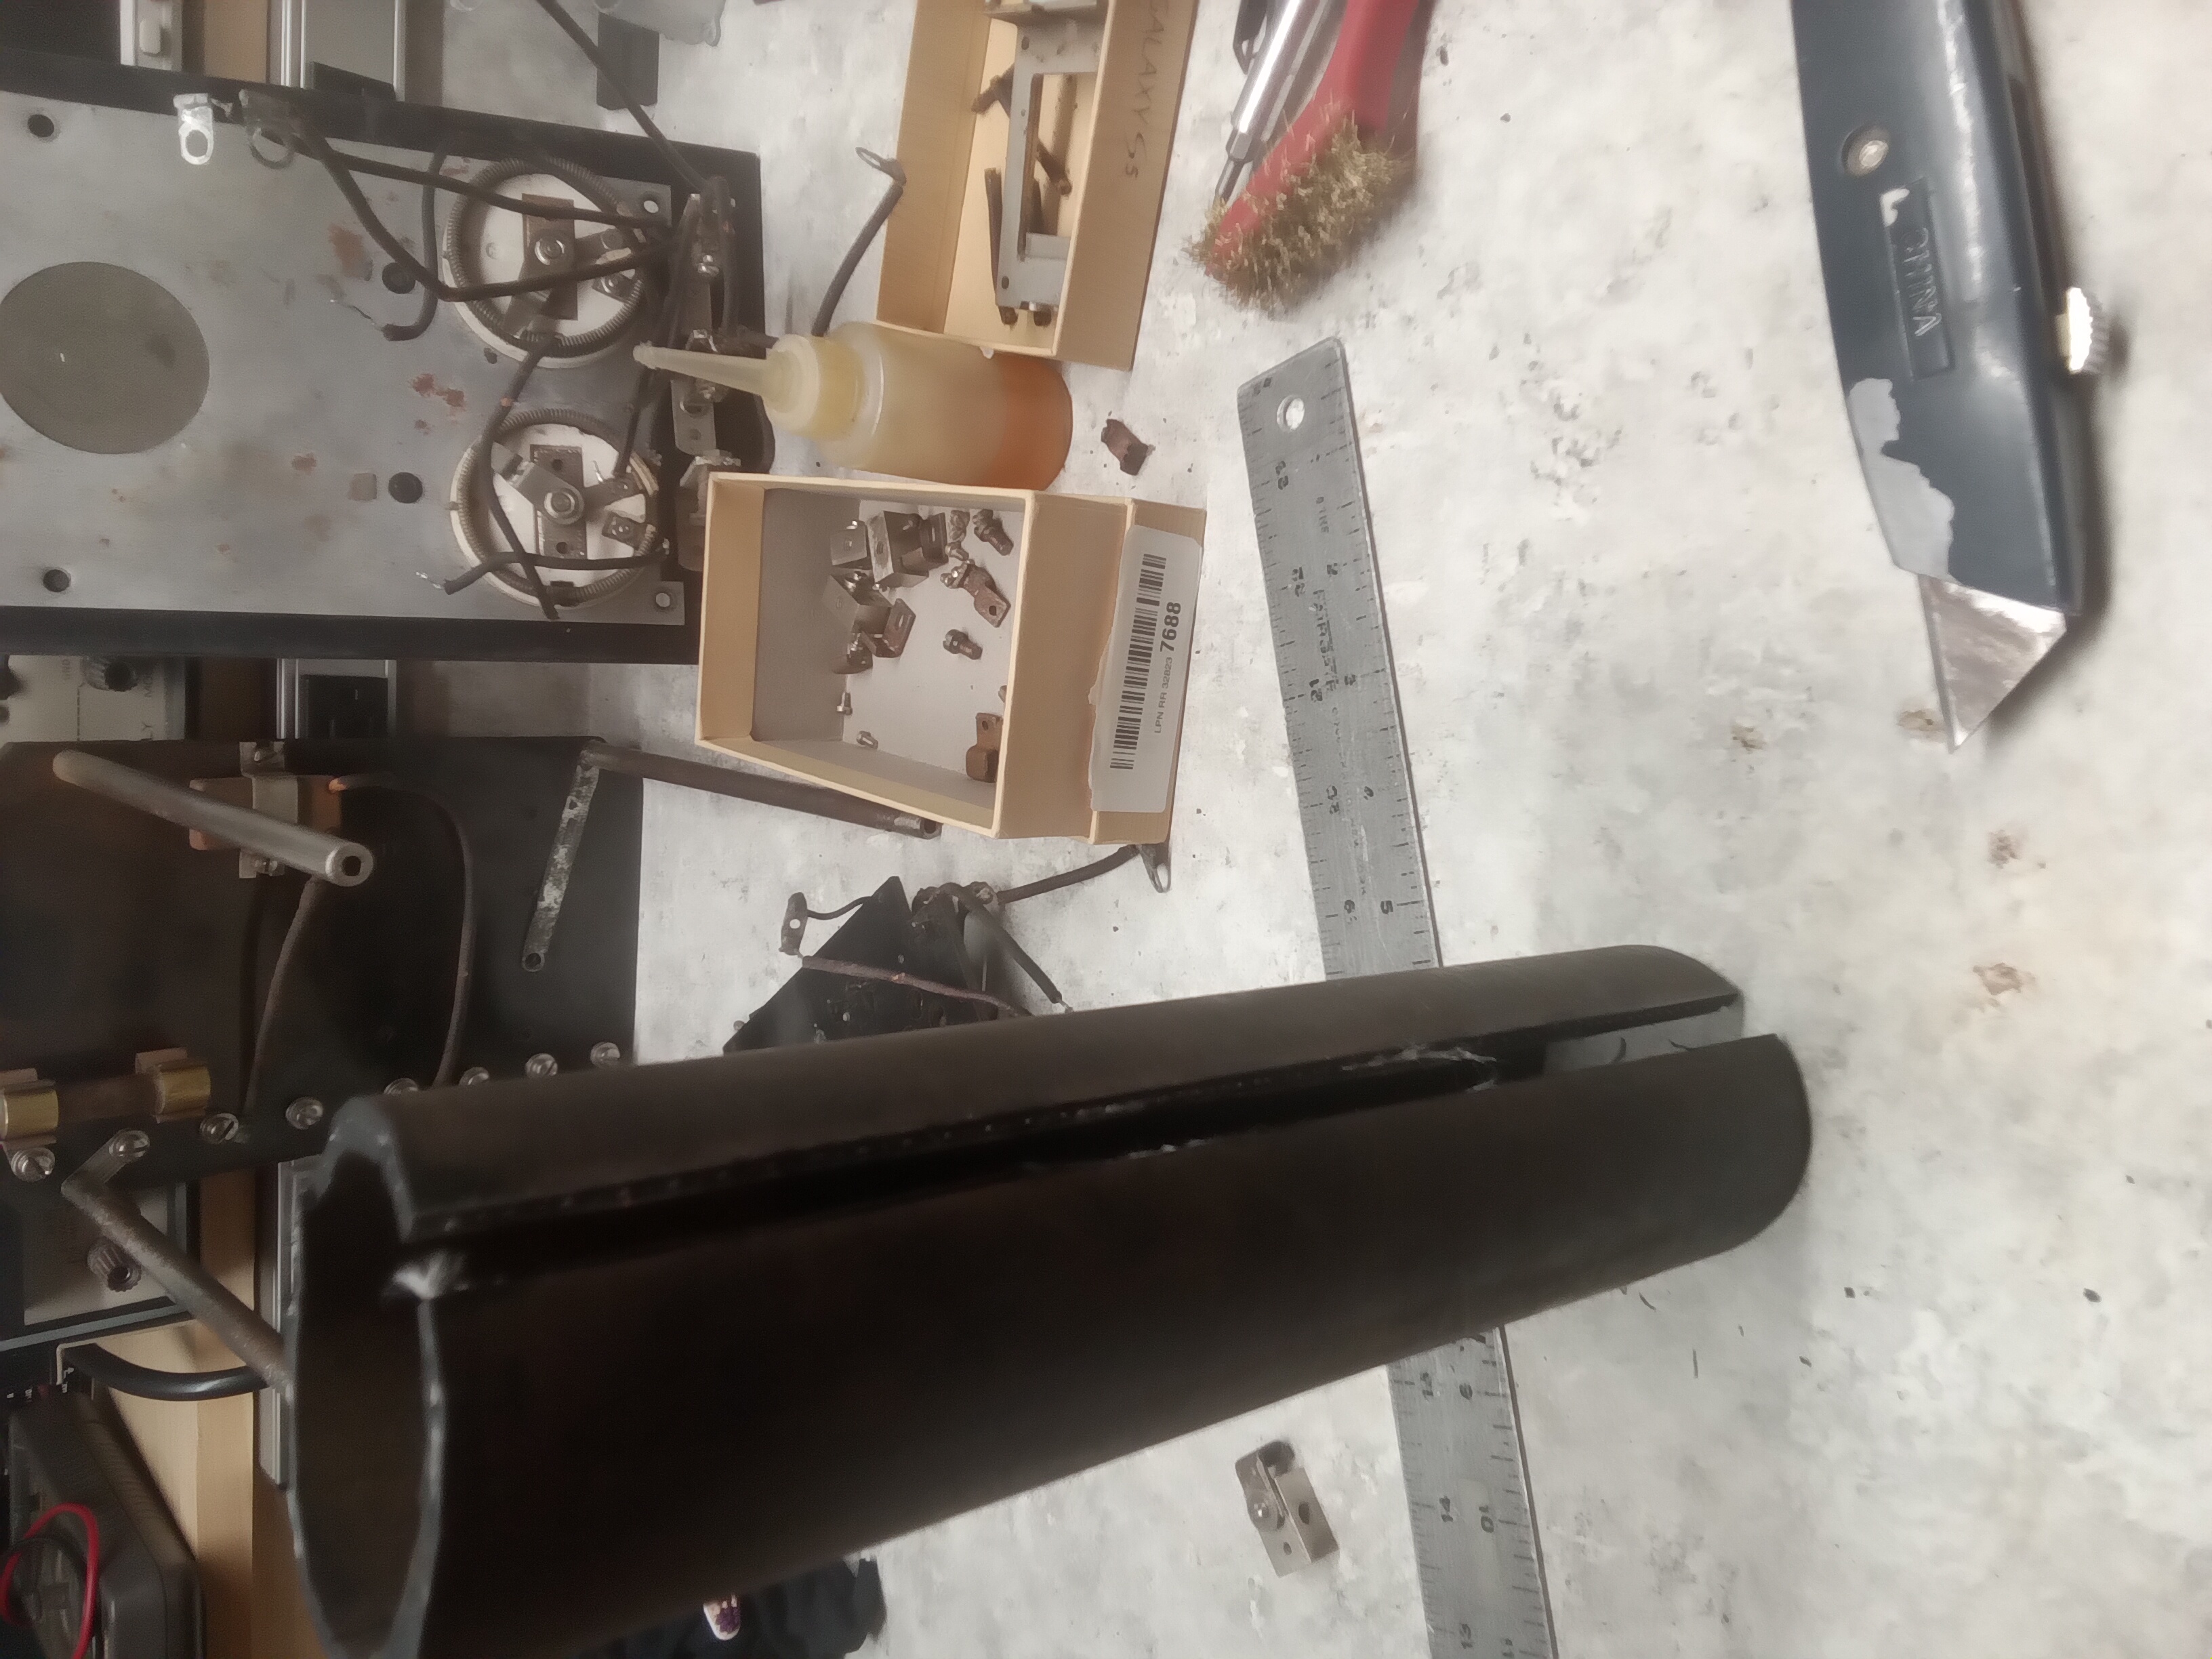
Metalworking As I've mentioned a number of times in the various restoration projects I've undertaken, metalworking is not my strong suit. The idea that you can cut and shape hard metal objects to suit your needs is just something that has always seemed foreign to me and out of my league. Too difficult to do, requiring specialized knowledge and big lathe-like metal cutting tools with cans of cutting oil all situated in a large well-lit shop with sturdy concrete floors. Even hearing the phrase "tool and die set", my eyes would glaze over imagining a $250 plastic carrying case filled with obscure little cutting devices that you would use maybe once every 3 years. So when it came time to replacing the rusted steel rod with the broken off threads I started out planning a stupid kluge with materials I felt more comfortable with. |
|
|
|
|
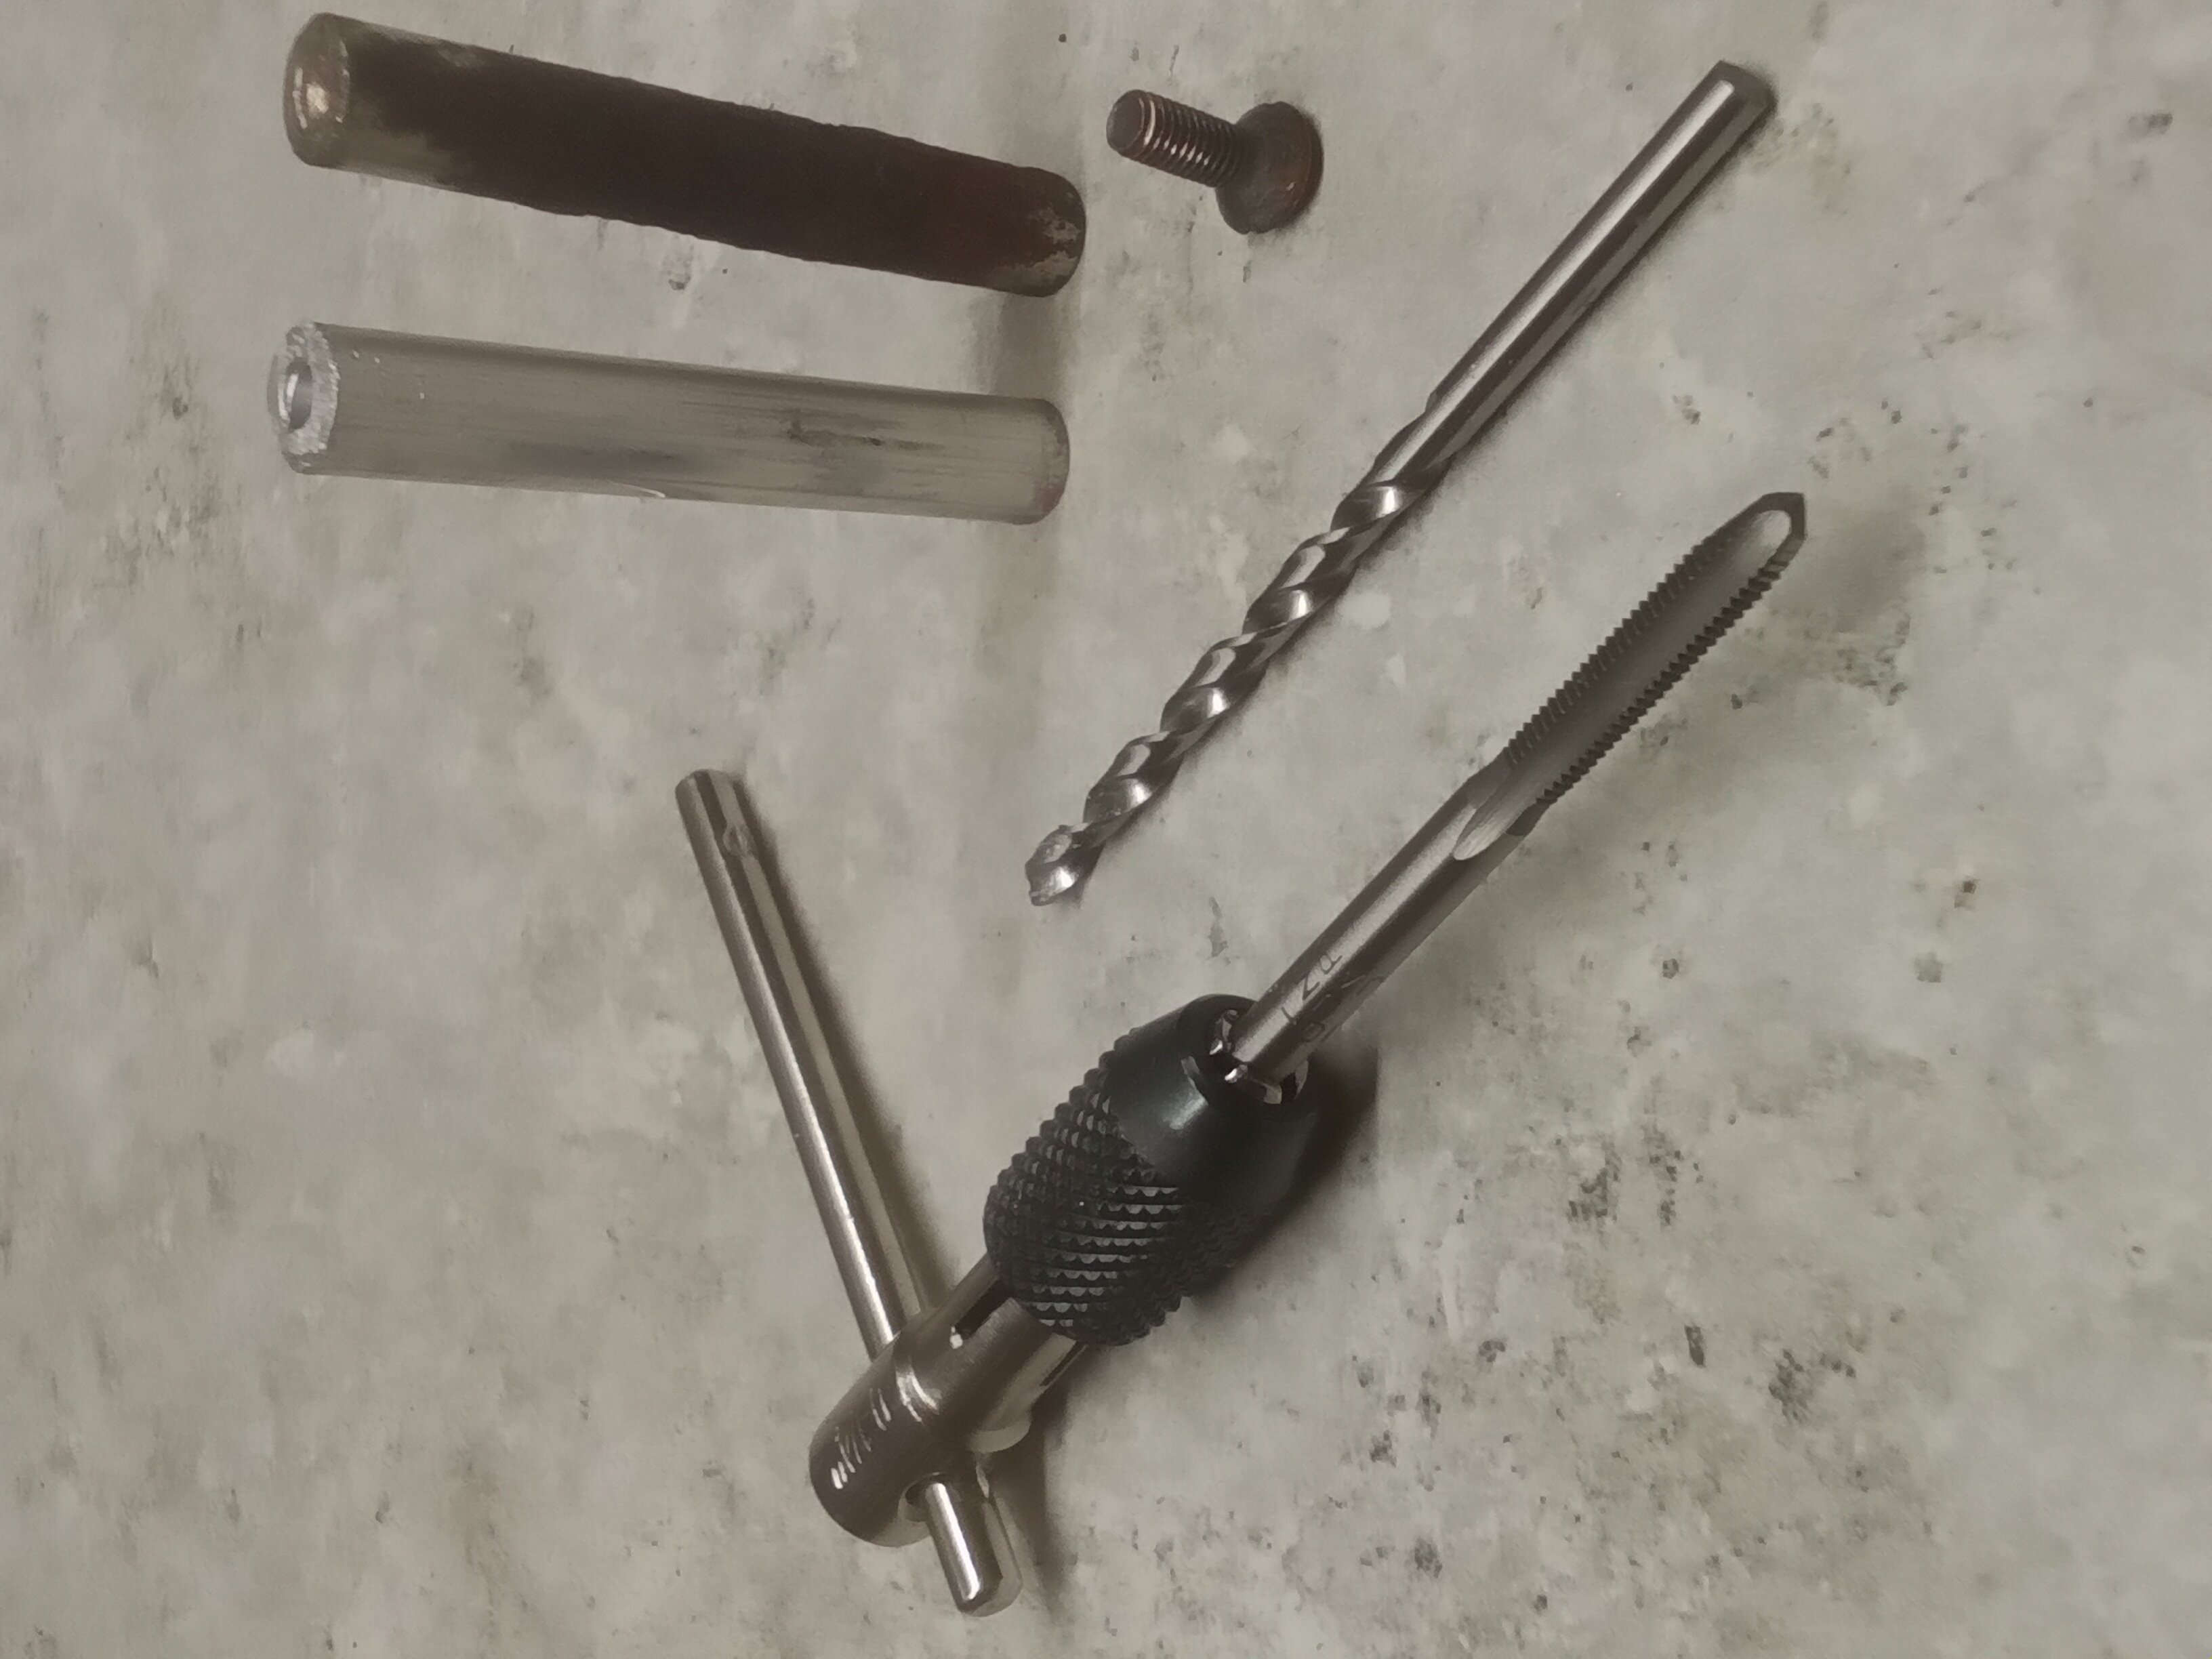
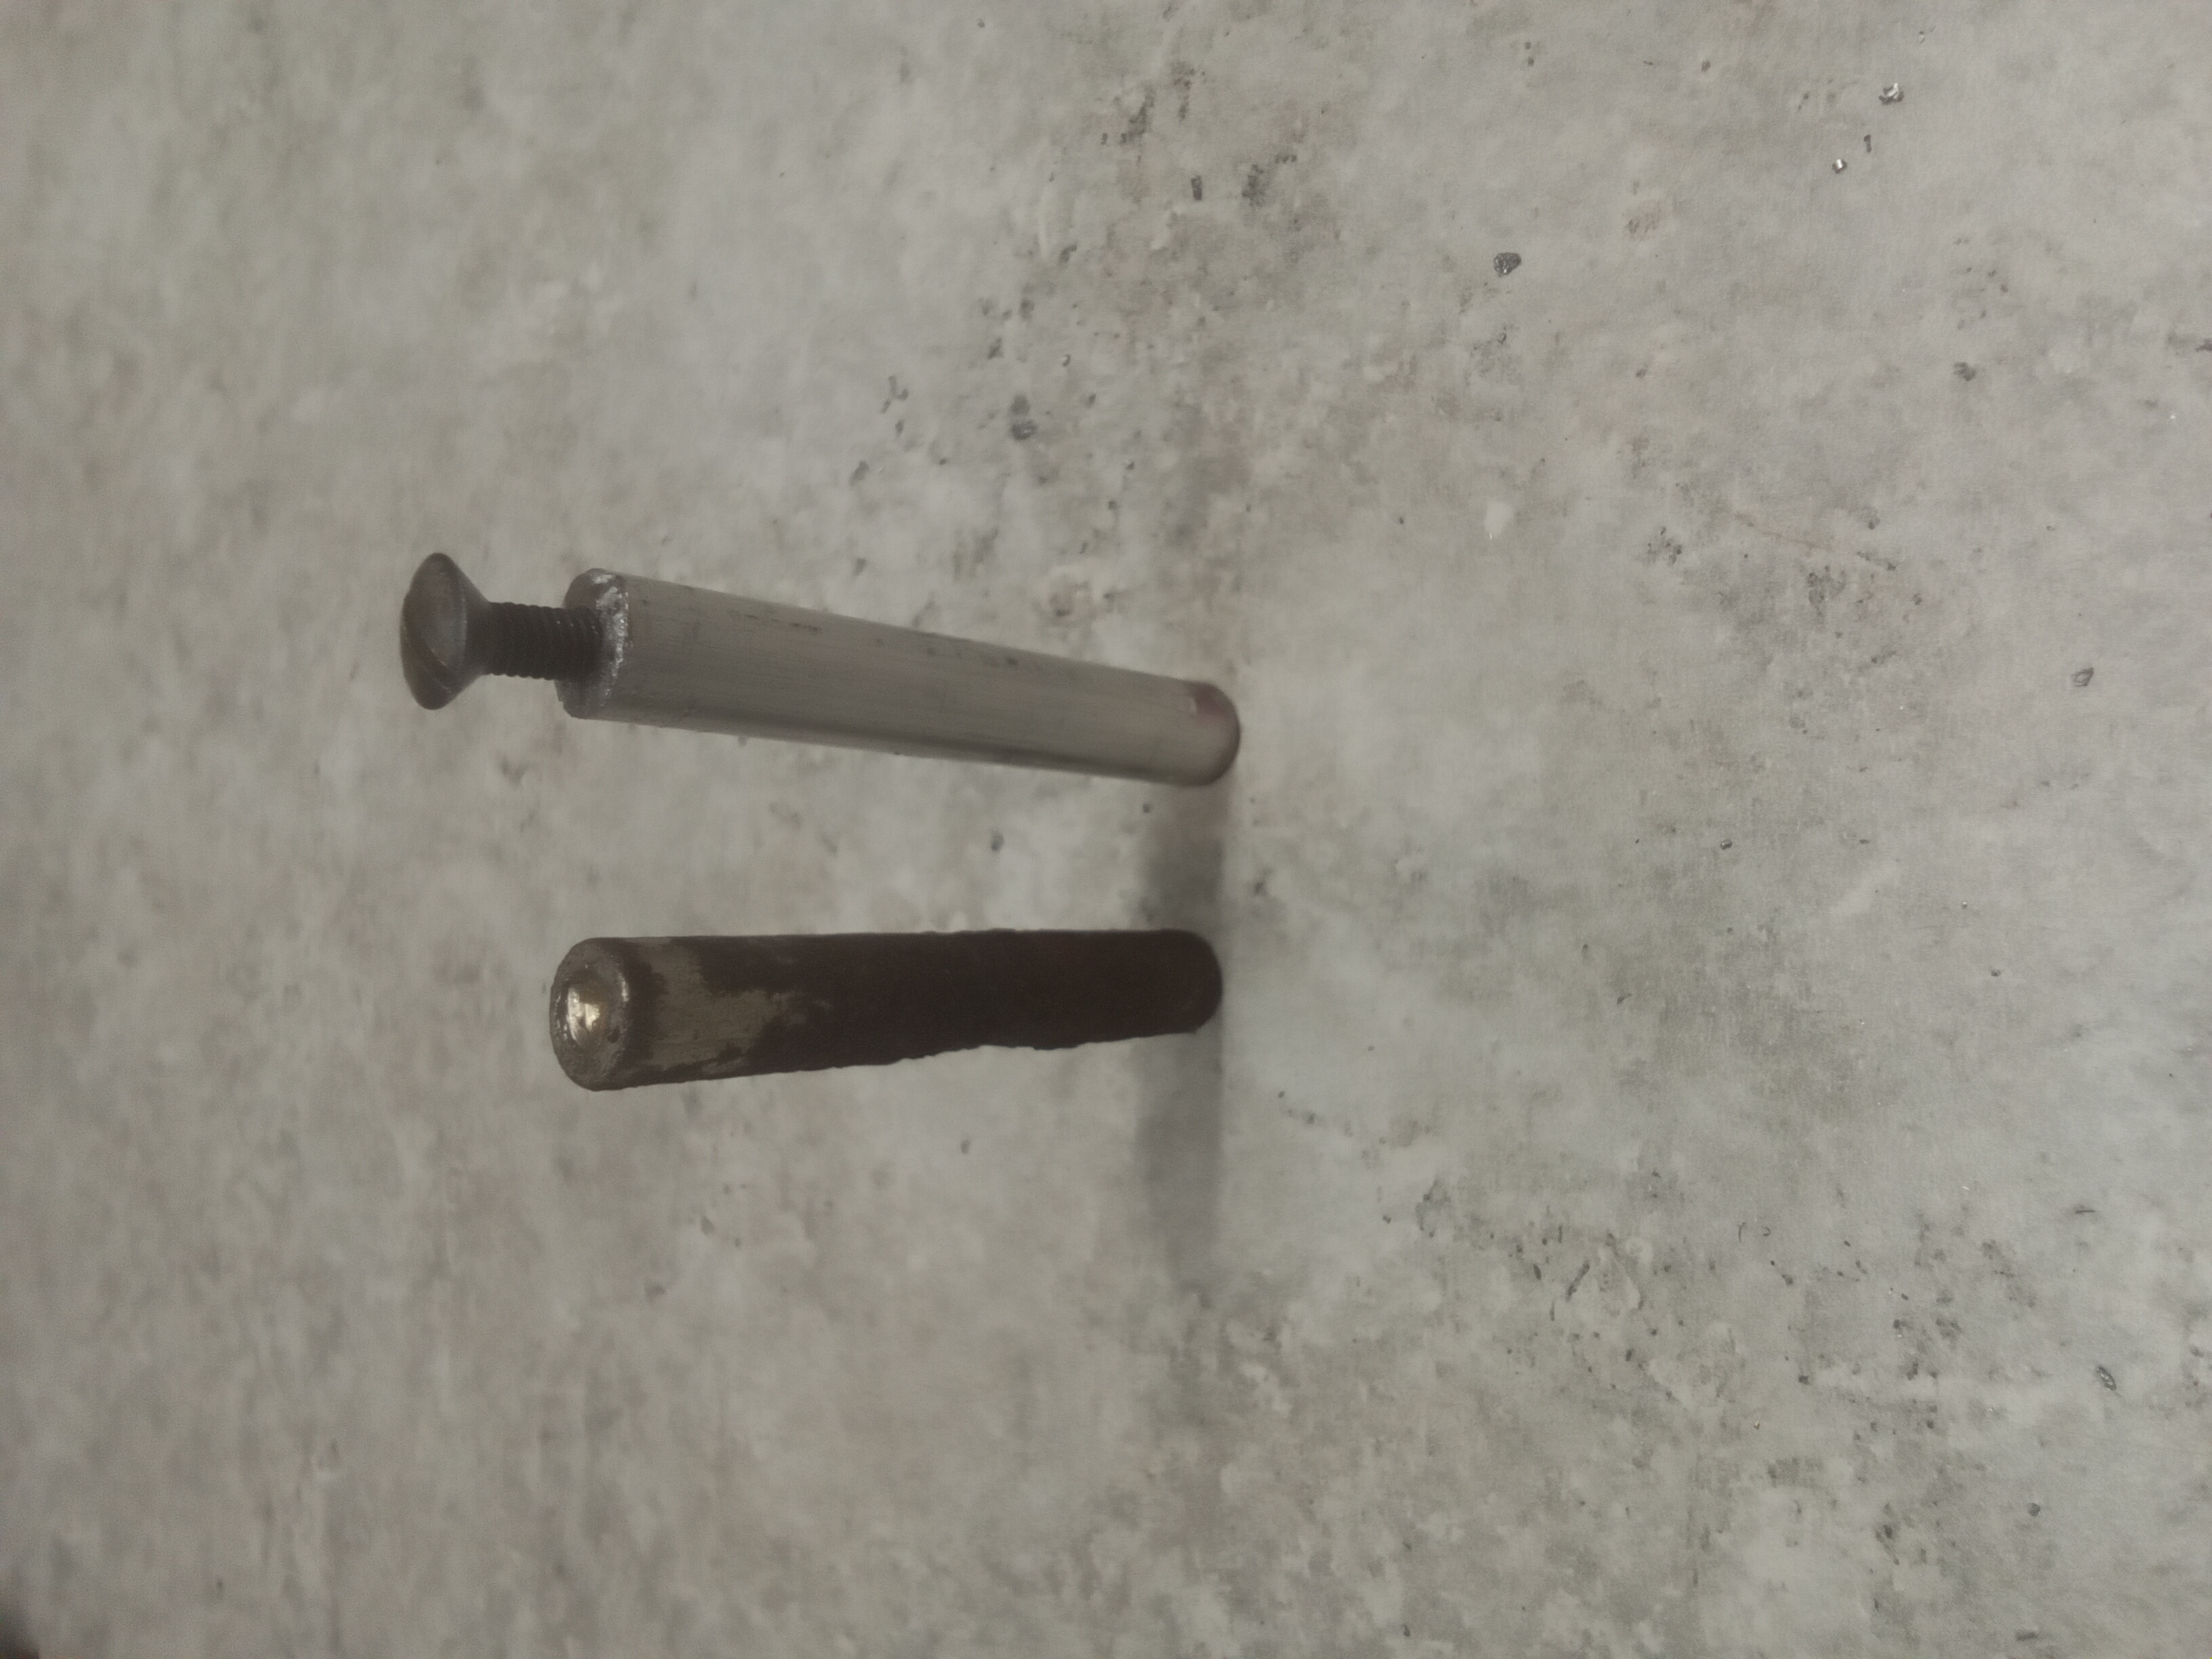
Wooden dowels, epoxy and silver spray paint. Of course it didn't work. No way the 2 nuts were going to stick to the wood. So I finally accepted the fact I was going to have to figure out how to get a piece of round metal with a proper sized threaded hole in it. Up at our trusty Pick & Shovel hardware store I rumaged through the plumbing accessories looking for that obscure little coupling that would somehow be able to be bolted to the RC panels. But I gave up on that and headed over to the tool section. Where I was pleasantly surprised to find that you could buy individual tapping sets. With matching drill bit. And that dies were only required if you were rethreading a screw. Which I was not. Suddenly things seemed much simpler. |
|
|
|
|
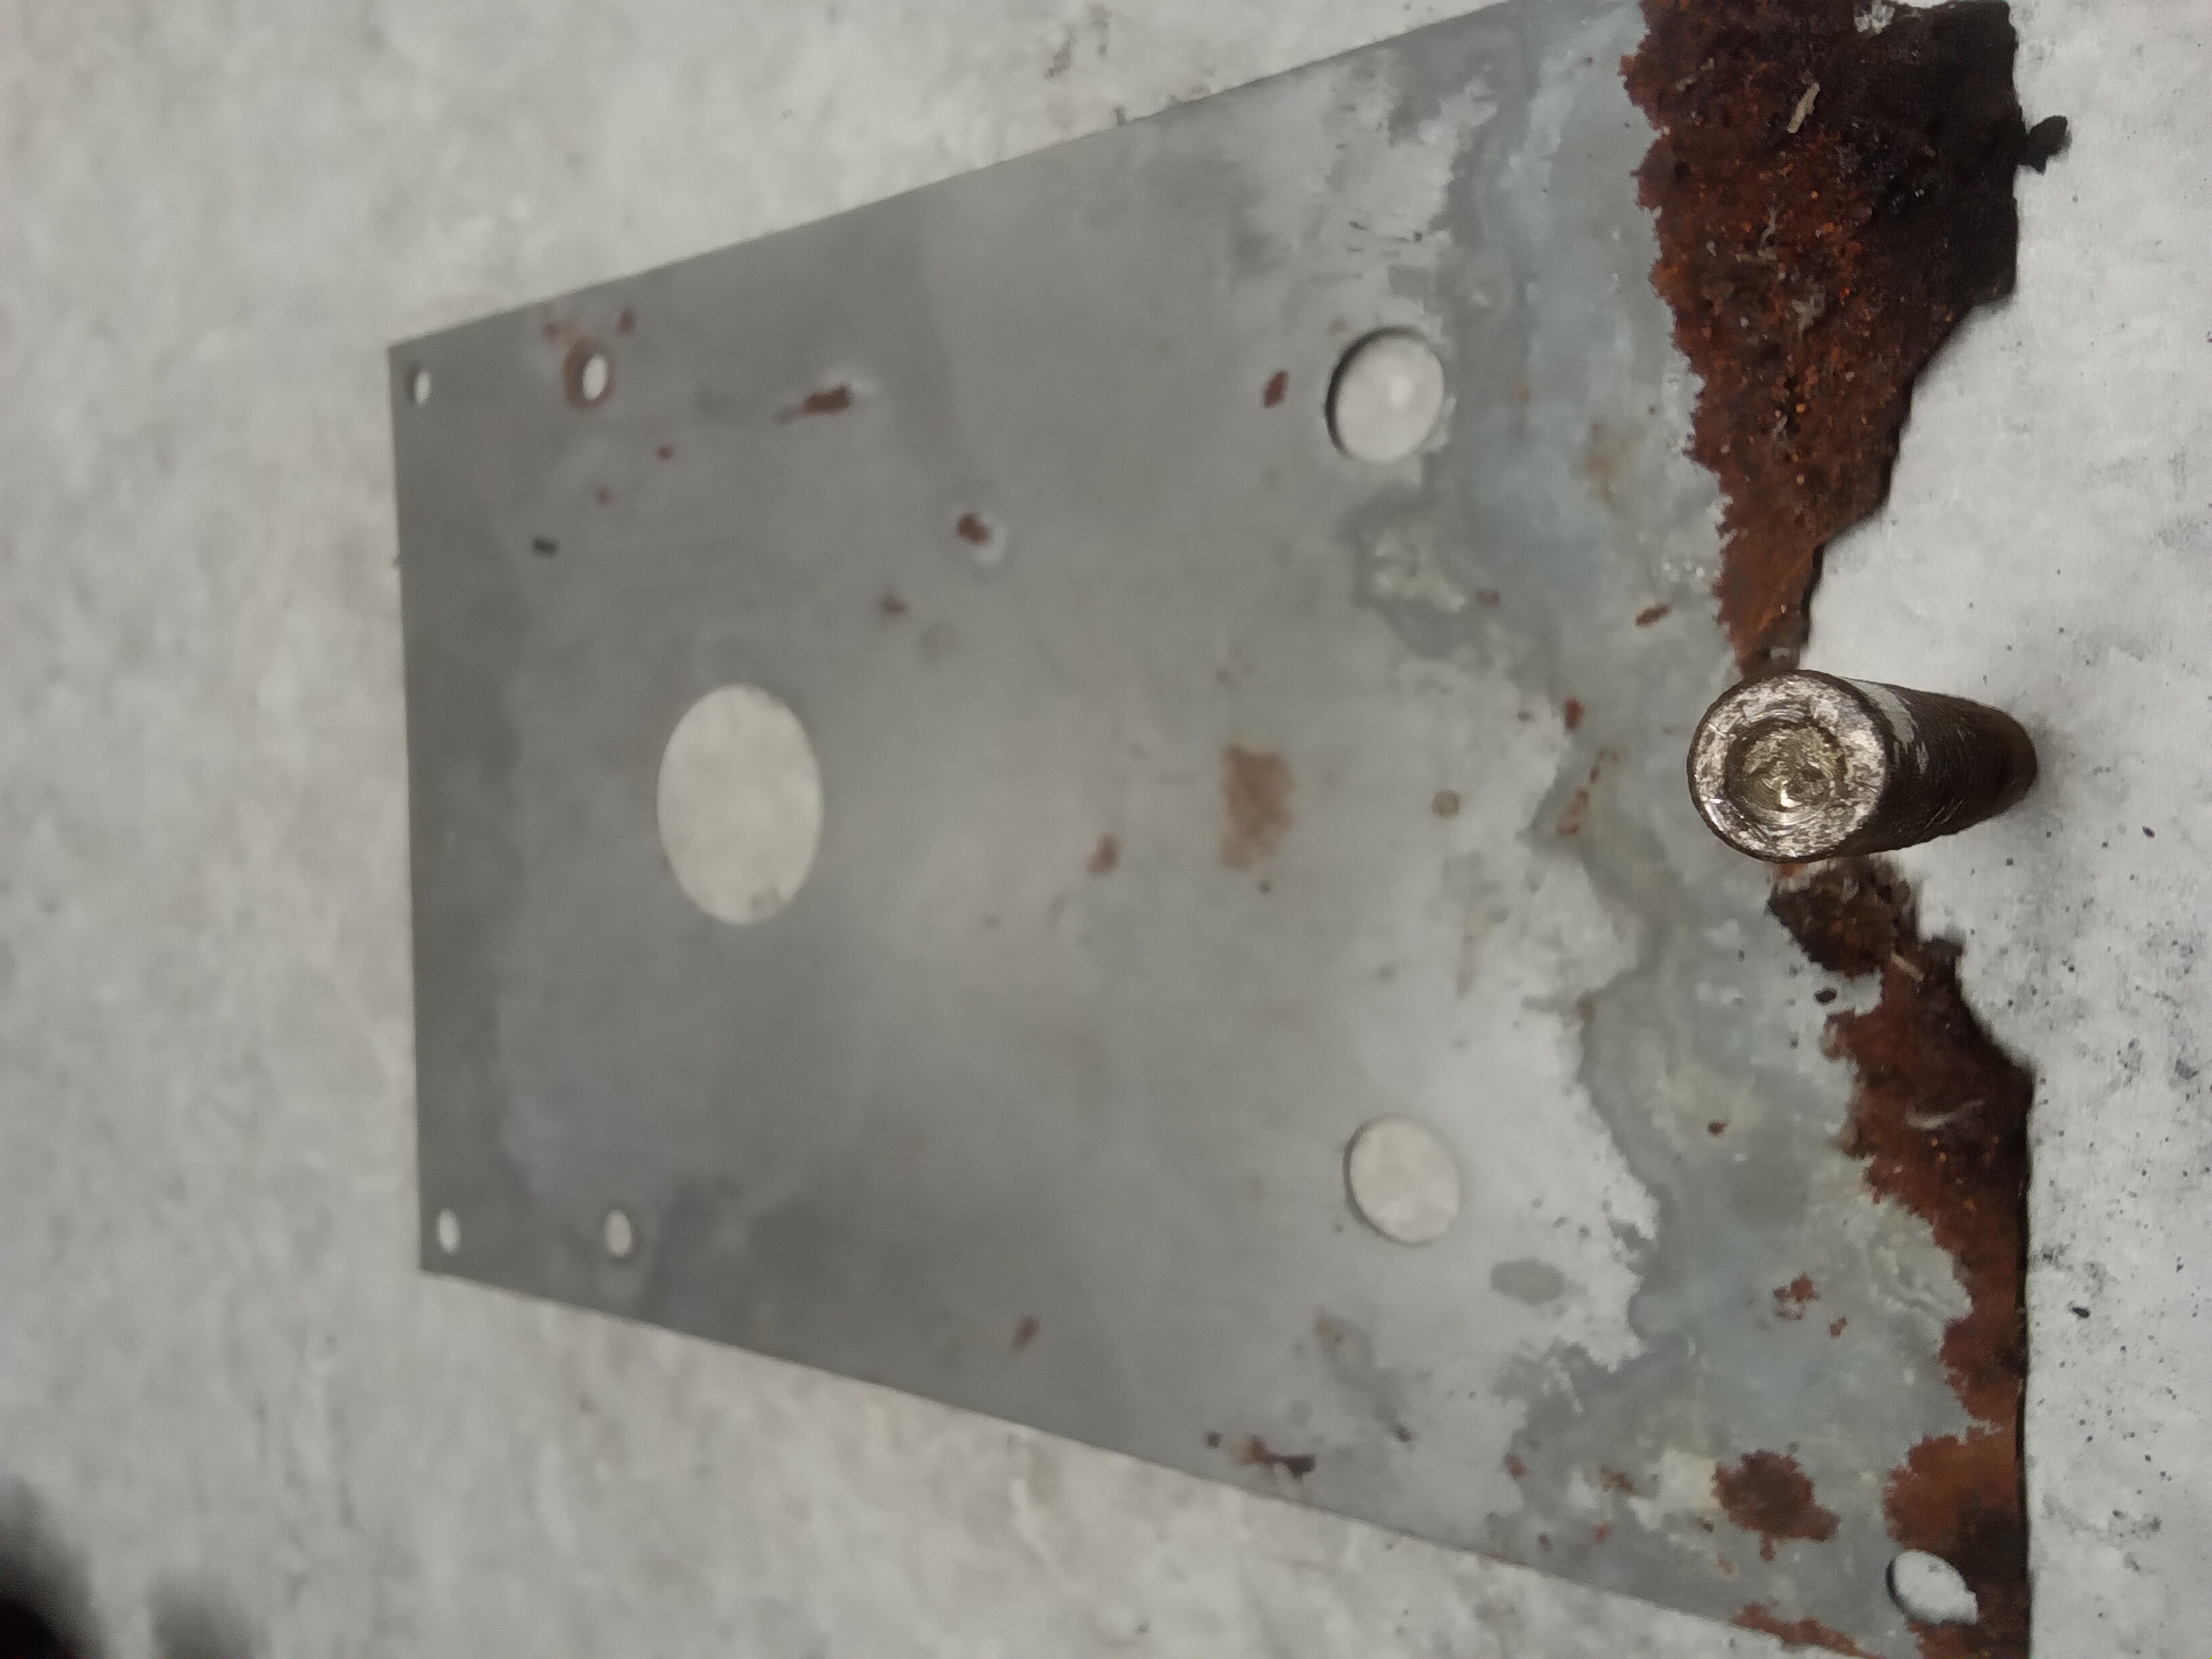
I cut up a few small pieces of roof flashing to replace the corroded front panel shield and bolted it all back together. I think it looks ok. Now on to the DA. |
|
|
|
|
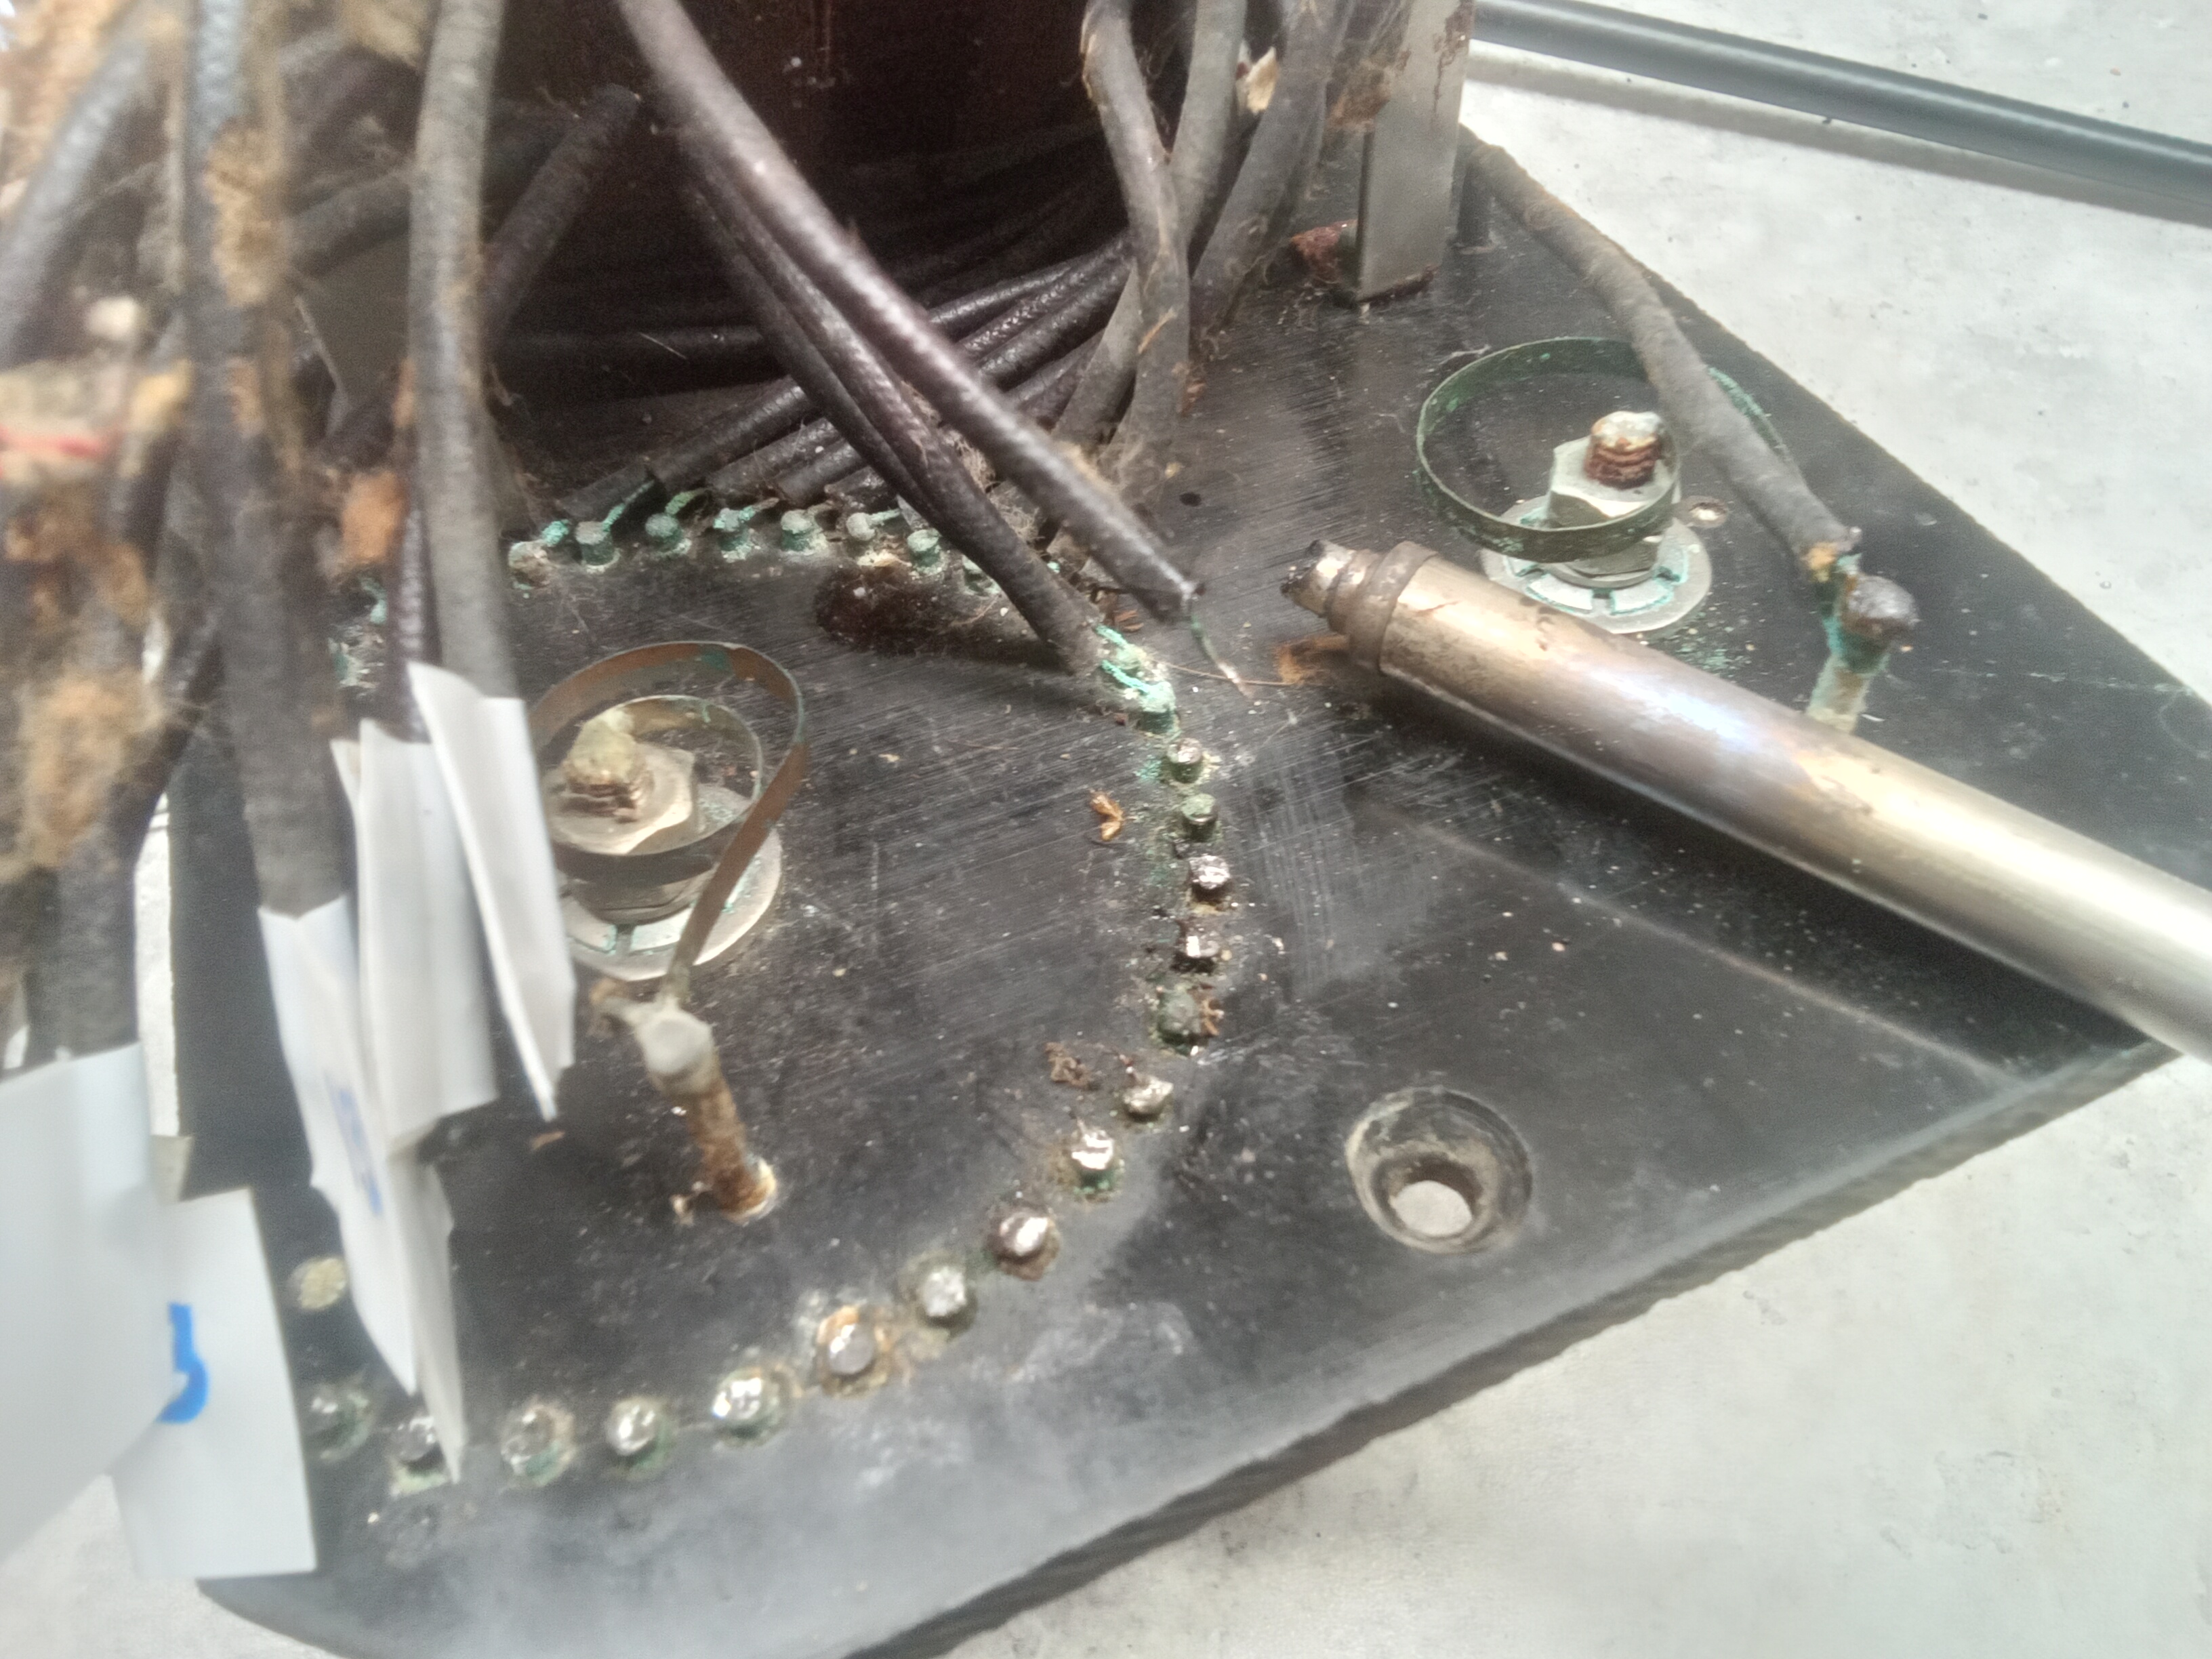
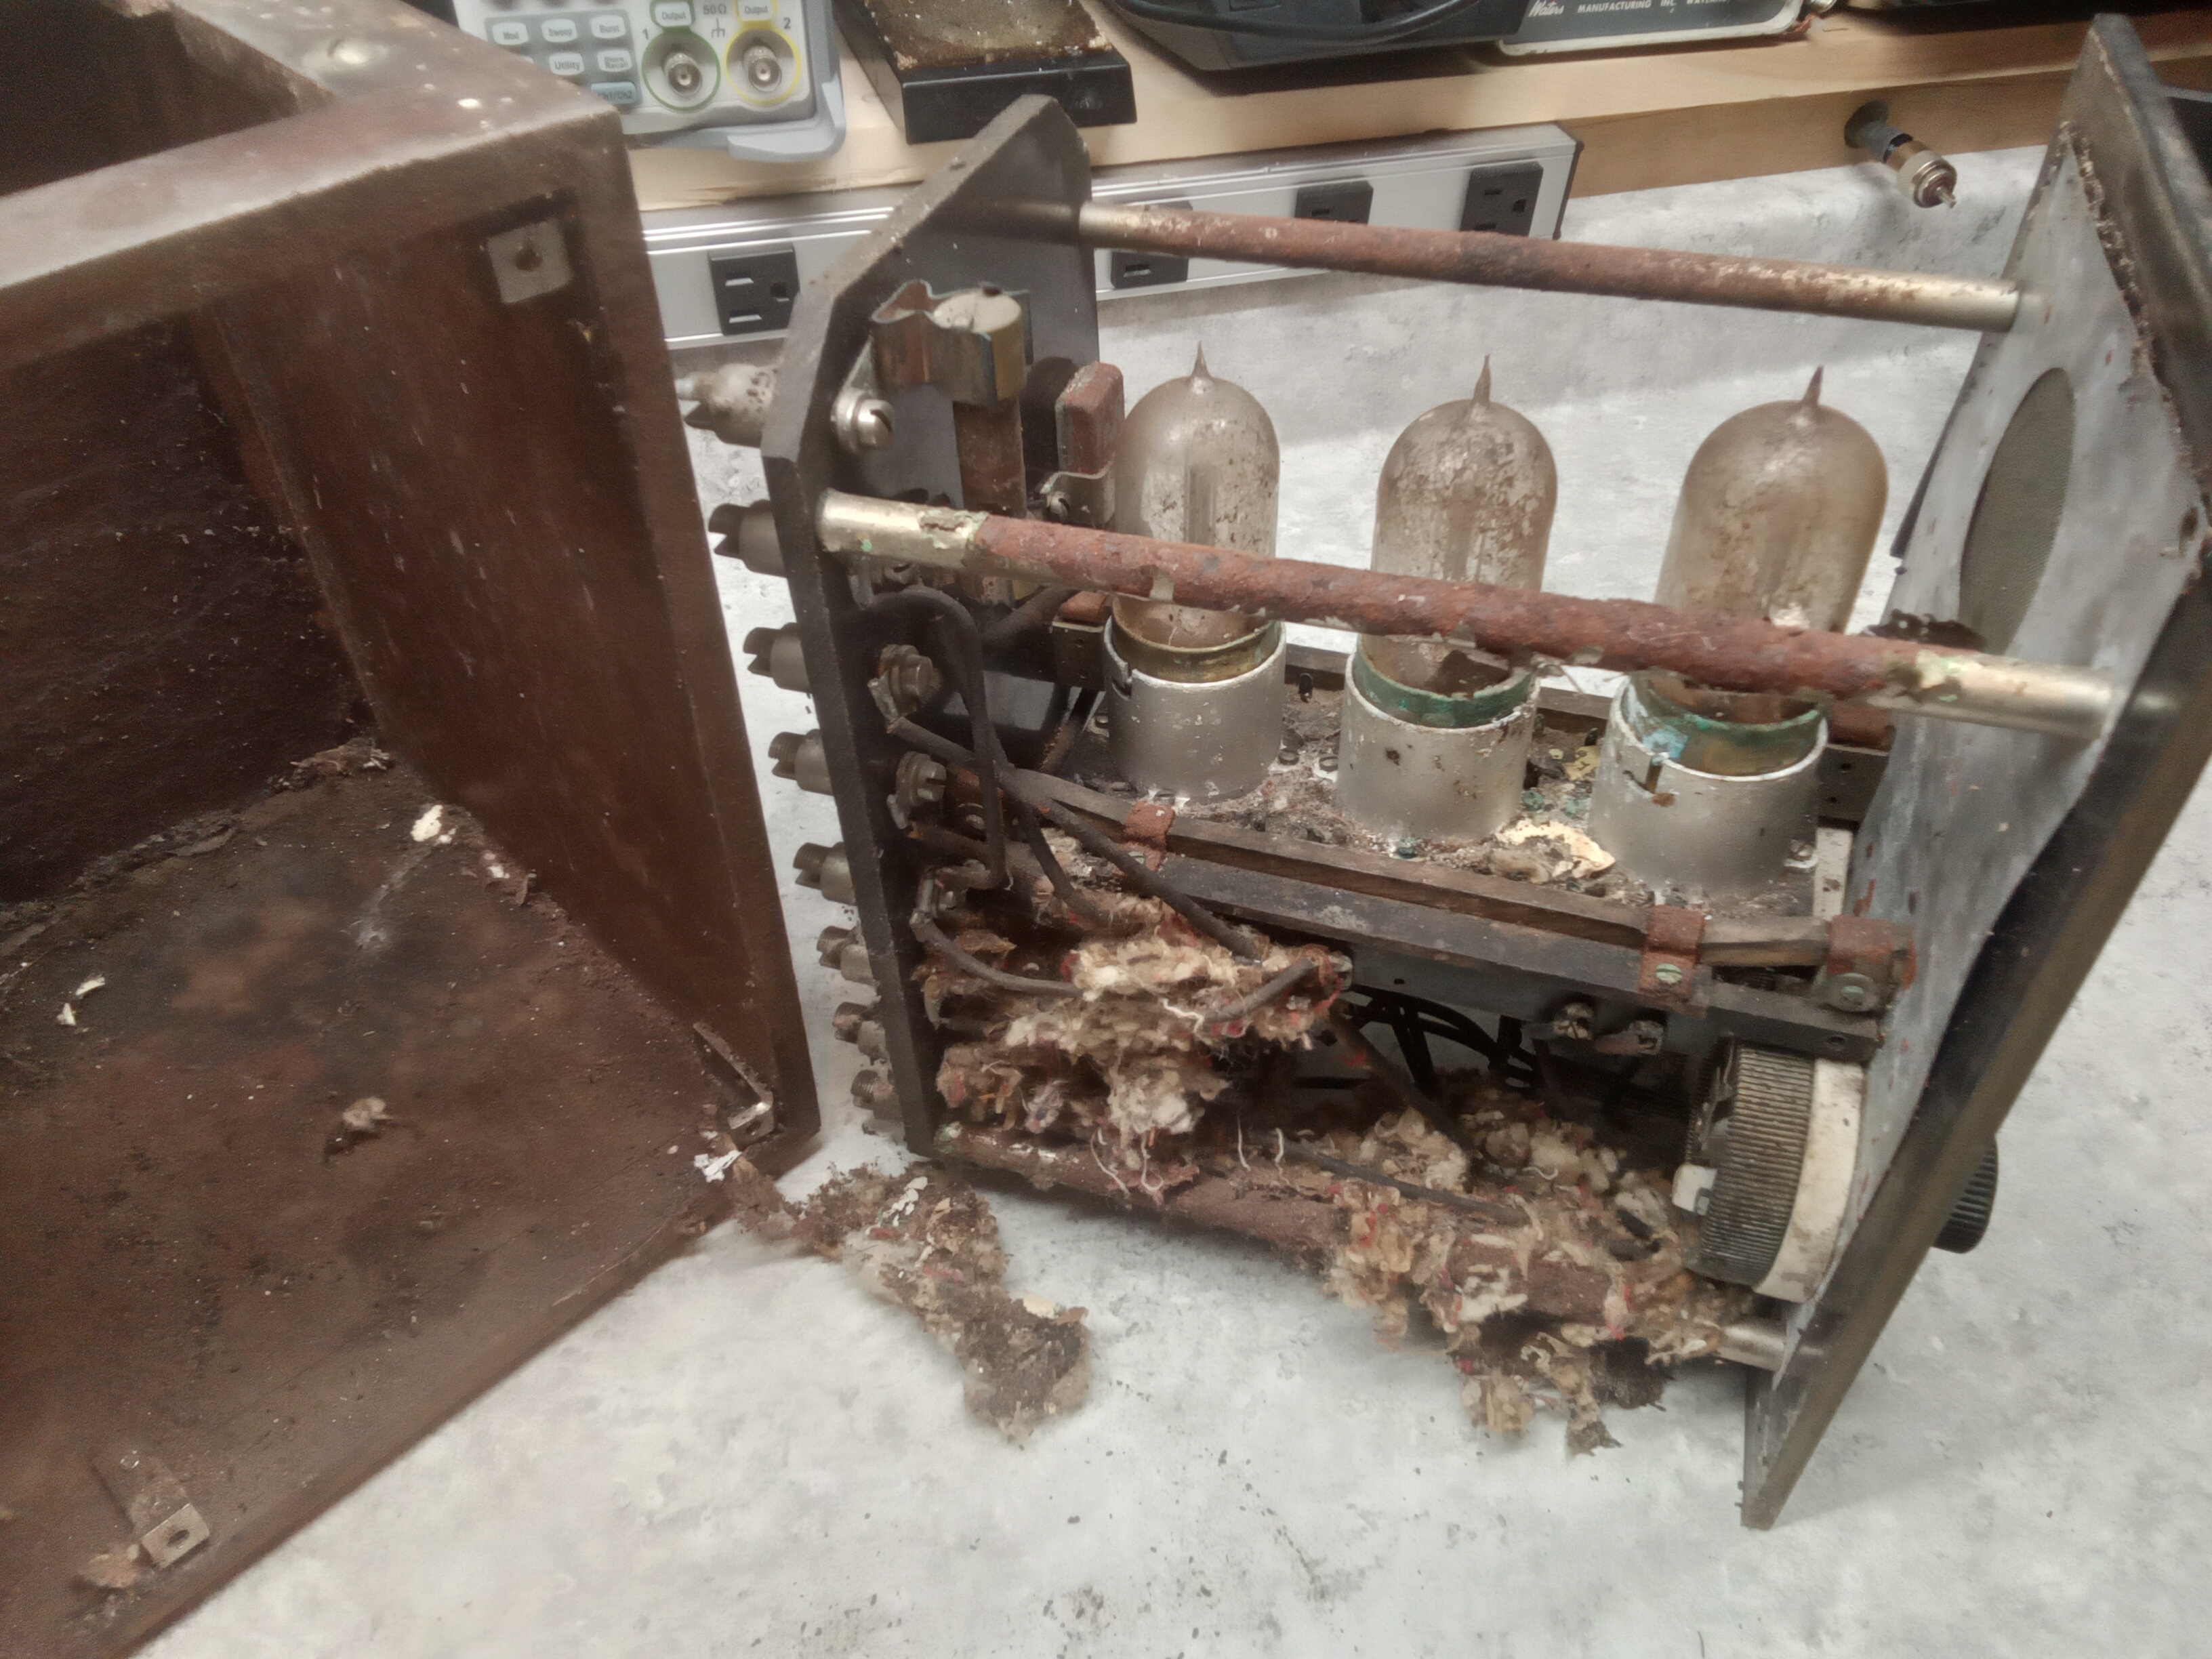
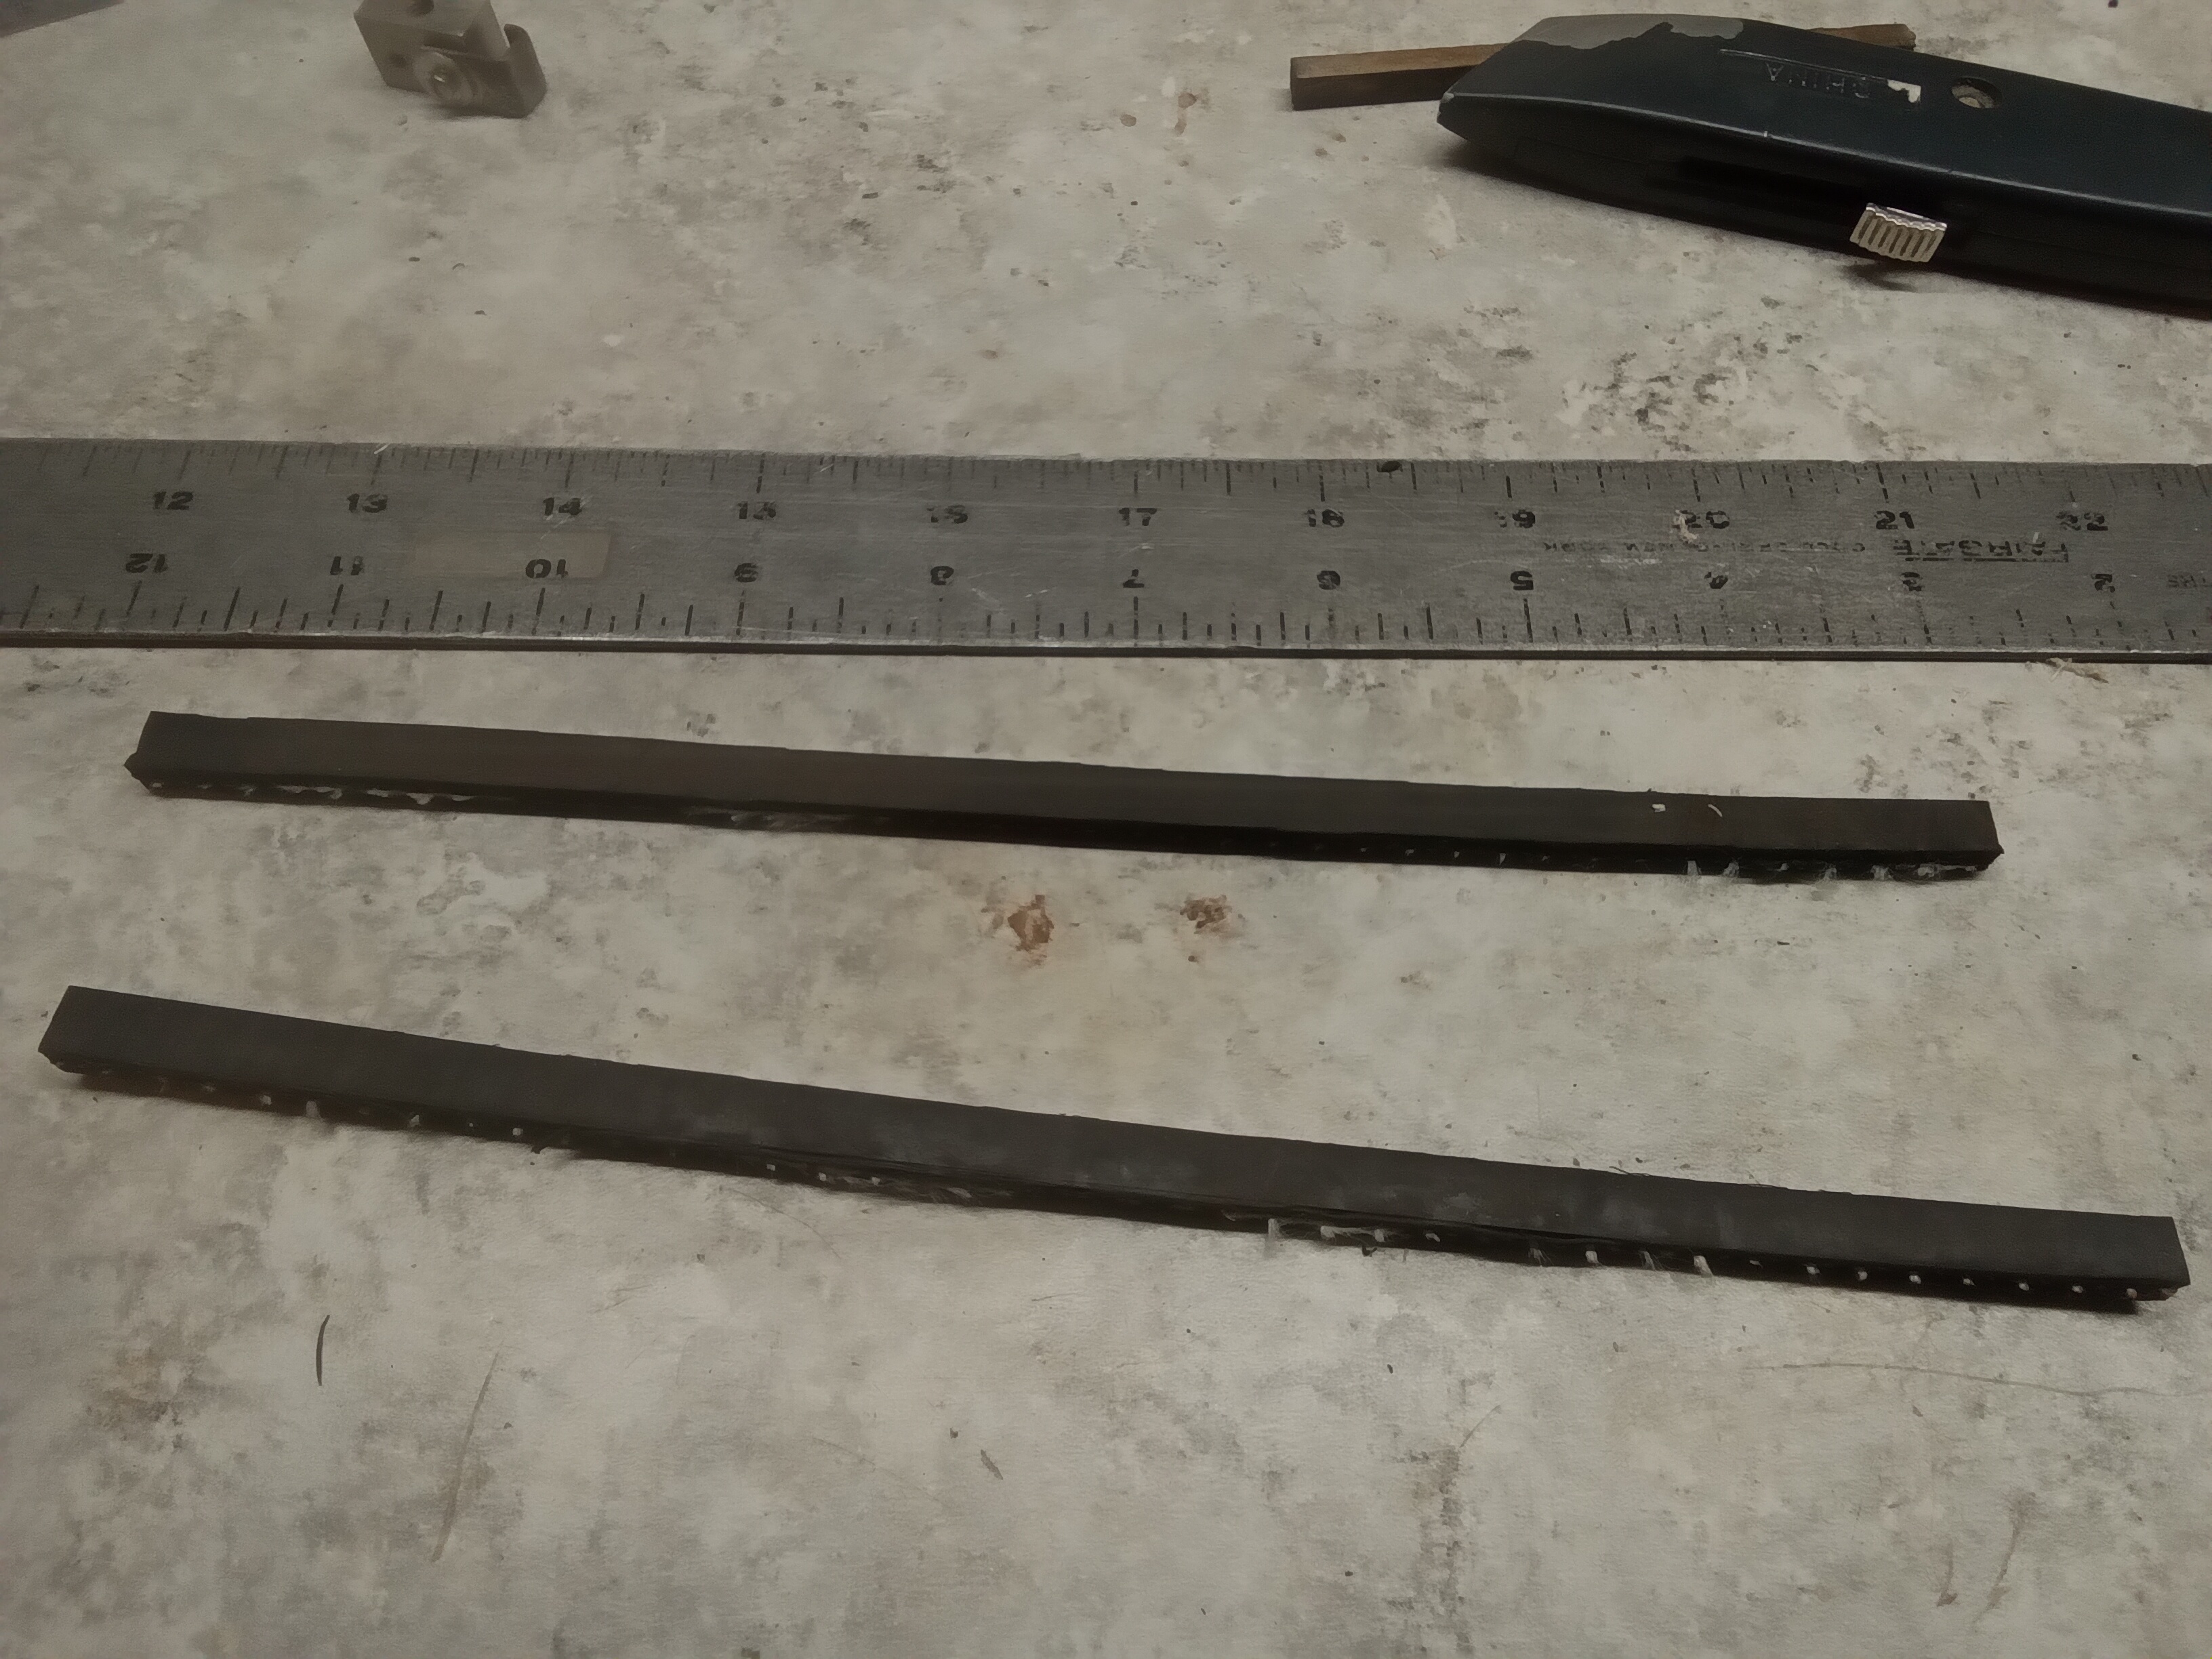
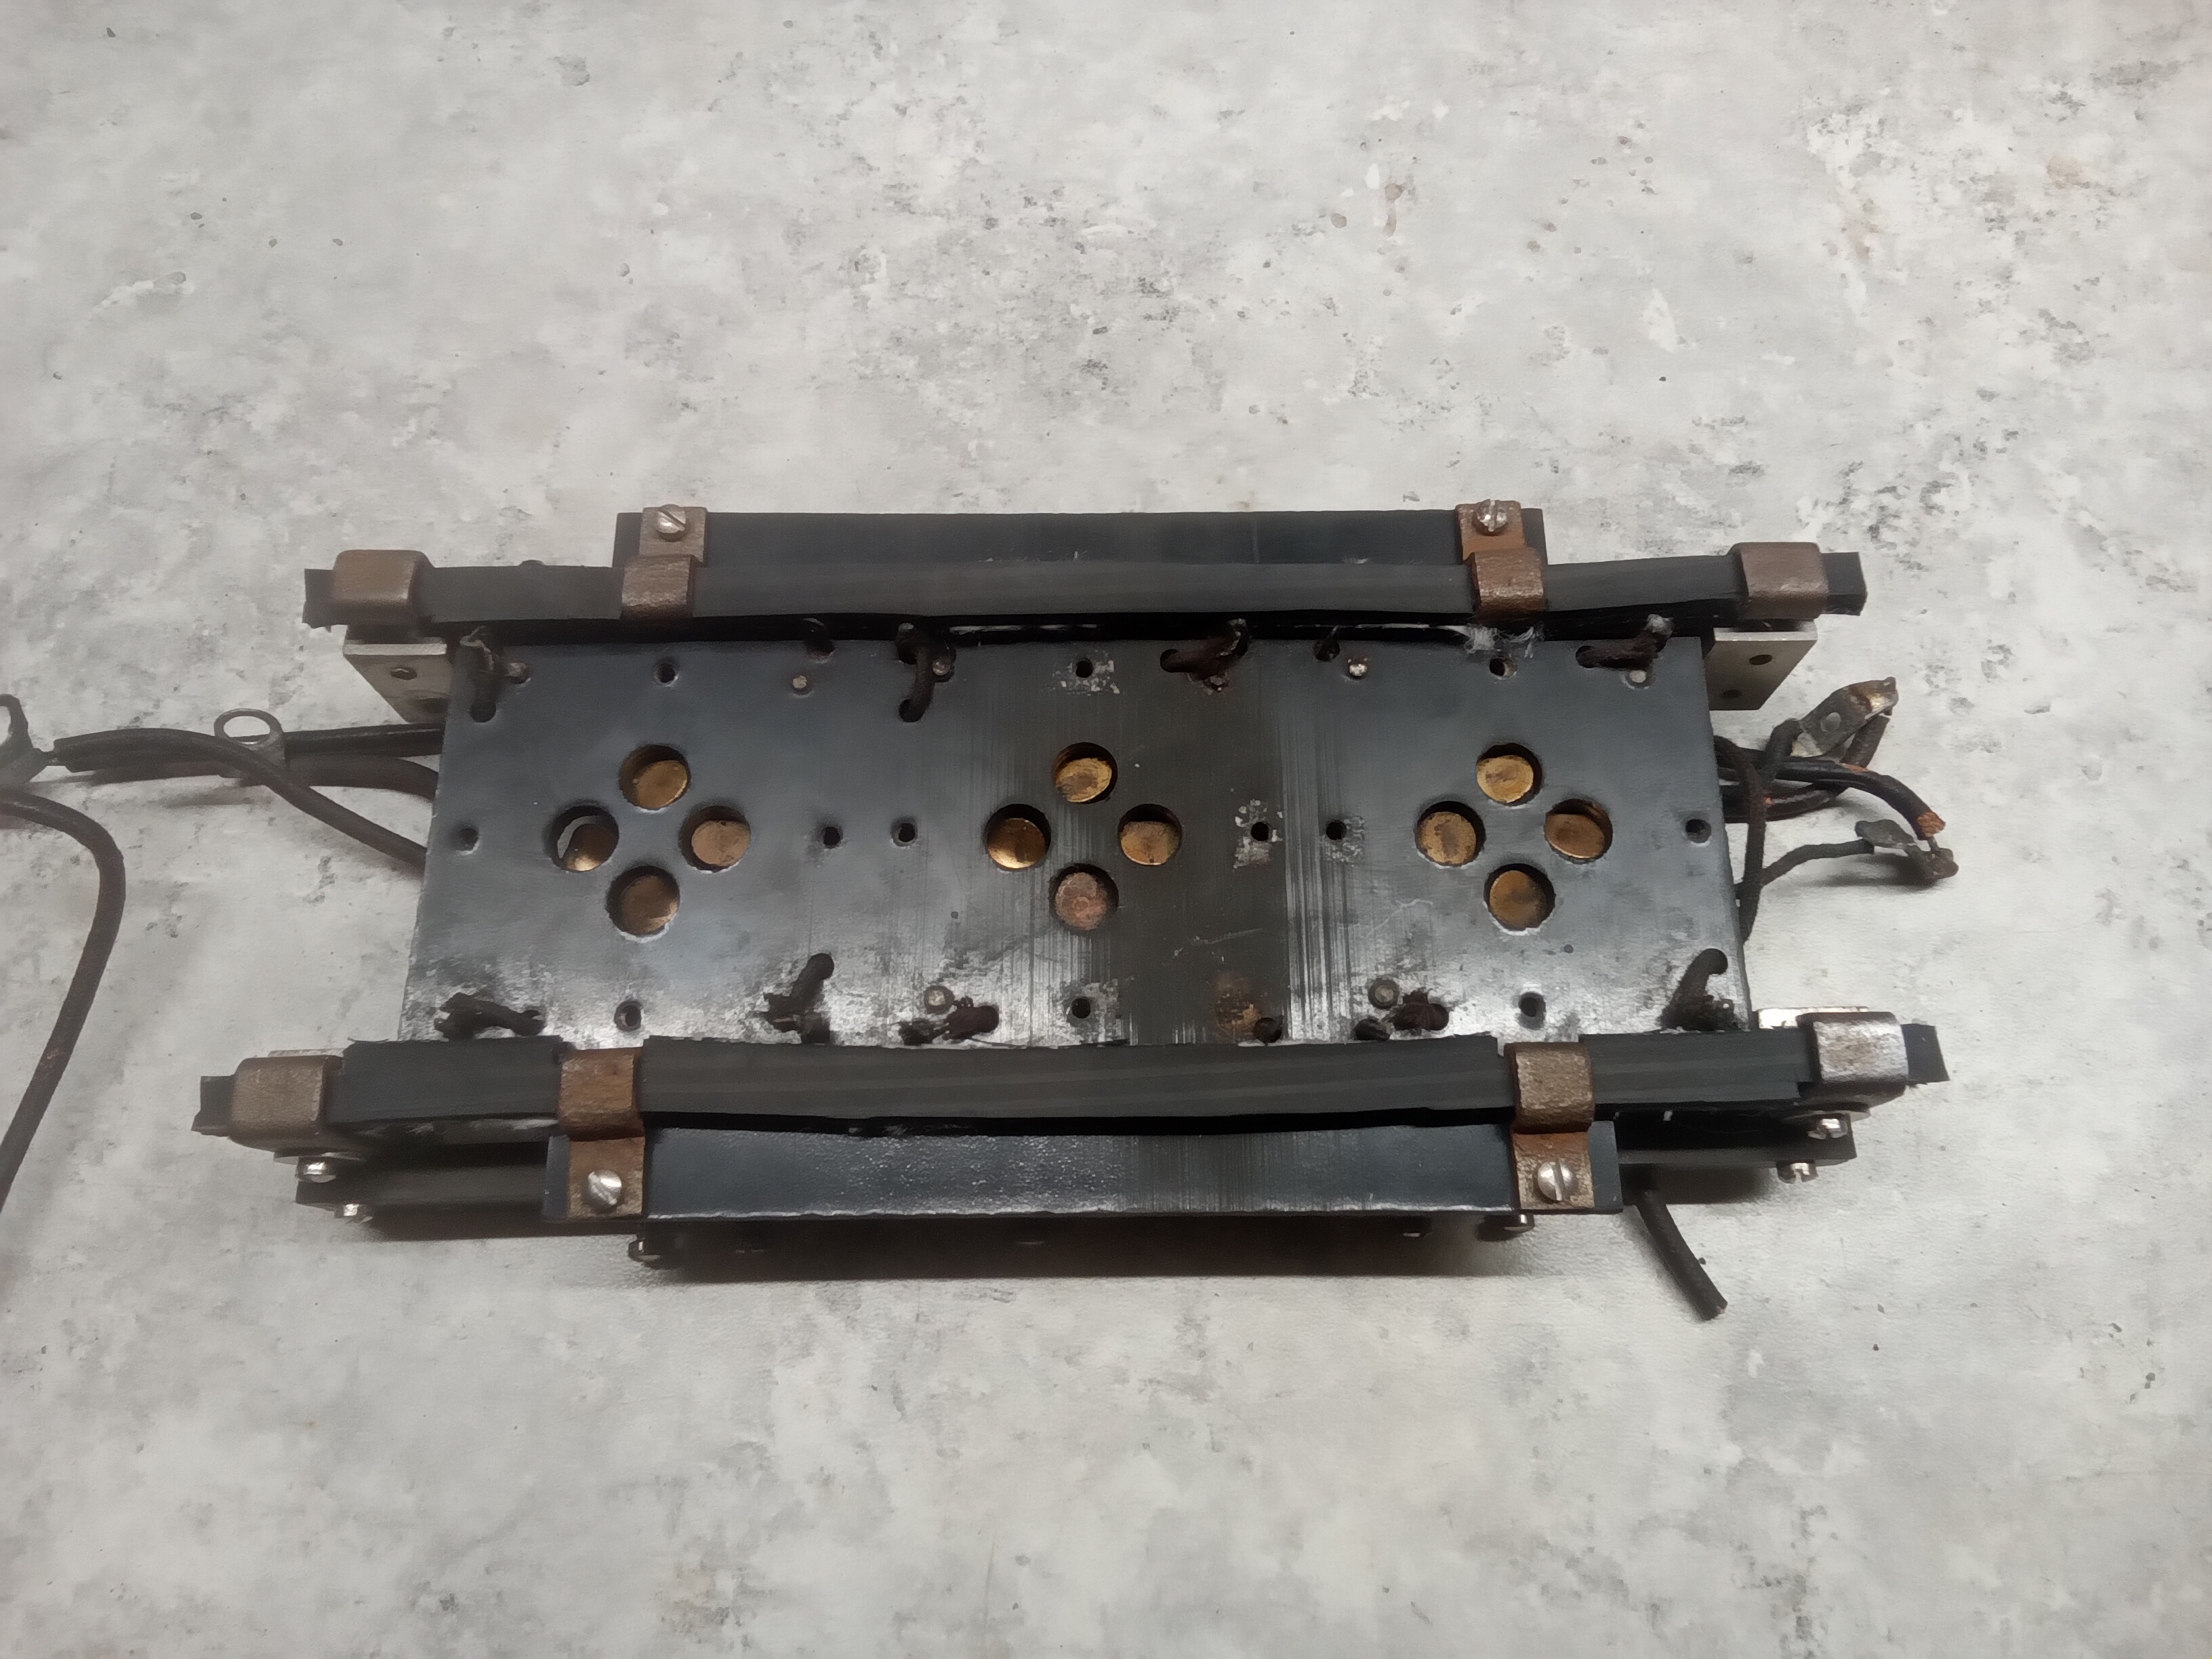
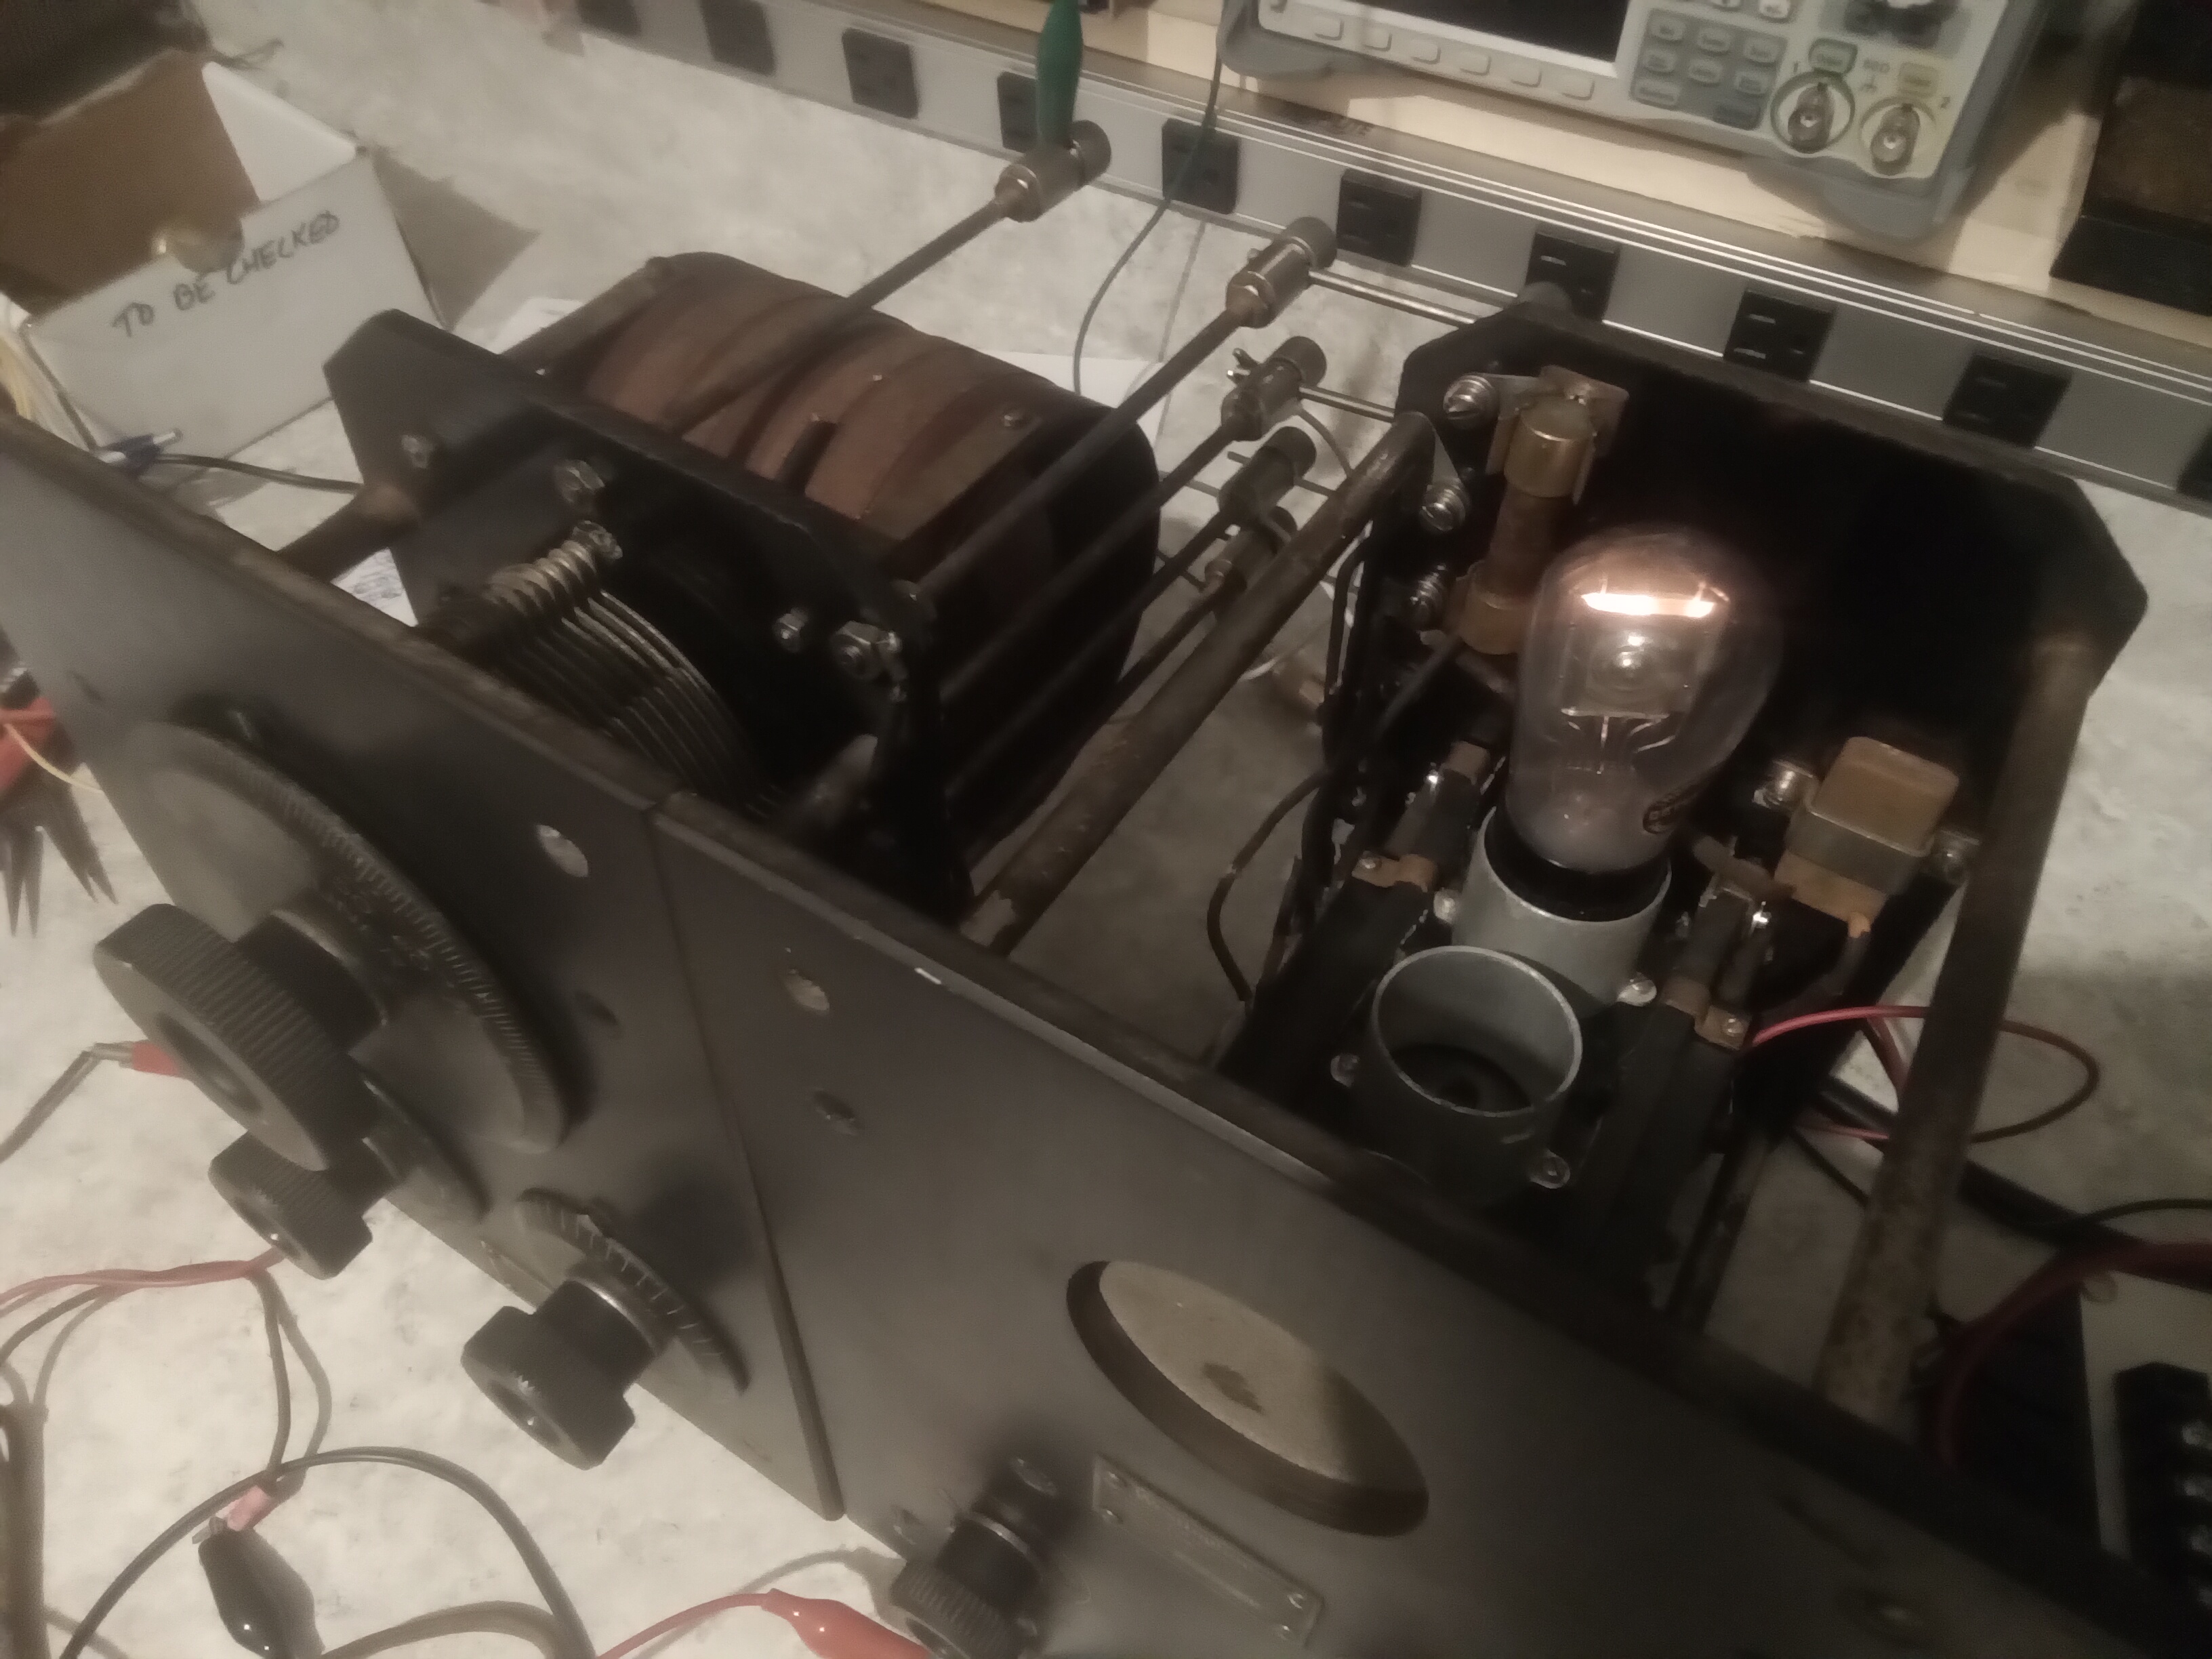
The DA The mouse hadn't done as much damage to this side of the RC but there's a lot more going on here. This one has three beautiful (or hopefully they will be) WD-12 brass based tubes which were manufactured by Westinghouse. One detector and two audio tubes. It has two audio transformers, both of them opened on both windings so I've got to decide how I'm going to deal with those. Two rheostats, three jacks and a cruddy tube platform with two 100 year old brittle rubber cushioning strips that need to be replaced. |
|
|
|
|
|
|
I started with the tube platform pulling it apart piece by piece. |
|
|
|
|
The wiring was all good, the metal was solid and the bakelite just needed some cleaning. But the rubber shock mounts were shot. I ran around to various plumbing supply departments looking for large rubber coupling components that might fit the bill but found nothing. Then I went to see our local car guy Gary Guilette. He had a small foot long piece of radiator hose sitting on a shelf and gladly parted ways with it for a few bucks. |
|
|
|
|
I sliced the hose up and got 2 kinda straight strips. A little too wide in spots but I whittled the ends down and got them to fit inside the coupling pieces. Not too pretty but peering into the dark radio inards from the trapdoor top you'll have to squint real hard to see it. |
|
|
|
|
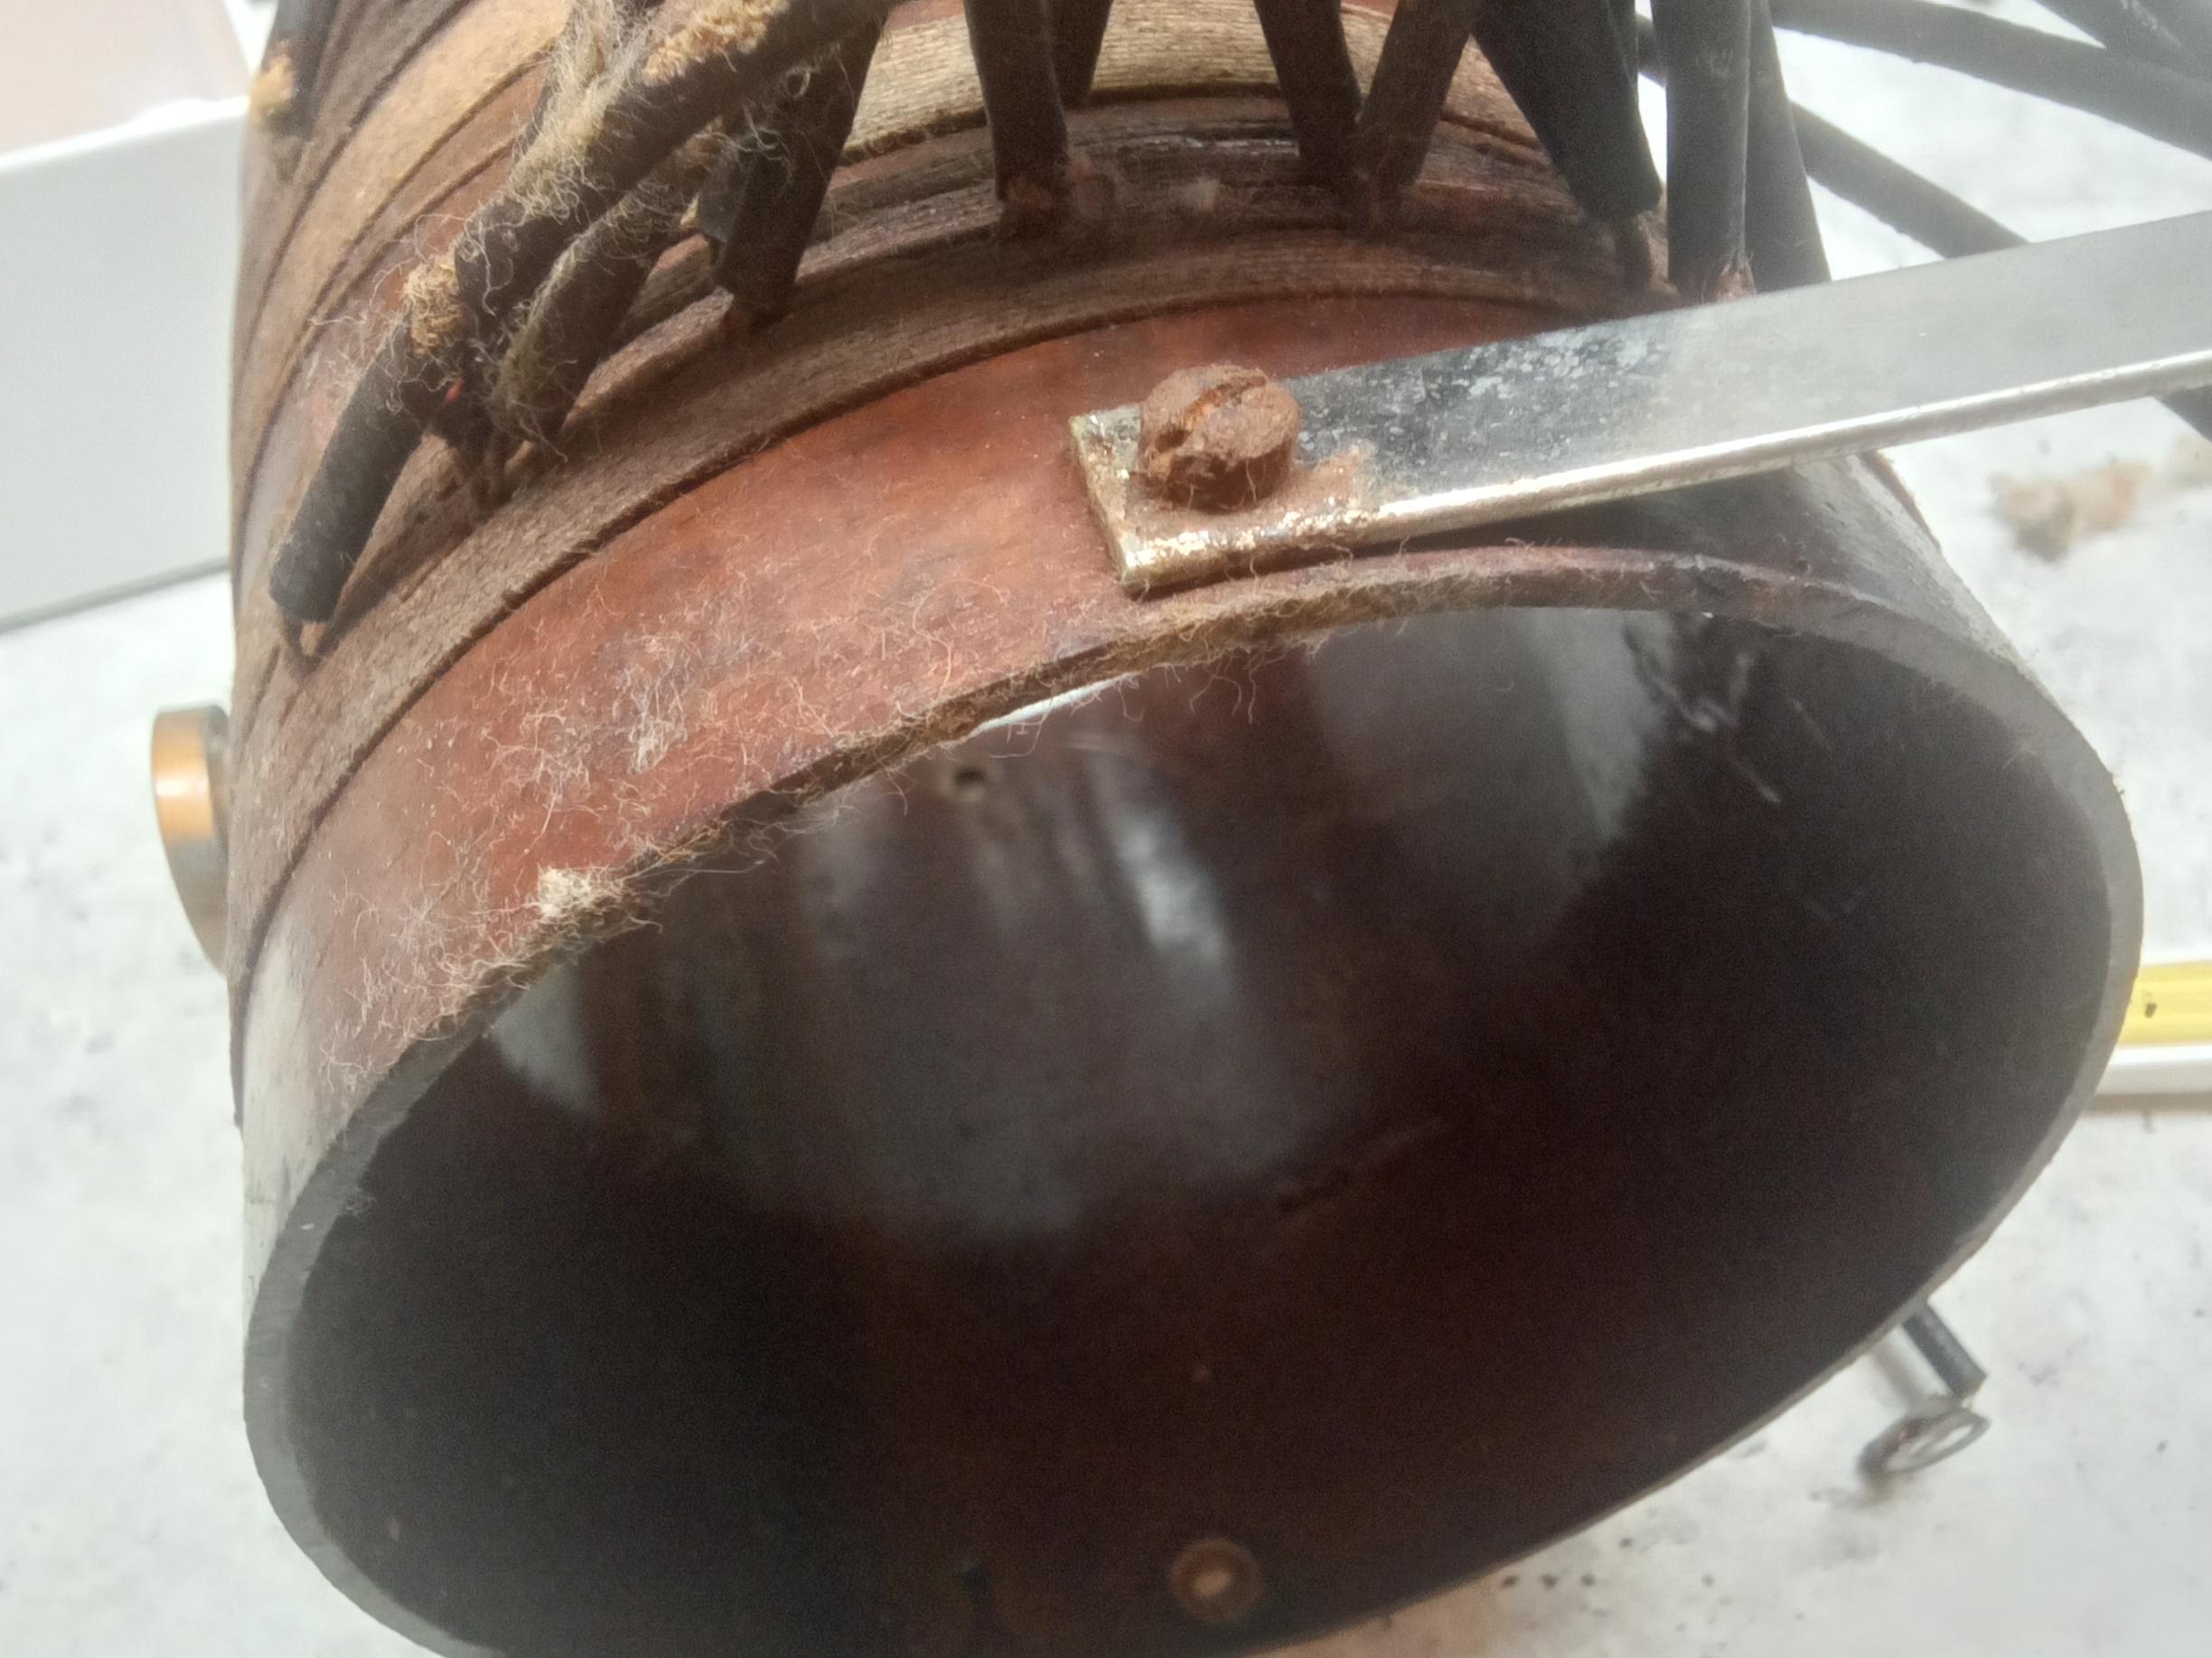
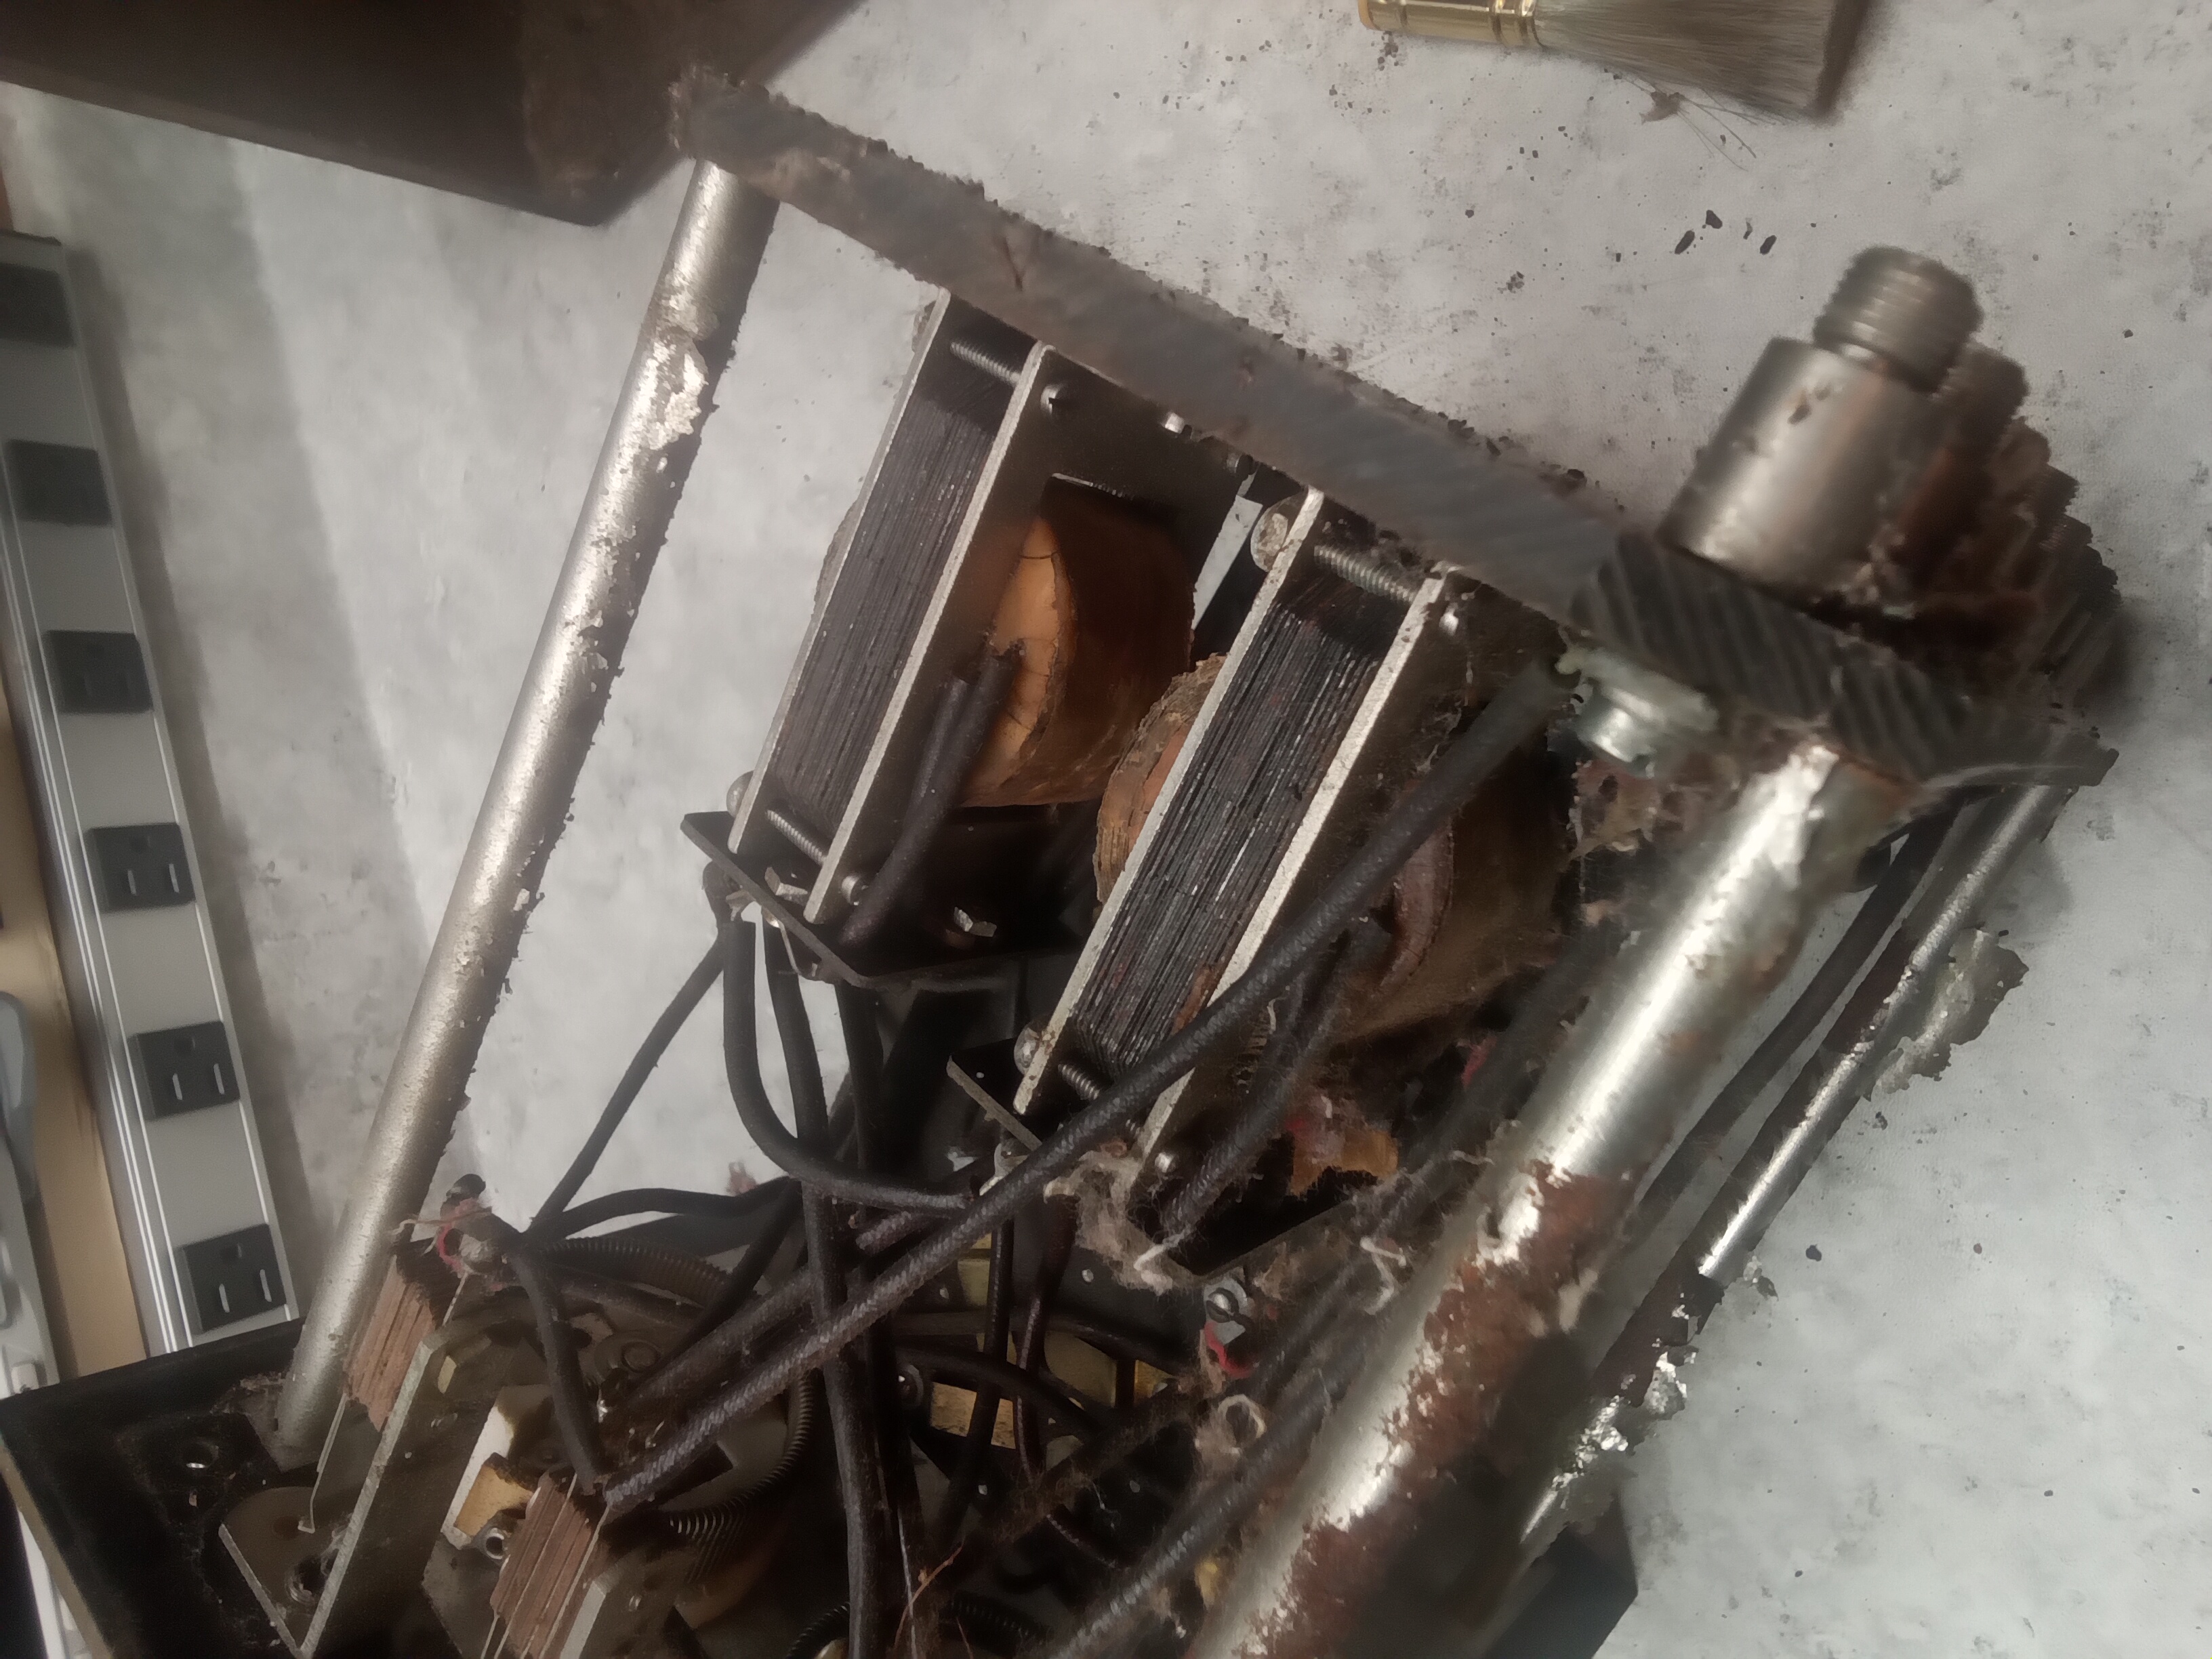
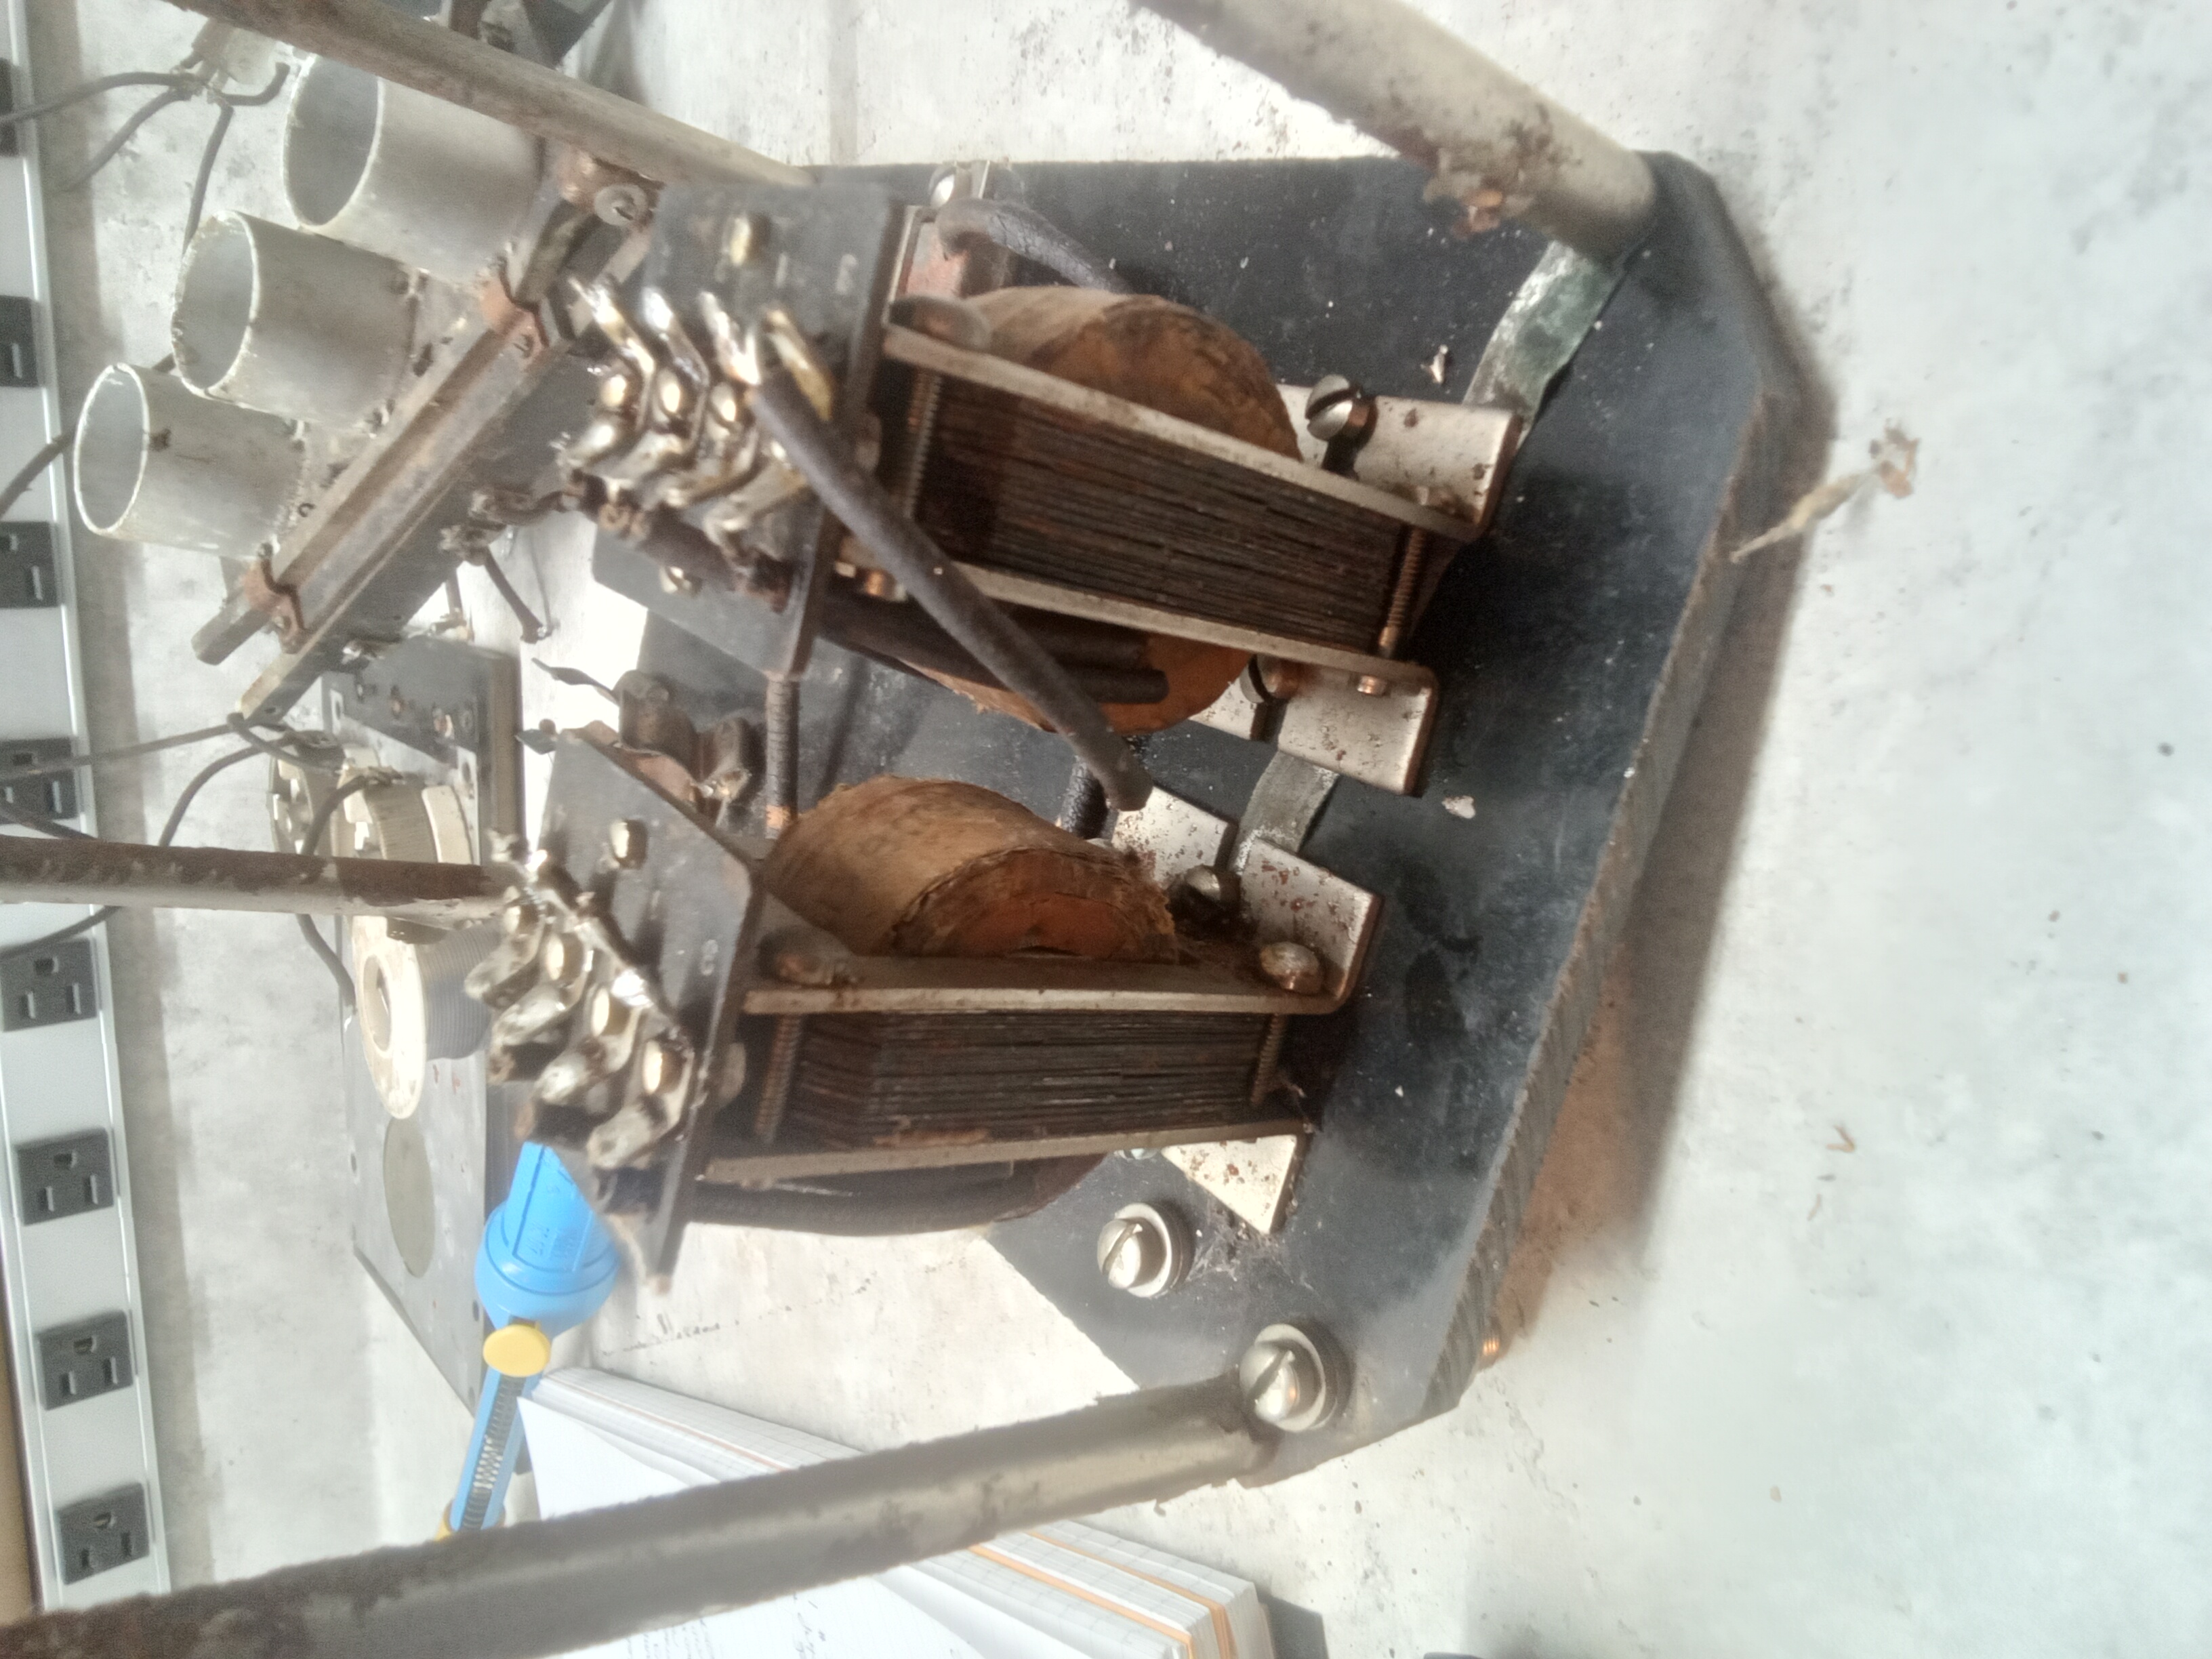
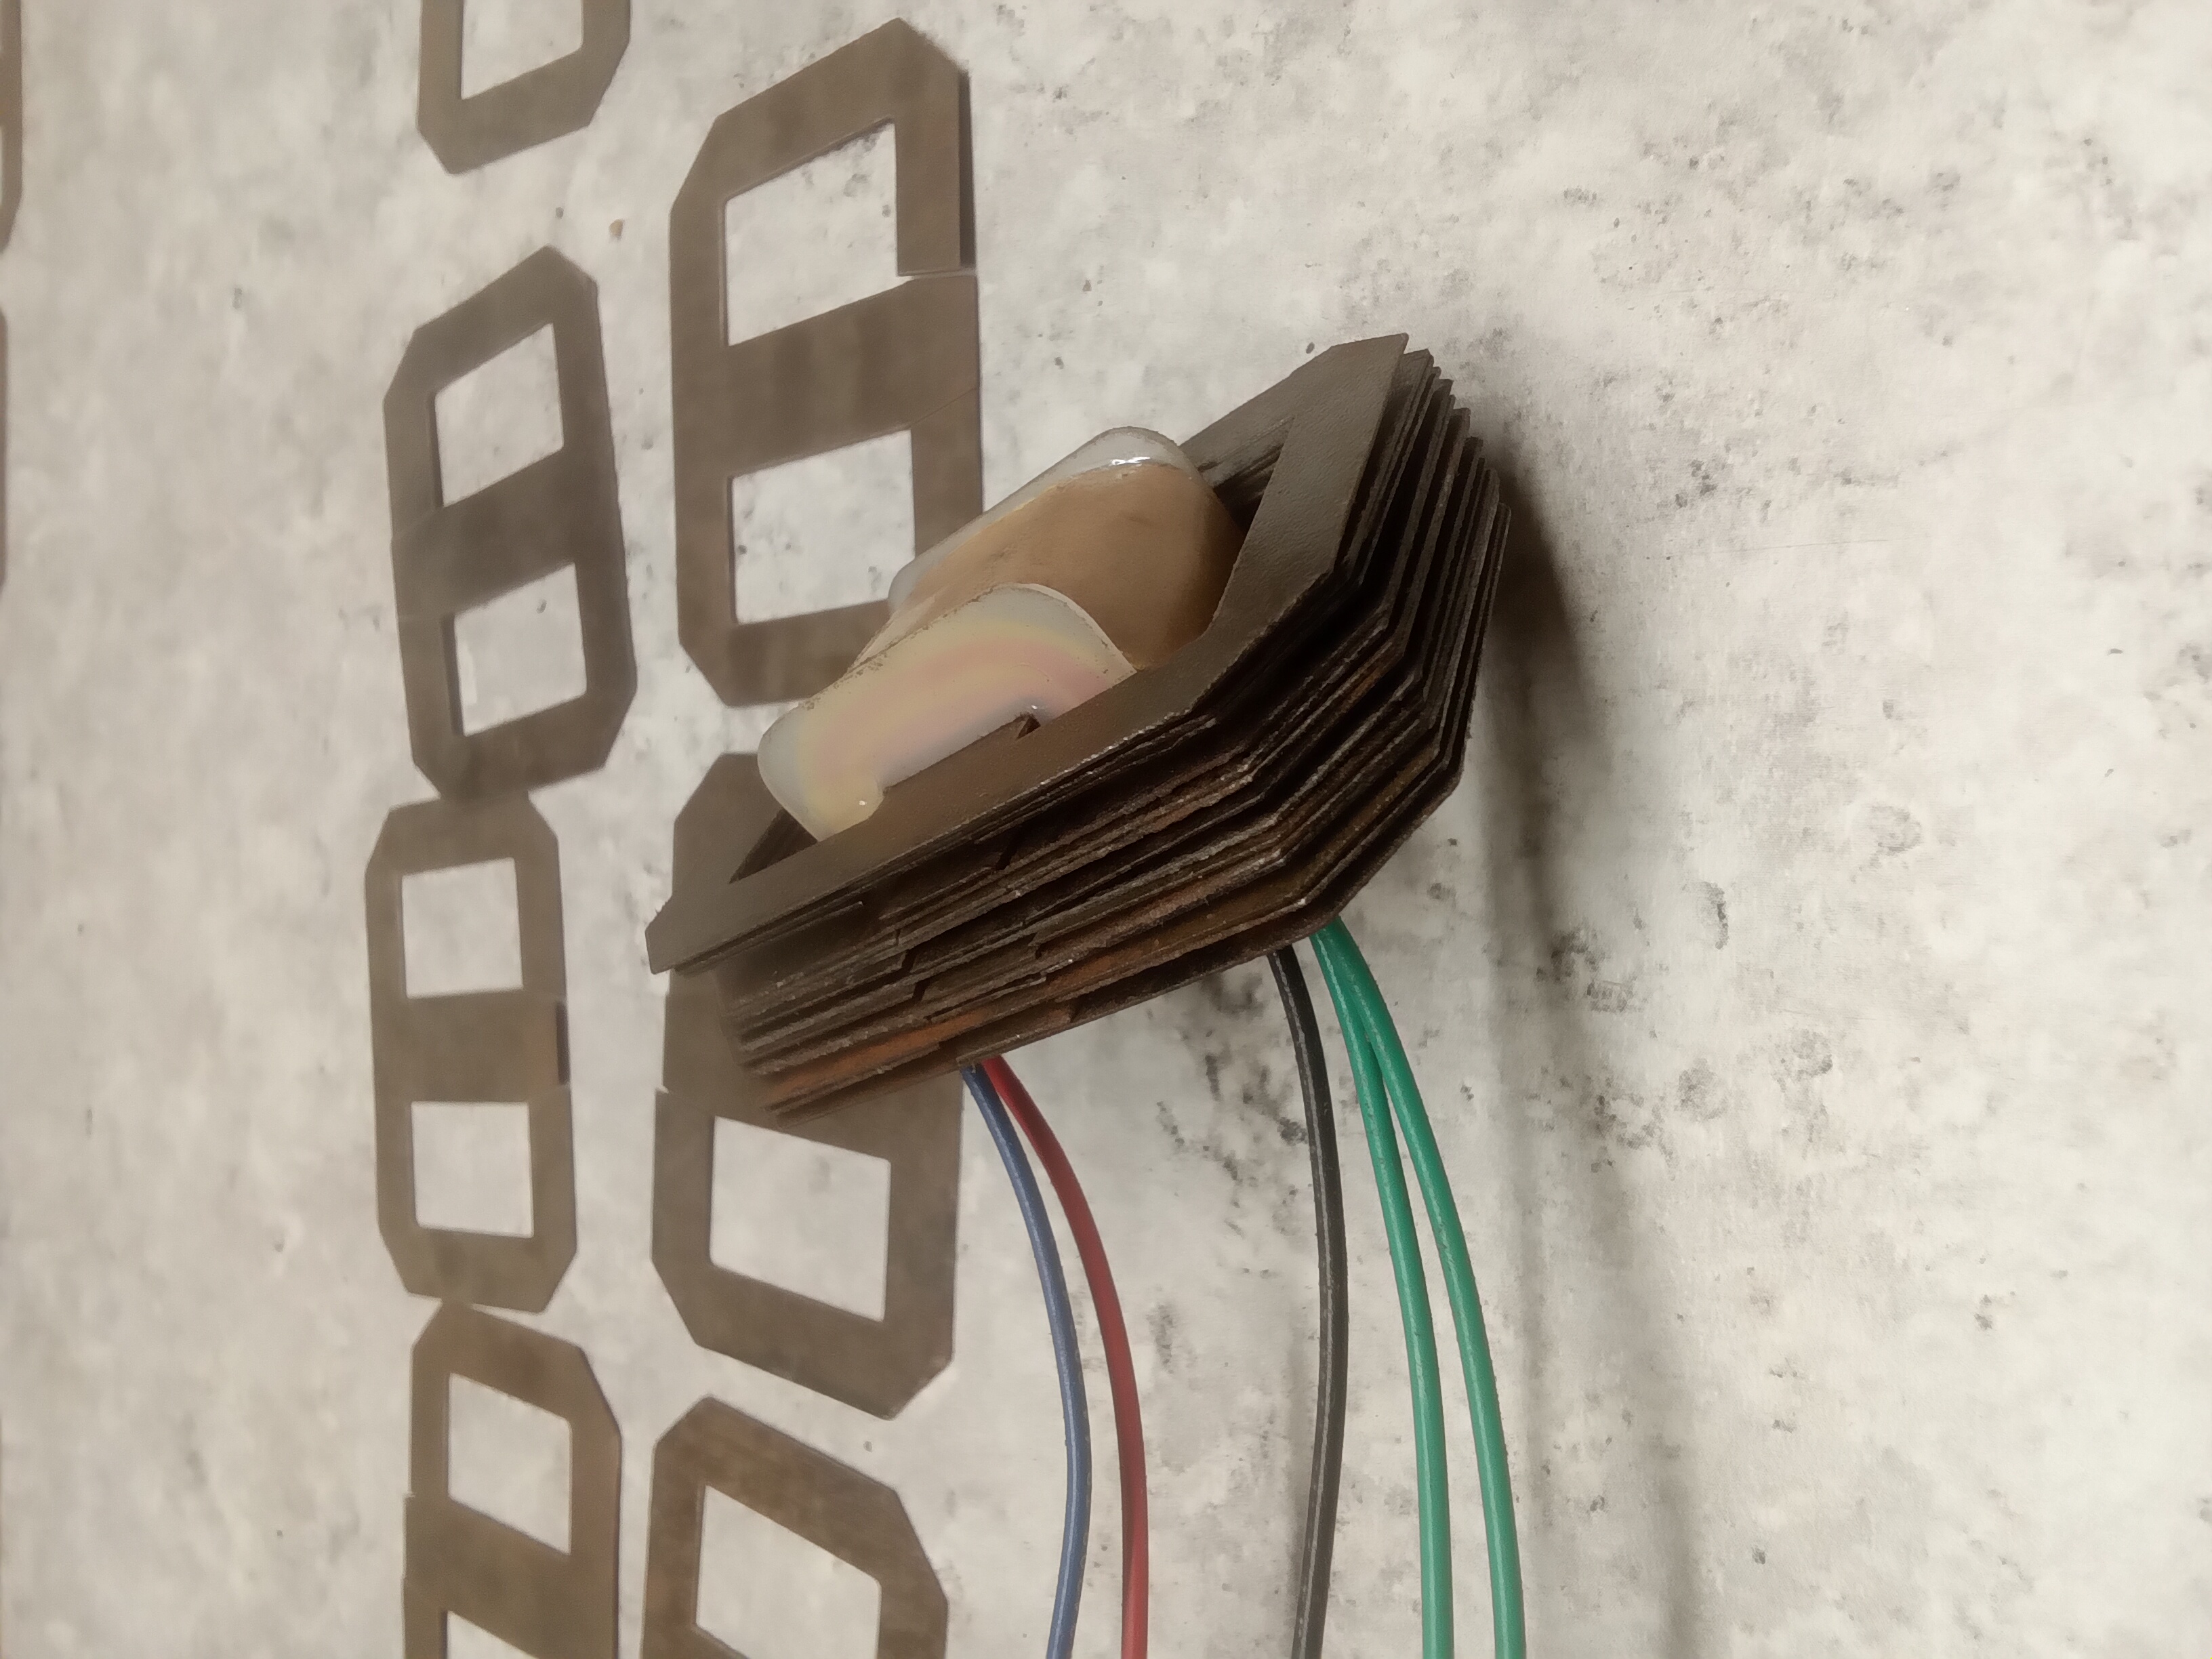
On Rebuilding Audio Transformers The other main problem with the DA unit was the bad audio transformers. Both of them open on both windings. I have a Dayfan 5 that I was working on a few years ago still sitting on the shelf with the same problem. I bypassed the bad transformers in a Grebe Syncrophase with capacitor\resistance coupling and got that one going. |
|
|
|
|
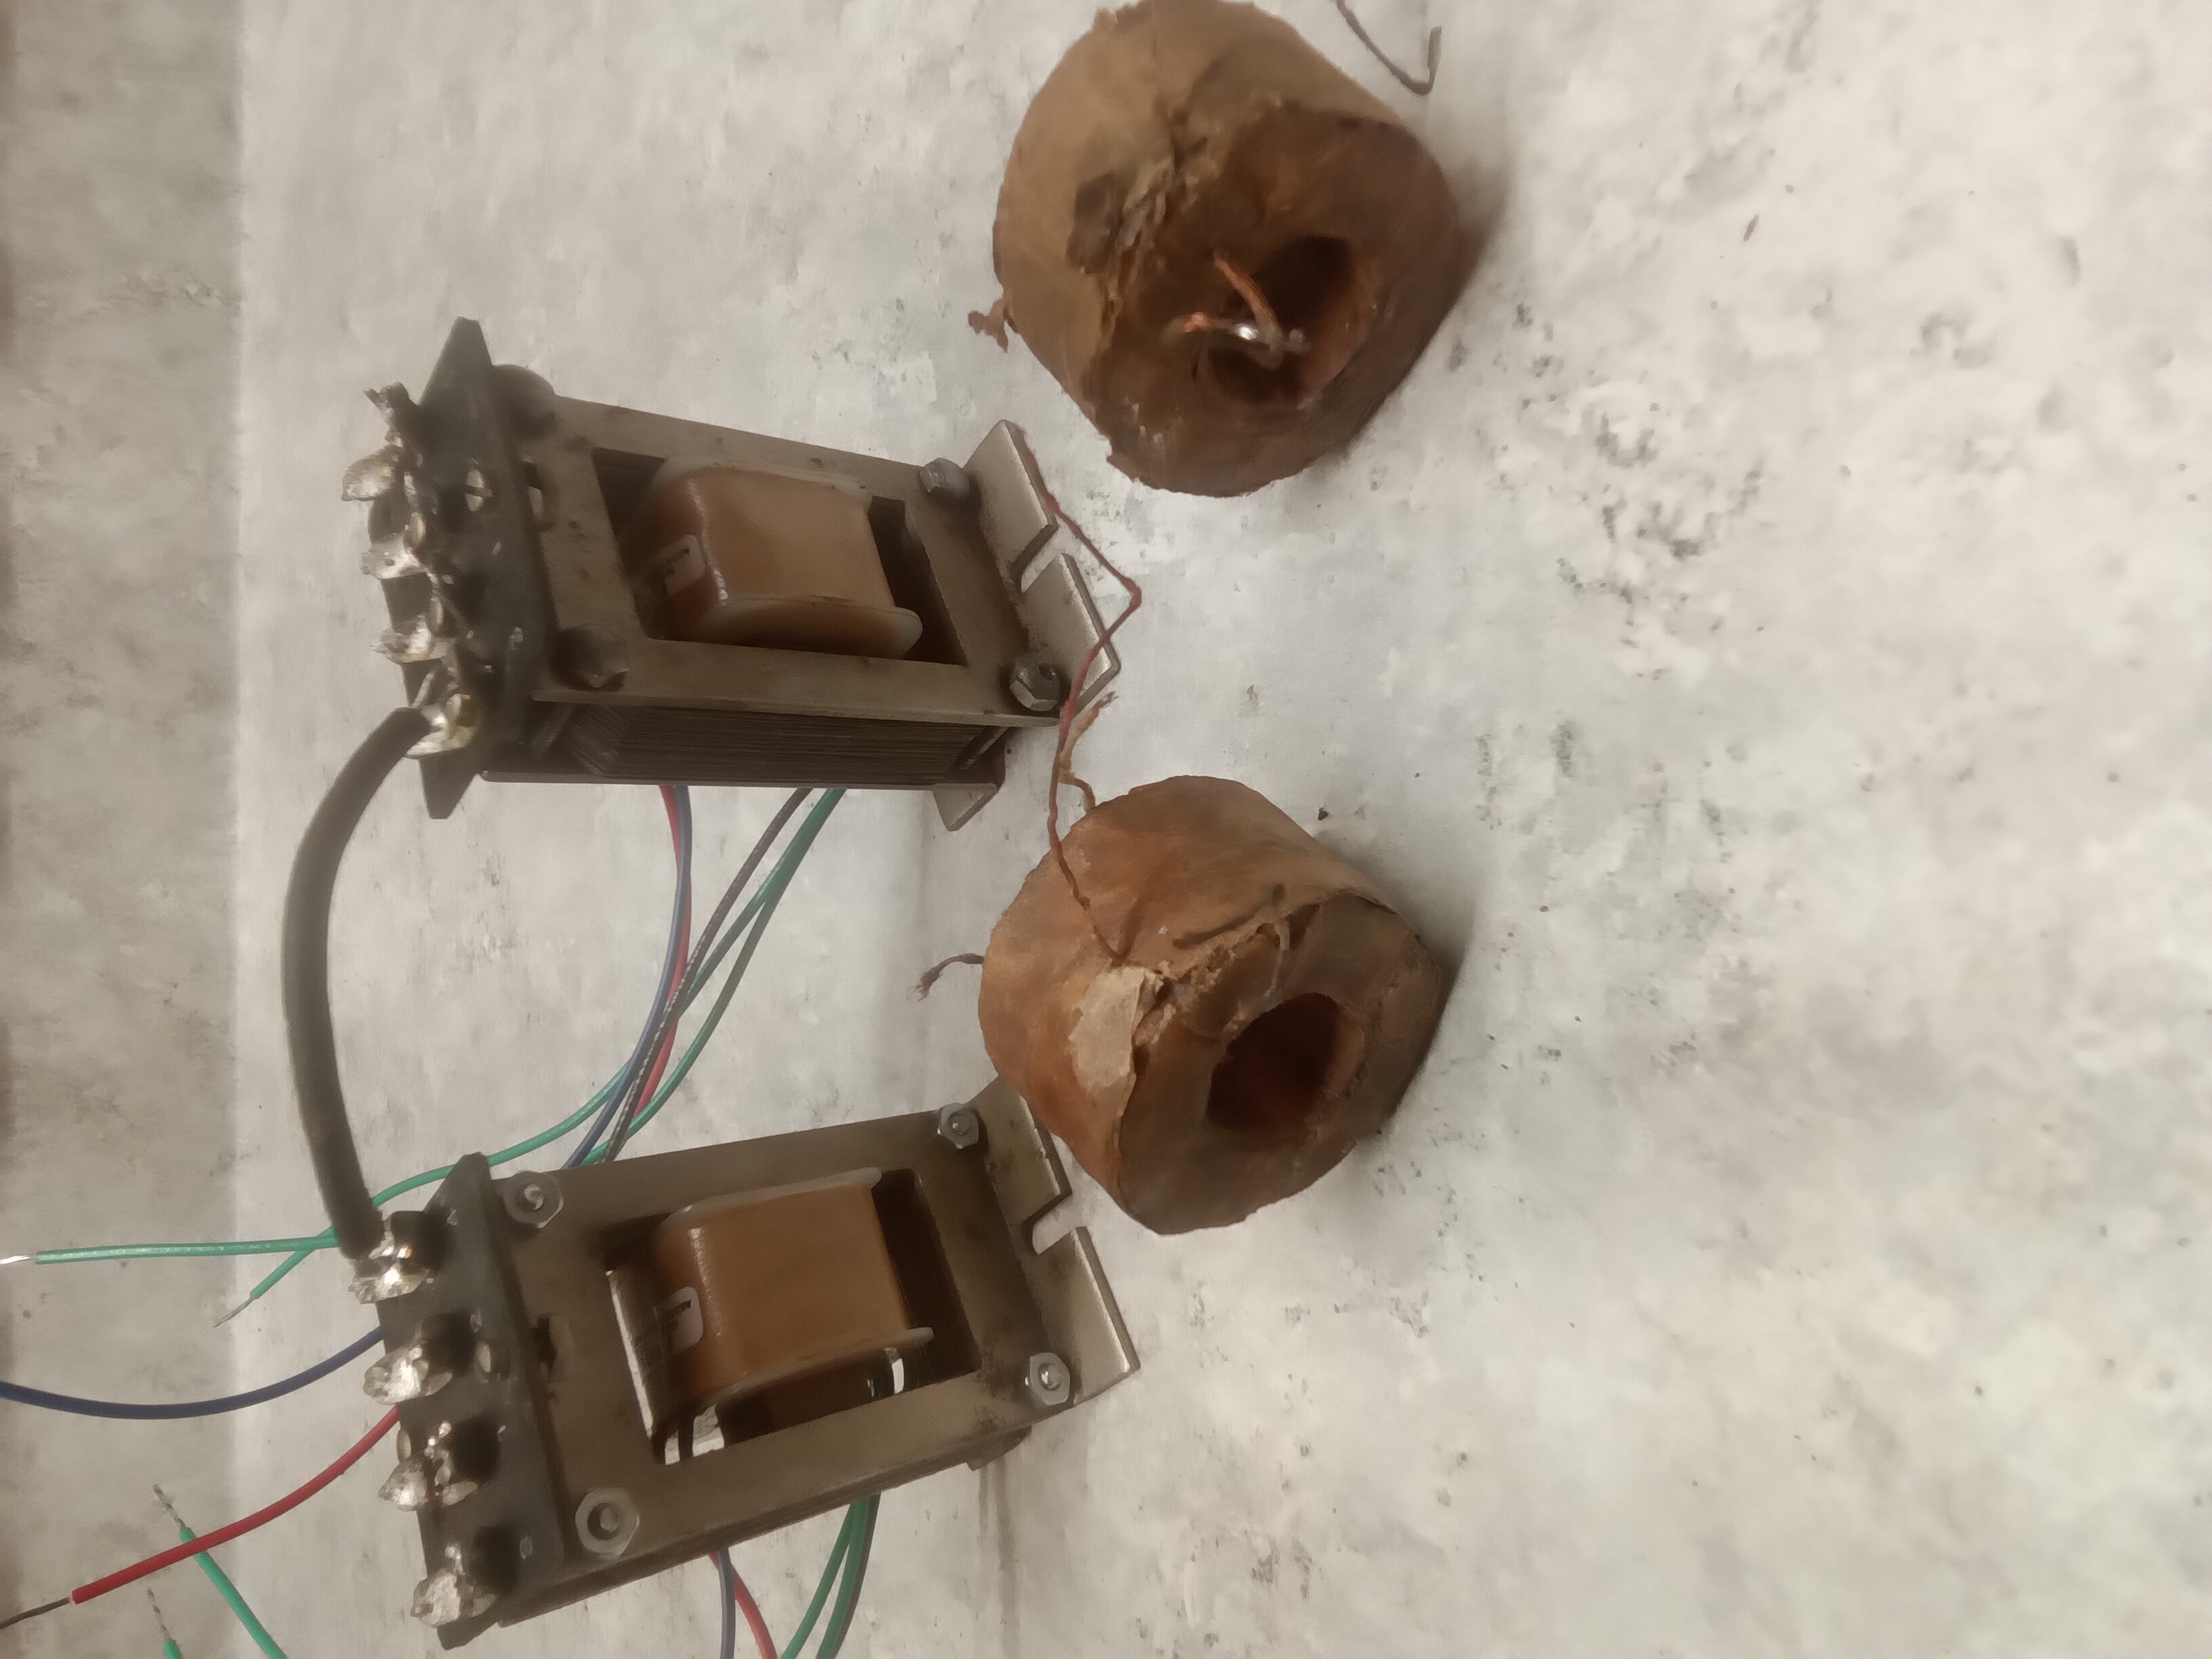
But I decided to rebuild the RC transformers when I was reminded that you can get modern replacement transformer cores that will usually fit inside the original metal transformer housing. The housing is made up of a bunch of small metal lamination sheets that need to be pulled apart and separated. Each one slides out of the original core. You then take the sheets and reinsert them in the new core. |
|
|
|
|
If you're lucky all the laminations will fit inside the new core. And these did indeed. But I knew that already because the webpage at Antique Electronic Supply. where you can purchase the cores included comments from buyers who had successfully used them in their radios, including the RC. |
|
|
|
|
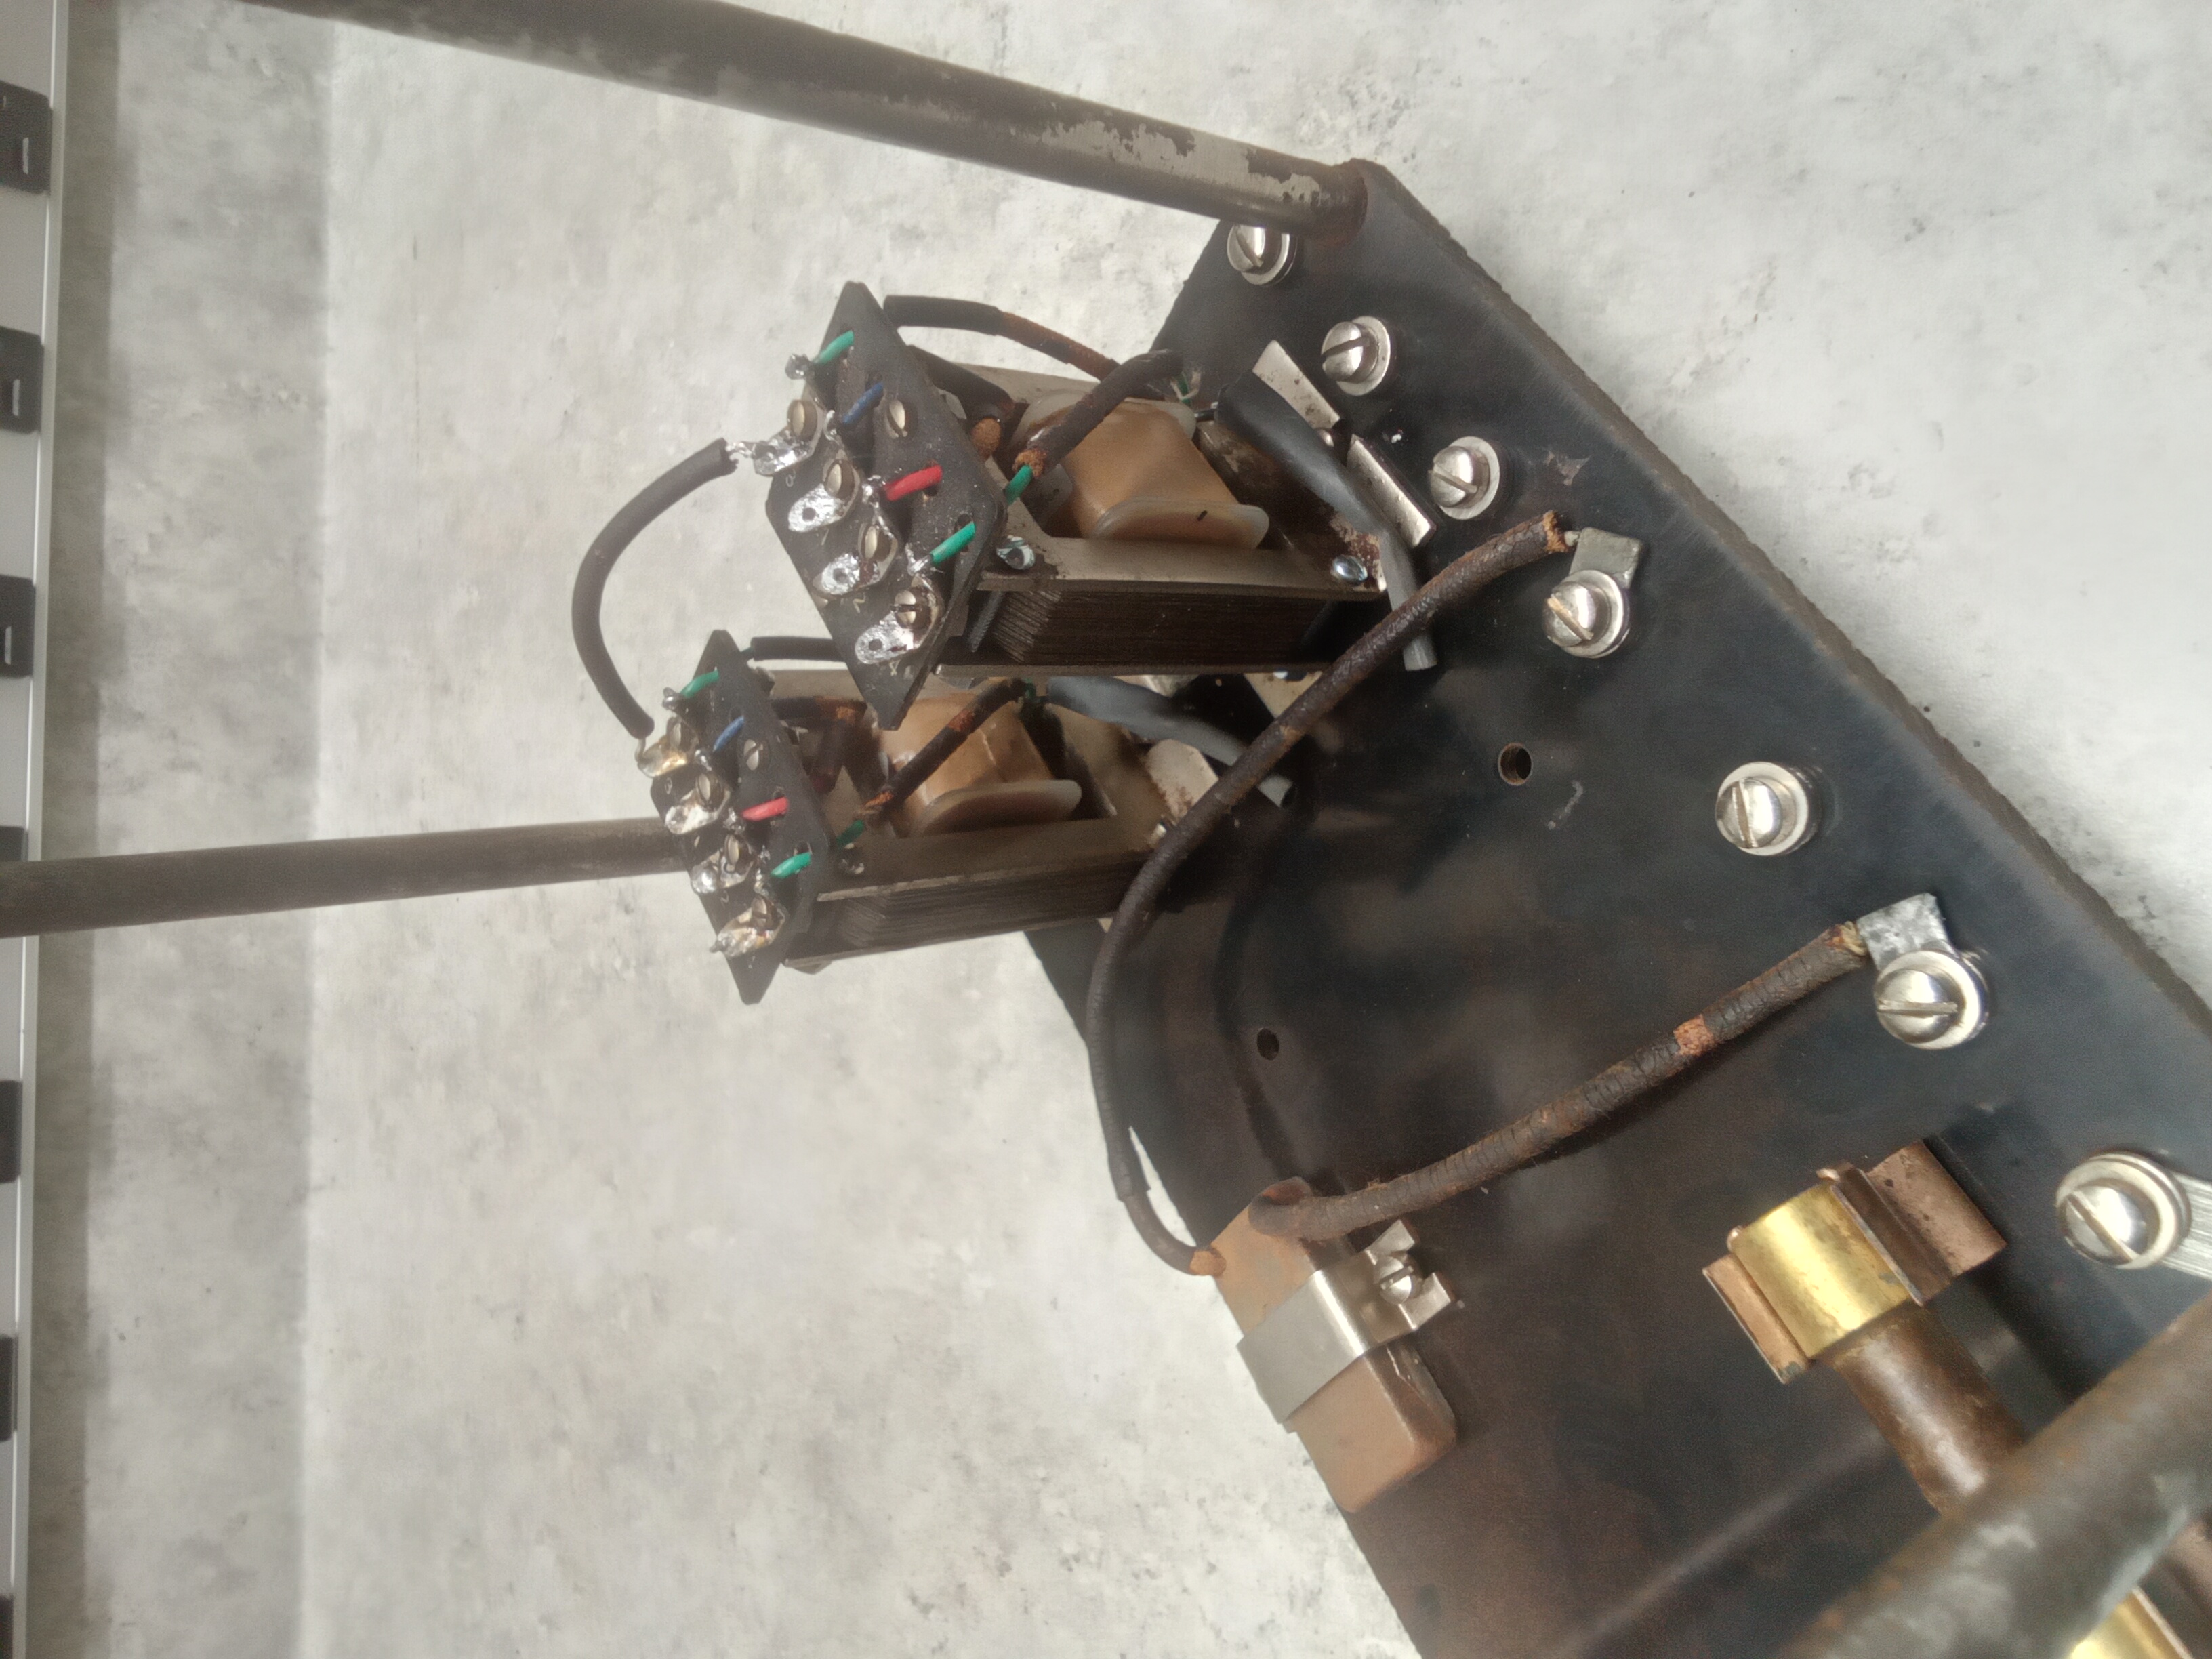
It Lives I started to piece the DA back together. |
|
|
|
|
With everything reinstalled I tried firing it up with a known good 201A. CJAD from Montreal on 800 instantly came in. I pulled the 201 and installed all three WD-12's. 2 out of the 3 were good and the First Stage was driving the Radio Shack speaker through a 5k to 8 ohm transformer. I pulled the WD-12's and put in three 201A's. WTIC 1080 out of Hartford was there at armchair level. Looking forward to listening to the Yankees - White Sox game tomorrow night on this 100 year old radio. |
|
|
|
 2023 WA2FXM - Mark Mohrmann 2023 WA2FXM - Mark Mohrmann |
 |